See How I Created a Midi Cottagecore Dress Out of a Vintage Bedsheet

I’ve been wanting to make a dress out of a bedsheet for quite some time, now. I saw it done and thought it was such a cool idea, and I really wanted to give it a try. So on a recent trip to the thrift store, I found a very old and very vintage-y looking bedsheet and knew that I just had to get it for this project. In this tutorial, I’ll show you what I did to transform that bedsheet into a great midi cottagecore dress!
Tools and materials:
- Bedsheet
- Measuring tape
- Ruler
- Curved ruler
- Marker
- Sewing pins
- Sewing machine
- Serger
- Elastic
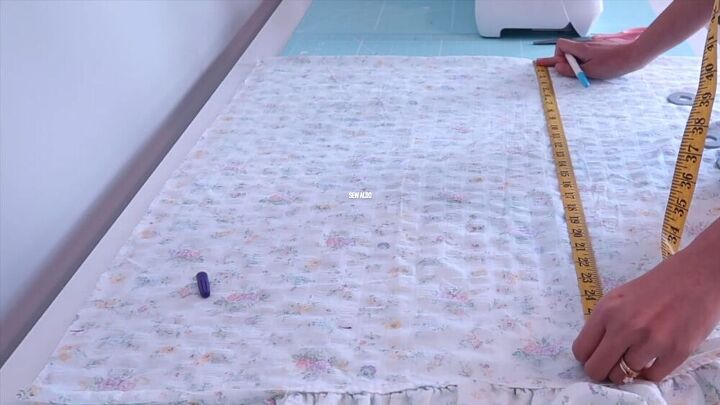
The first thing I did was cut out the bottom part of the dress. My plan was to do two layers for the skirt. I then measured my bust measurement and multiplied it by 1.5, which gave me my width. So I marked that down along with my length of 11”. I chose these measurements because I like my dresses to be high-waisted. I then cut out the fabric, and since I had folded the fabric beforehand, I had two panels after cutting.
With my fabric folded right sides together, I measured and marked 3” down with my curved ruler and cut it out. Then, on a different piece of fabric, I cut out 10” by 14” to be the sleeves. Then I used my bodice template to mark out half of the arm side onto the fabric I had cut out for the sleeve. Once it was marked, I cut out that curve.
The next thing I did was hem the neckline by double-folding the edge and sewing it all the way down the fabric. Once all my pieces were hemmed, I overlocked all the raw edges with my serger.
I took the pieces and lined them up, right sides facing each other, and stitched the side seams with a ½” inch seam allowance. I then did the same thing on the sleeves, stitching the end seams.
With all my pieces ready and stitched, it was now time to join the sleeves to the bodice. With the right sides facing each other, I matched up the centers of the sleeves with the centers of the armholes. Then I stitched along the edge with a ½” seam allowance.
I laid my top down and measured and marked 8”, which is the measurement under my bust. Then, starting at that point, I used the lines on the fabric to guide me in shir-stitching all the way until the end of the fabric.
The next thing I needed to do was making a casing for the elastic. So, since my elastic was ¼”, I folded the edge at about ½” and pinned it down. I did this all the way around the shoulders and the neckline. I then sewed the channel, keeping an opening that I would be able to feed the elastic through.
After that was ready, I fed the elastic through the casing and tried on the top so that I could make adjustments. Once I made them, I was able to go ahead and secure the elastic and close the opening.
Now that my top was almost done, all I had to do was hem the sleeves. I actually couldn’t decide whether to add elastic to the sleeves and make them puff sleeves or if I should just hem them as they were. So I left them for the time being. Should I decide to add elastic, it will be a similar process as before, in which I’ll make a casing for the elastic then feed it through.
For the skirt panel, I used a double layer of fabric, using the second layer to cover up a stain on the first one. The width of the skirt panel was the same as the bodice’s width, which was about 51”. So I cut the fabric down to the right width and the right length that I needed.
I took the two panels and sewed them together. This made it so I only had to work with one piece instead of two separate pieces of fabric. Then I was able to join the side seams. Since there were ruffles on my side seam, I had to be extremely careful to align them perfectly.
It was now time to join the bodice and the skirt together. So I matched the waistlines, right sides facing each other, and pinned them together. Then I shir-stitched it so that waistline would stretch, making it easier to get in and out of the dress.
In the end, I decided that my sleeves were too long, so I cut them about 2” at an angle so that they would taper to the centerfold. Then I double-folded them to hide the raw edges and my dress was done!
I love the way this dress turned out. I think it’s super cute and it’s really comfortable, too. I just can’t believe this dress started off as a thrifted bedsheet! I’m very excited to wear this dress, and I even made a matching bow to go with it. The only thing left to do now is to decide whether to make the sleeves into puff sleeves or to leave them flowy like they are now. Which do you think I should do? Let me know in the comments!
Enjoyed the project?
Suggested materials:
- Bedsheet
- Measuring tape
- Ruler
- Curved ruler
- Marker
- Sewing pins
- Sewing machine
- Serger
- Elastic
The author may collect a small share of sales from the links on this page.


Comments
Join the conversation
I love it. Your detailing is on point
I like the sleeves the way they are. It might look too little girlish with both ruffles and puffed sleeves. Very cute as it is!