Turn a Skirt Into a Dress With This Cool Thrift Flip

Who doesn’t love a good thrift flip? It’s honestly one of my favorite kinds of projects! I love finding a cool garment and turning it into something completely different. It’s so satisfying. In this tutorial, I’ll show you how I took a midi skirt that had multiple panels and fabrics, and was too big on me, and turned it into a super unique sleeveless dress that is absolutely perfect for summer.
Tools and Materials:
- Long skirt
- Sewing machine
- Scissors
- Sewing pins
- Zipper
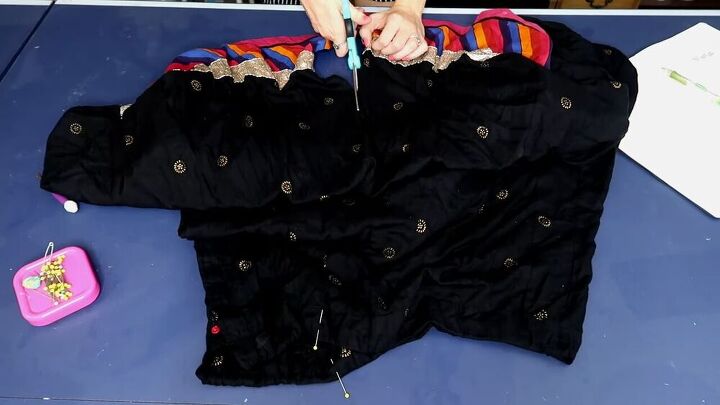
The first thing I did was completely deconstruct the skirt. I took apart the different materials and cut up the main fabric so that I would have enough for both the bodice and the skirt. I decided to use the striped material on the bottom of the skirt as most of my bodice, and then some of that main black material for the rest of the bodice. The skirt of the dress I decided to create from the original skirt of the piece.
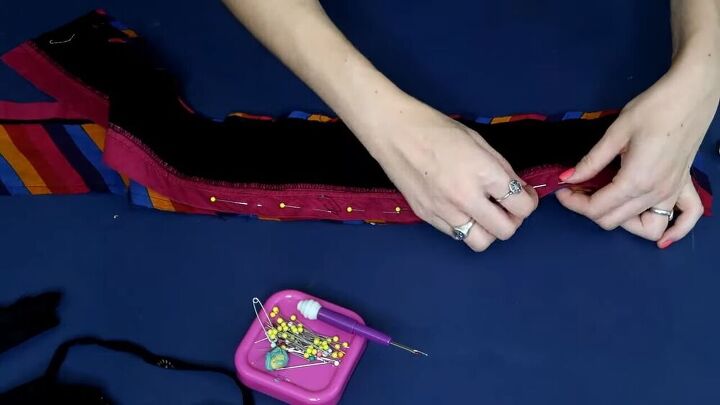
To make the bodice I took the bottom striped material and cut it in half, then sewed it together to make a thicker piece. I laid both halves on top of each other, right side to right side, and pinned then sewed them together. Once that was done, I pressed open the seams with my iron so that it would lie nice and flat.
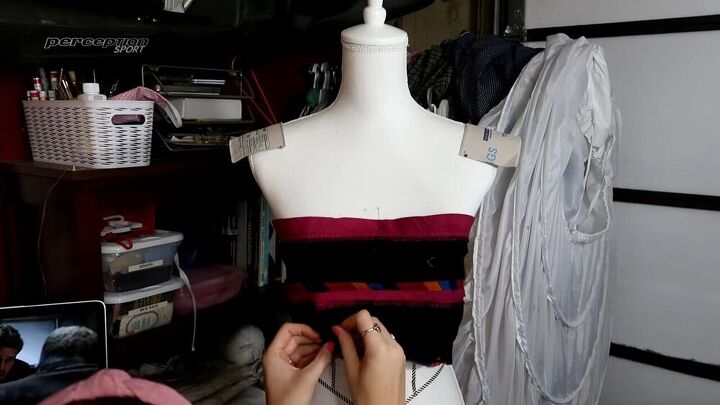
Next, I put the bodice on my mannequin and worked out my dart placements. I decided on two darts in the front both for fit and style and none in the back. Once I did that I placed the bodice over my body and adjusted the darts according to the fit. Then I sewed them into place.
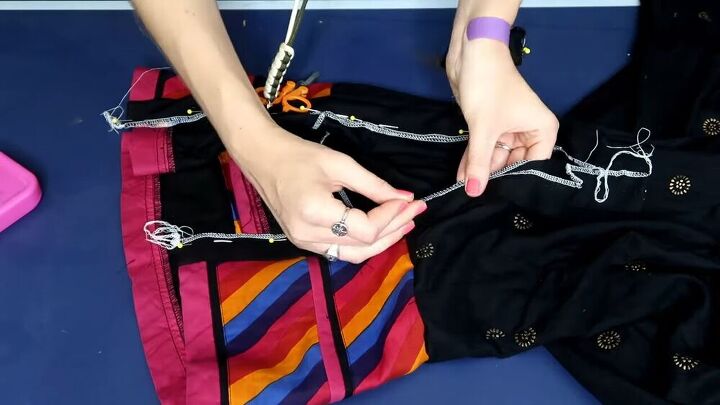
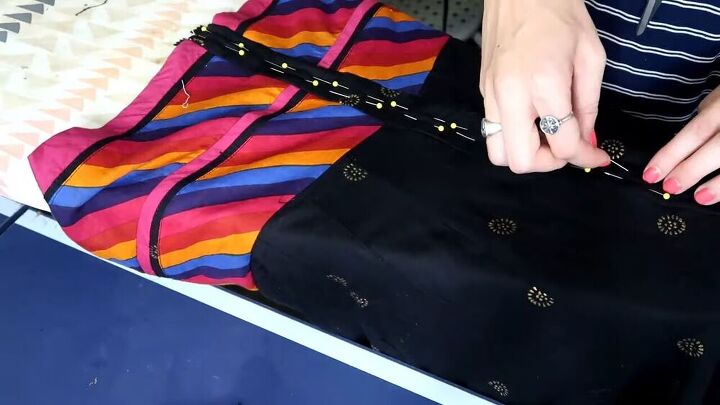
Now that my bodice was pretty much ready, I measured the waistband of my skirt to the high waist of my bodice to make sure that the fabrics were all the right widths and to match up the seams. Seeing that everything was correctly matched up, I pinned it into place then sewed them together. Then I sewed the section in the back of my dress, leaving about ¾ open for my zipper.
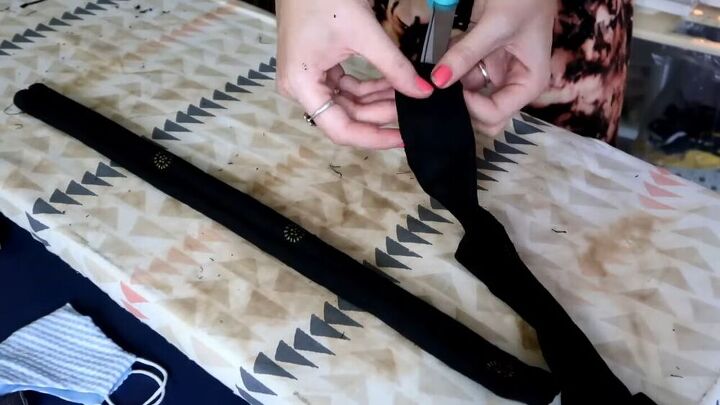
For the straps I cut pieces of the fabric into strips that were about 2” wide. I folded them in half and sewed them together, then turned them right side out and pressed them before attaching them. This gave me basic 1” straps.
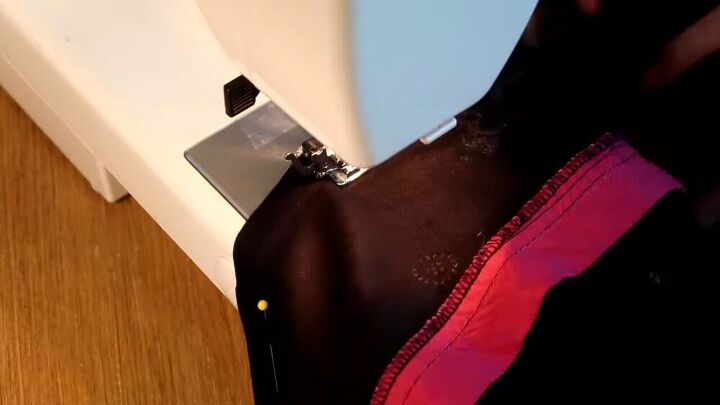
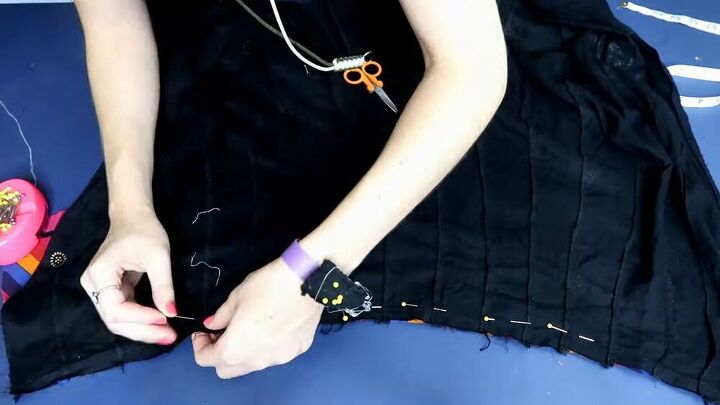
Because I took apart the skirt, I was left with a raw edge at the bottom. So I went in and created a seam to hide that raw edge. It took away about 1” from the length of the dress, but I didn’t mind that. Once that was done I just took my iron and pressed down all the seams.
At this point, I realized that my dress was actually a bit too snug on me to add the zipper. So I took extra fabric from the skirt and added it to the back to give me that extra room. I did this by adding panels to either side on the back. When I sewed them in place I tried to blend them into the already existing seams. Then I gave the dress another good press.
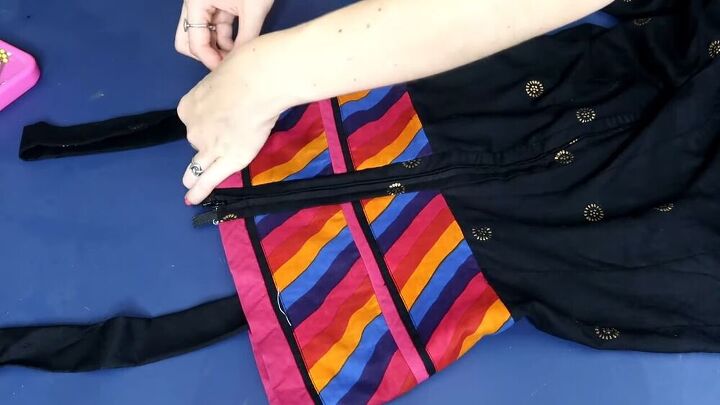
I added the zipper to my dress through a technique that I really like. First I sewed the back of my dress together with a basting stitch. Then I placed my zipper right on that stitch and pinned it in place. Once that was done I sewed down the zipper and went back and ripped out the basting stitch.
To attach the straps I first marked where I wanted to place them. I pinned them on the inside of the bodice on one side then folded them over and tucked them on the inside of the bodice on the other side. Because my fabric already had a black line in the pattern, I used a black thread and sewed the straps on that line so that the seam wouldn’t be noticeable.
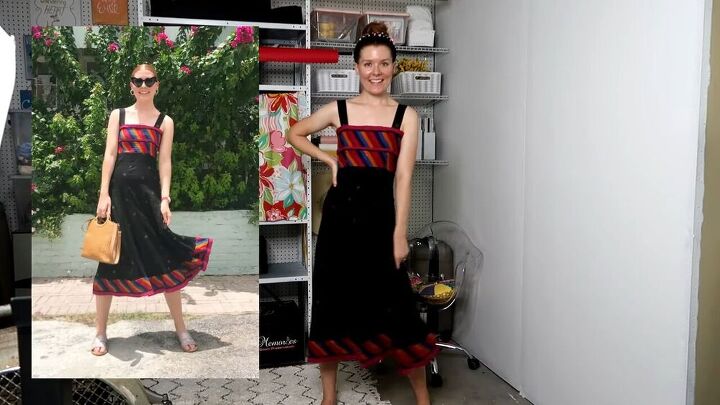
That’s it, guys! I’m so happy with the way this dress came out. It’s so pretty and also totally perfect for hot summer weather. It’s honestly such a cool experience to take an already existing piece and completely recycle and redesign it. If you try this on your own I would absolutely love to see your results, so drop a pic in the comments!
The author may collect a small share of sales from the links on this page.


Comments
Join the conversation
Very cute! Looks amazing on you! Fun project!