How to Sew an Apron Dress - Quick & Easy Sewing Tutorial

If you’ve ever wanted to know how to sew an apron dress, this tutorial is for you. This is a super versatile piece that’s perfect for beginners. You can dress this up or down and wear it anywhere.
Tools and materials:
- 1 Yard of fabric
- 1 Yard of bias tape
- Measuring tape
- Scissors
- Sewing machine
- Marking chalk
- Clips
- Ruler
- Pencil

1. Measure the body
In order to make the apron dress sewing pattern, you’ll need body measurements to make sure it fits you properly. Measure the shoulders on the back from end to end.
In this apron dress tutorial, I’m going to finish the width at 12 inches. Although my shoulders are 14 inches across, I don’t want the dress to be as wide as my shoulders for a slimmer look.
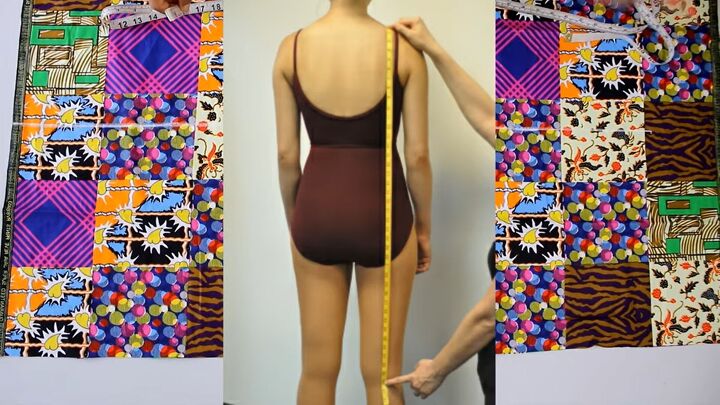
Then measure the length from the shoulder to the knee. I’m making it 40 inches long for me. I’m also adding about 2 inches for hemming. You can adjust it to the length you prefer.
Add a 1-inch seam allowance on the sides and a 1½-inch seam allowance at the bottom.
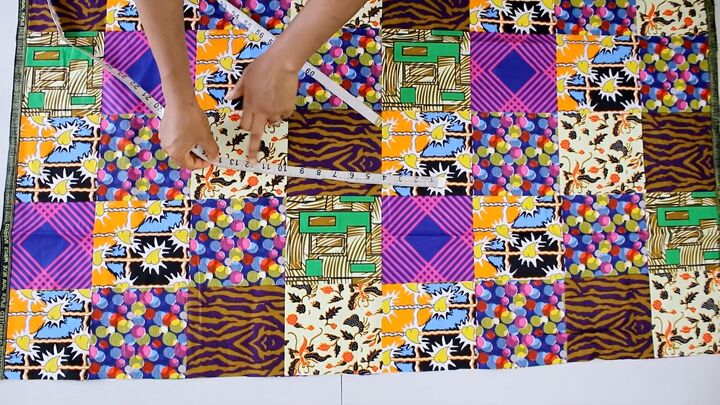
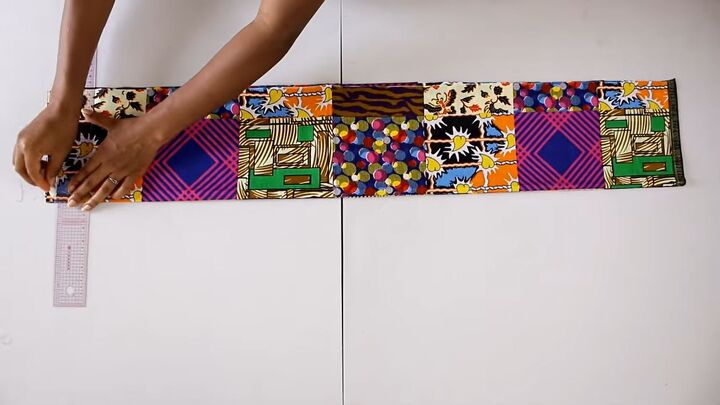
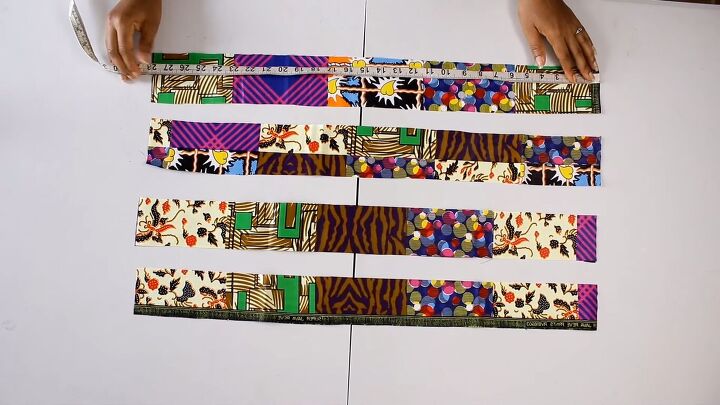
2. Mark the fabric
Mark the fabric with the measurements. For me, I marked 14 inches for the width and 40 inches for the length for the seam allowance.
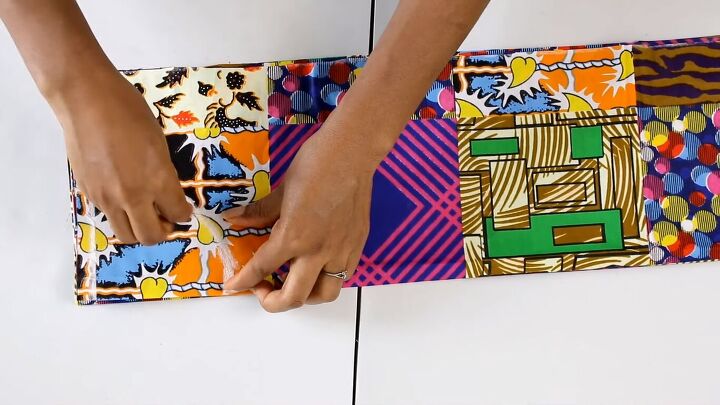
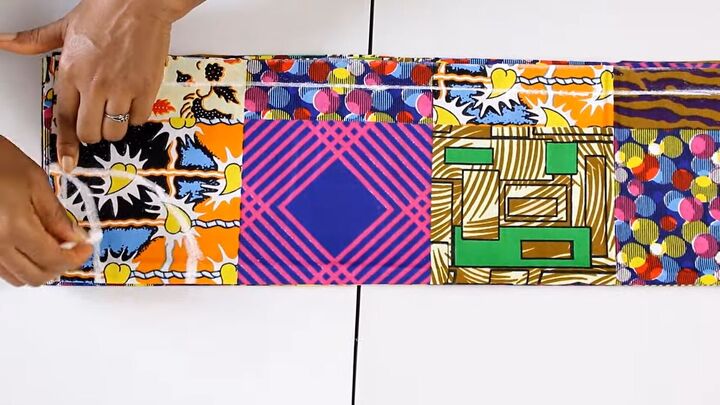
3. Cut the fabric
Cut on the measurements. Once I cut my fabric, I used that cut piece as the pattern for the second piece. You could also fold the fabric in half and use the measurements so you cut both at the same time. Either works.
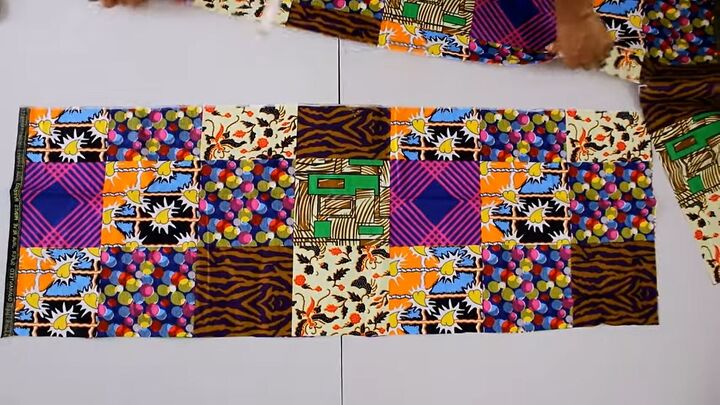
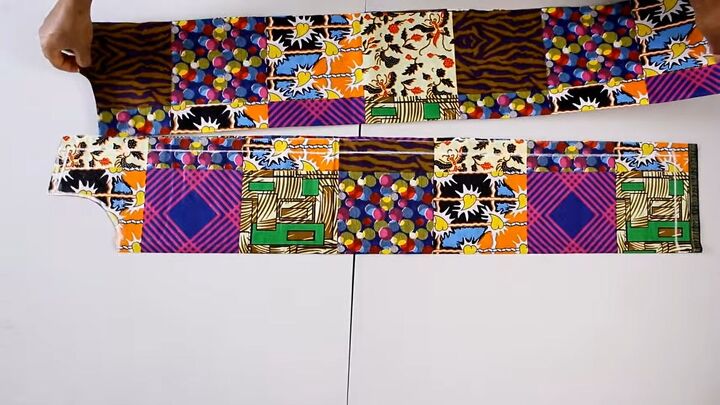
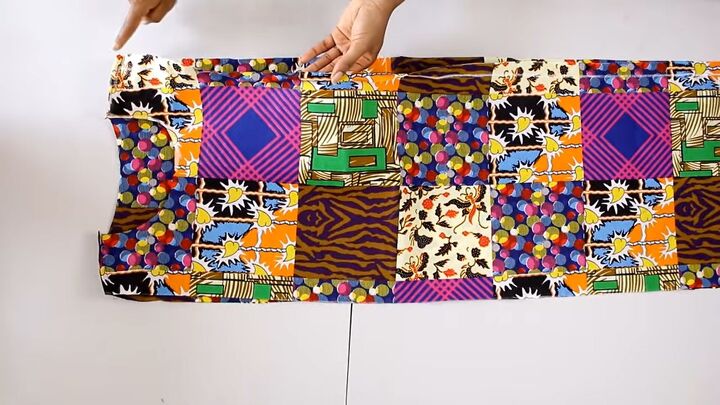
4. Make the apron dress sewing pattern
Once both pieces are cut, fold each piece of fabric in half lengthwise. Place one on top of the other with the folded edges on top of each other.
On the top piece, measure ½ inch from the top. From the folded edge towards the outside of the fabric, I measure for my neck. This is about 3½ inches. If you’re making this, you can make it larger. This is just a size I prefer.
Then, I mark down on the fold about 4 inches downward. I connect the 2 points on a curve. This is for a rounded neckline. You could make it with a point for a V-shaped neckline.
Mark the back neckline 1 ½ inches downward. The top curved line is for the back and the deeper curved line is for the front.

Measure the width of the fabric, making sure the fabric is correct for the shoulder width. I wanted 12 inches wide, so on the folded fabric, I measured 6 inches, with an inch on either side for seam allowance and hemming.
From this point, I measure ½ inch or ¾ inch downward for the shoulder slope. Connect the slope measurement with the neck point.
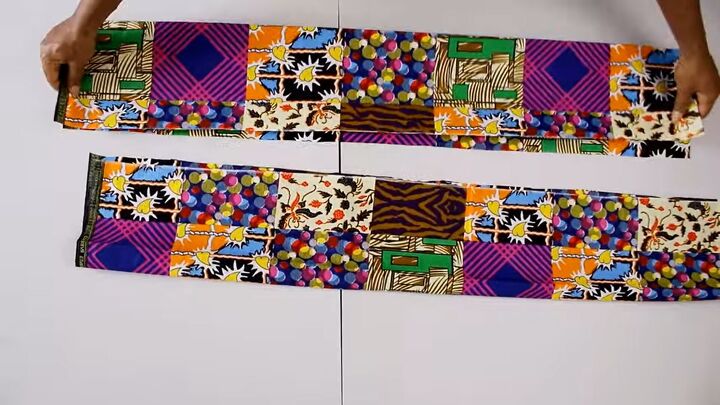
5. Cut the fabric
Once I’ve marked everything, it’s time to cut. I cut the shoulder first, then I cut the back. Then I cut the front.
I cut 4 straps from the leftover fabric. Each piece is 28 inches long and 3 inches wide. You can adjust the width and length to your preference.
6. Sew the apron dress
First, sew the straps. Fold the right sides facing inward. Sew the bottom end first, then lengthwise.
Now, sew the pieces. Have the right sides facing each other. Sew the shoulders with a ½ inch seam allowance. Hem the sides by folding them in twice and sewing them down. Hem the bottom the same way.
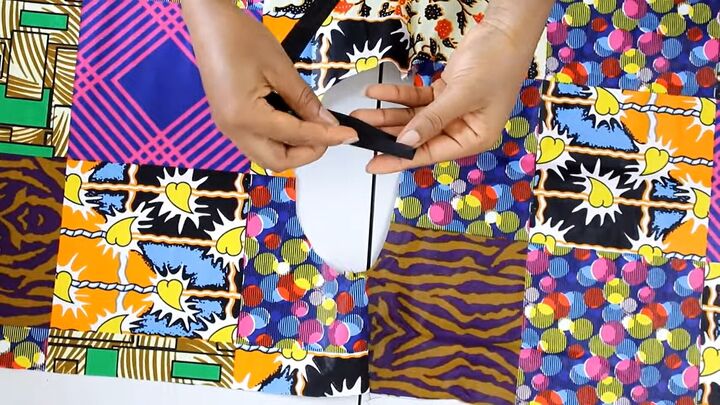
To sew the neckline, use bias tape. Open the half bias tape that was flattened and ironed down.
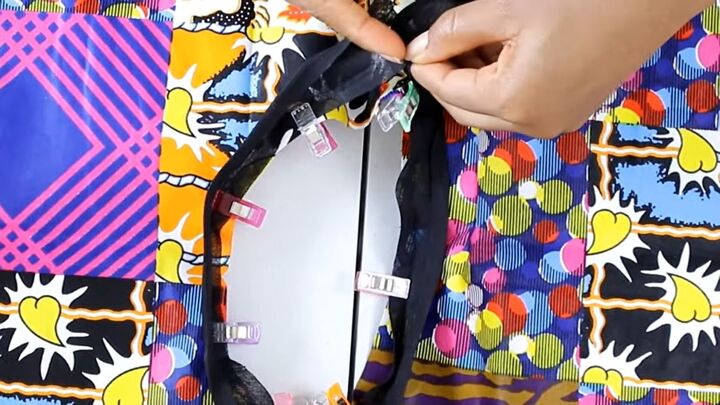
Place it with clips along the neckline on the right-facing side of the fabric. When it is at the end, join the pieces of the bias tape together.
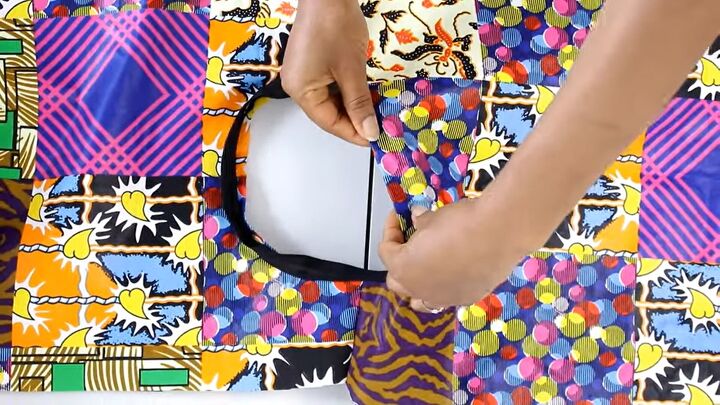
Sew the ½ inch bias tape by the crease. Once that’s sewn down, turn the bias tape inward and sew the tape on the inside so it is hidden. Sew that down.
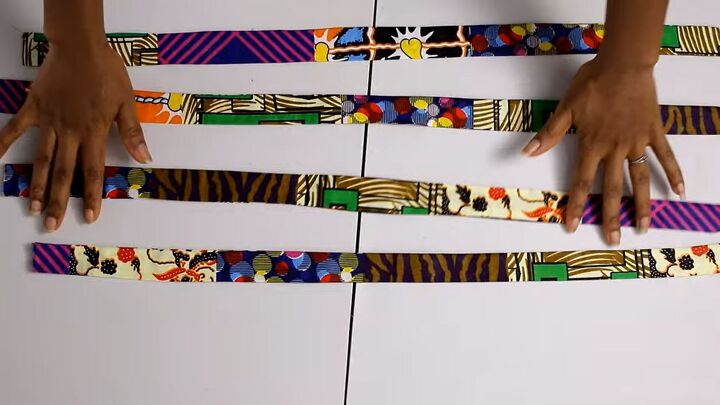
Take the straps and turn the fabric to the right side using a pencil. Sew up the open short end. Then iron them flat.
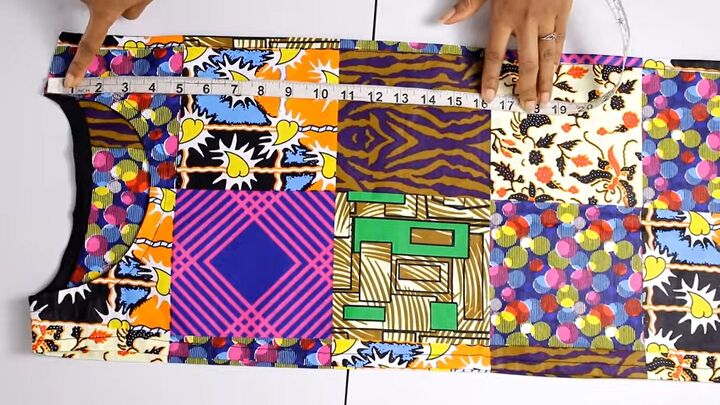
Measure the shoulder to the smallest part of the waist. Mark the spot on the inside. For me, it is 16 inches. Mark all 4 sides.
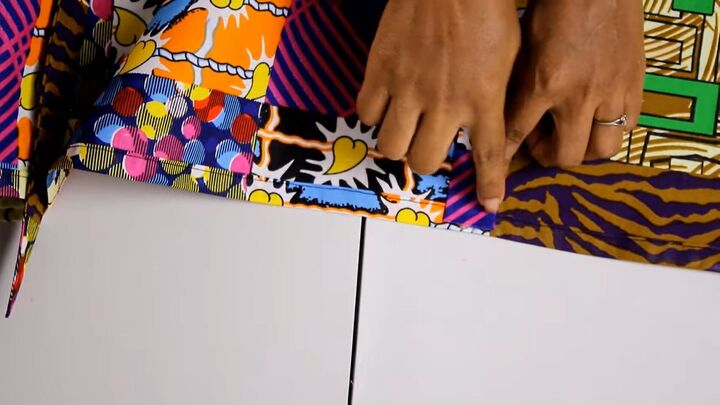
Open the apron to the wrong side. Lay a strap on the inside with one end at the mark and the rest of the strap inside of the dress. Have it about ¼ inch from the edge of the hemmed fabric. Sew it down in place.
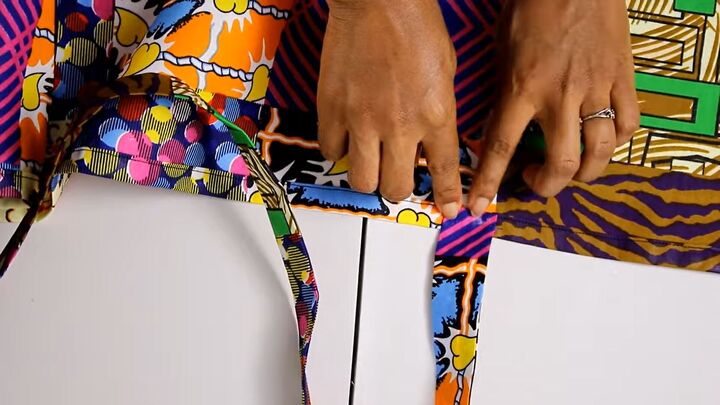
Then fold the fabric over and sew it again so there is a small fold in the strap. Do all 4 sides.

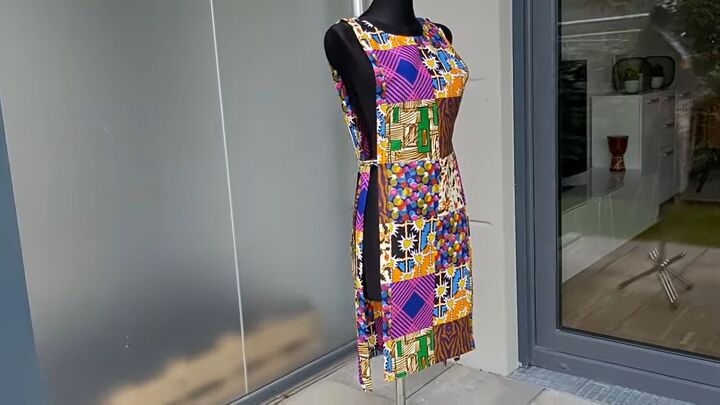
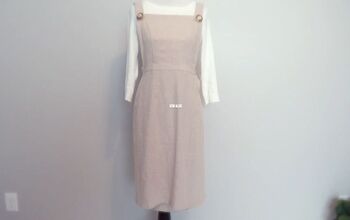
How to sew an apron dress tutorial
Wear this apron-style overdress and get ready for the compliments! This look is so easy, simple to do, and beautiful. Let me know what you think of this apron dress tutorial.
The author may collect a small share of sales from the links on this page.


Comments
Join the conversation
Am so making one