How To Sew An Invisible Zipper: The Teri Dress Sewing Tutorial
And at long last, we have given a bit of a facelift to our very first sewing tutorial here on the blog: How to sew an invisible zipper! This was the first tutorial we covered because it really is such a vital construction detail to learn how to sew.
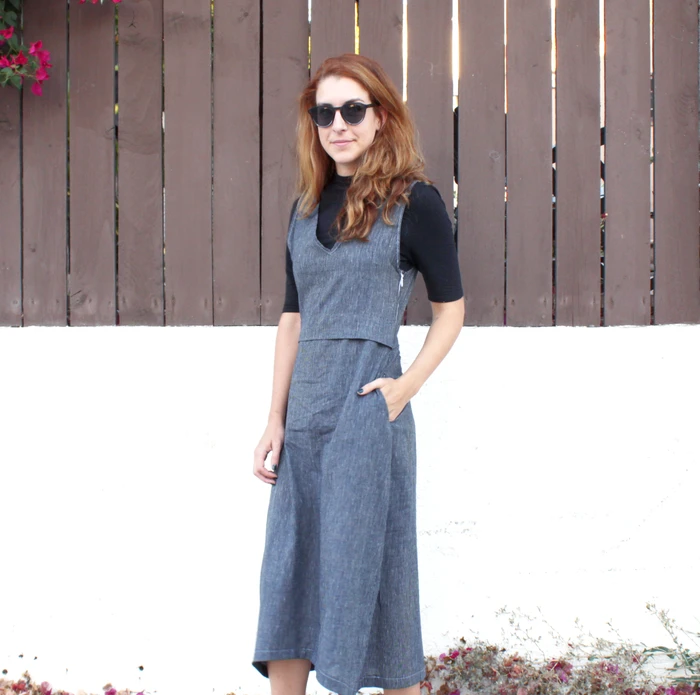
Why? Because if you take a look in your closet, I guarantee that more than a handful of the garments in there include an invisible zipper of some sort. They really can be used for pretty much any casual garment out there: Skirts, dresses (like the Teri Dress!), shirts, pants, shorts.
I think sewing invisible zippers can seem a bit intimidating the first time around.. But once you know the steps, the process is cake. And knowing how to sew an invisible zipper really can be invaluable because it doesn't affect the overall look of a design. (If you sew it correctly, that is! Hence the invisible aspect of the zipper.)
"Actually, yah, I CAN do that."
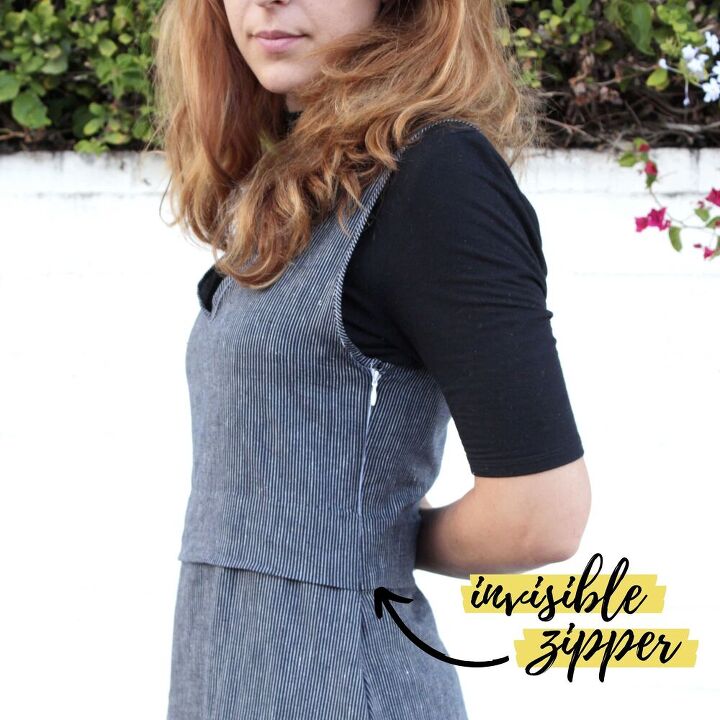
Getting the tape of an invisible zipper completely concealed can be a bit tricky and does take practice. If you look closely at the photos of the Teri Dress, you'll see that mine isn't completely 100% concealed. And THAT'S OKAY.
Another thing that's okay? Not using a special invisible zipper foot with your sewing machine. I used them at FIDM, and I never liked them. My sewing needle would always, without fail, get stuck in the teeth of the zipper. Which would then result in ripping the stitches out and doing it over and over again.
However, I get excellent results just using the regular foot on my sewing machine, so don't feel like you have to go out and purchase a special foot JUST for sewing invisible zippers. No one is sewing enough invisible zippers to justify that.

But first. What is an invisible zipper?
A zipper is a fastening device made with metal teeth (or plastic coils, more often) that makes a complete closure by interlocking together. Generally, there are 3 main categories that a zipper should fall into:
- Conventional Zippers: A zipper that opens at the top, and has a stopper at the bottom. The teeth of these zippers are exposed, and is often used as a design element. Conventional zippers can be used for pretty much anything, with the exception of coats & heavy outerwear.
- Invisible Zippers: These zippers also open at the top and have a stopper at the bottom. However, because of the special plastic coils on these zippers, the teeth are completely concealed. Invisible zippers can also be used for a wide variety of casual garments, and are ideal when looking for a clean, simple finish for a design.
- Separating Zippers: A zipper that opens at both ends of the zipper tape. These zippers have exposed metal or plastic teeth, and are most often used in coats & outwear.
All three of these zippers require unique sewing techniques, and are ideal for different projects and reasons. However, for this specific sewing tutorial, we are going to stick with learning how to sew an invisible zipper. So let's get started!
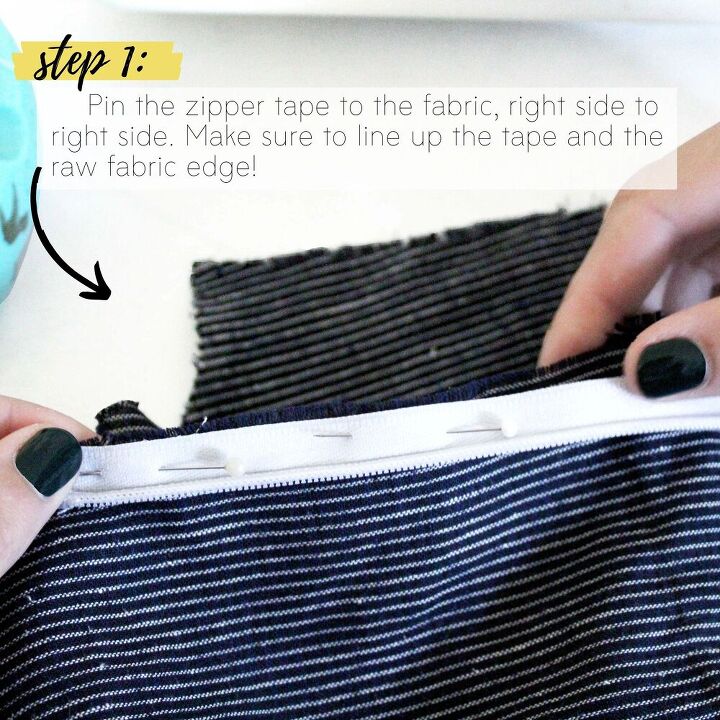
How to sew an invisible zipper sewing tutorial: Step 1
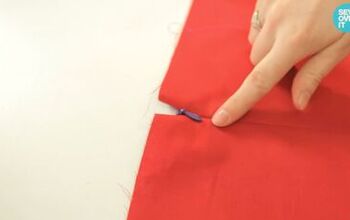
Pin the zipper tape to the fabric, right side to right side, lining up the zipper tape and the raw edge of the fabric.
The right side of the fabric refers to the side that you see when wearing the dress. The wrong side refers to the side that is closest to your skin--The side that you won't see when wearing the garment. (The bulk of the zipper tape is on the WRONG side.)
NOTE: Make sure the extra tape near the top of the zipper is long enough to be sewn in with the armhole excess. You will cut off this excess after stitching the armhole seam.
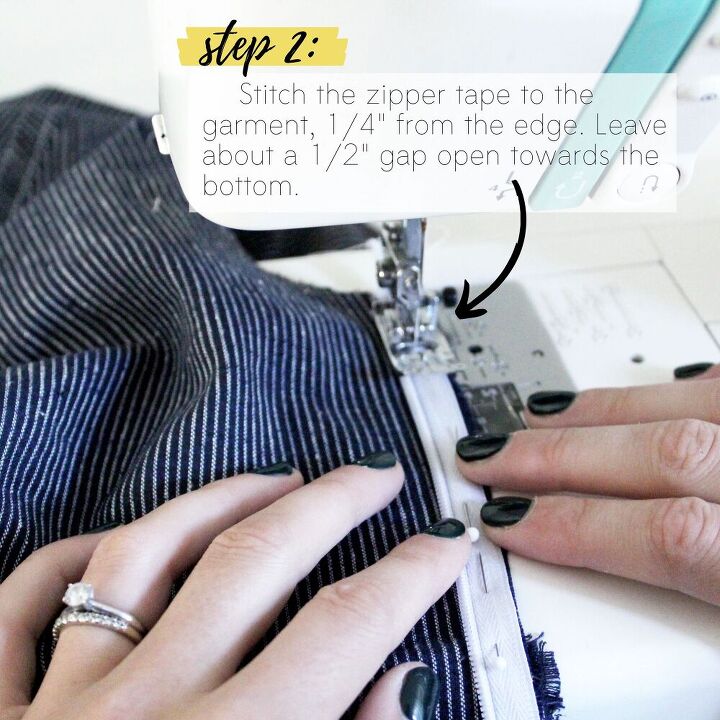
How to sew an invisible zipper sewing tutorial: Step 2
Next, stitch the zipper tape to the garment, about 1/4" from the edge. (Make sure to leave about 1/2" open towards the bottom, near the stopper.) Repeat the stitching on the other side of the tape!
NOTE: To clarify, this stitch line doesn't need to be perfect. It's just there to hold the zipper in place while stitching nice and close to the zipper teeth in the next step.
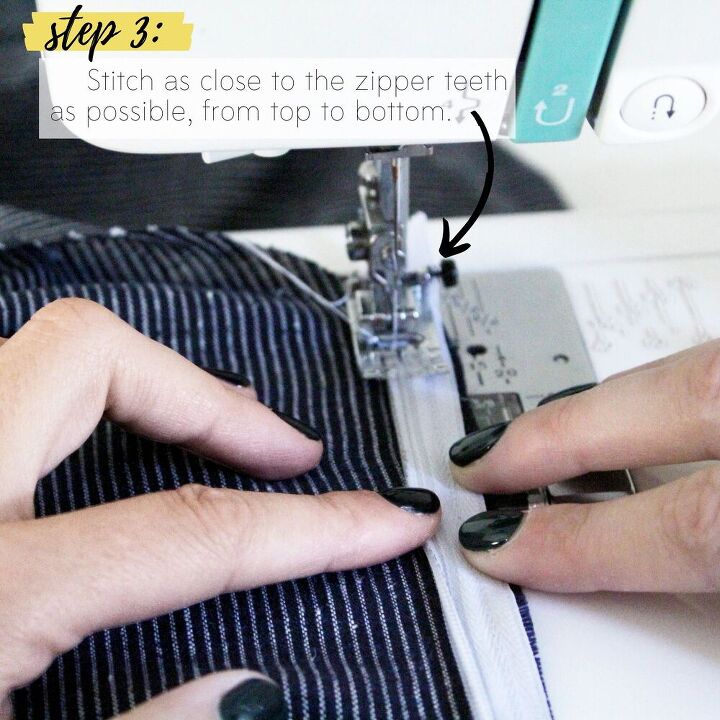
How to sew an invisible zipper sewing tutorial: Step 3
Now that the zipper is attached to the dress, we want to stitch a second line as close to the zipper teeth as possible. This is essentially what makes the zipper invisible--The closer you can stitch to the teeth, the better!
Unzip the zipper so that the zipper pull is at the bottom of the tape. Stitch from top to bottom, as far as you can go before hitting the zipper pull. (And the 1/2" gap left open from step 1.)
As you stitch, press the tape open with your fingers, as flat as it will go. Drop the needle as close to the teeth as possible, without stitching over them. Once you are satisfied with one side of the zipper, repeat the process for the other side.
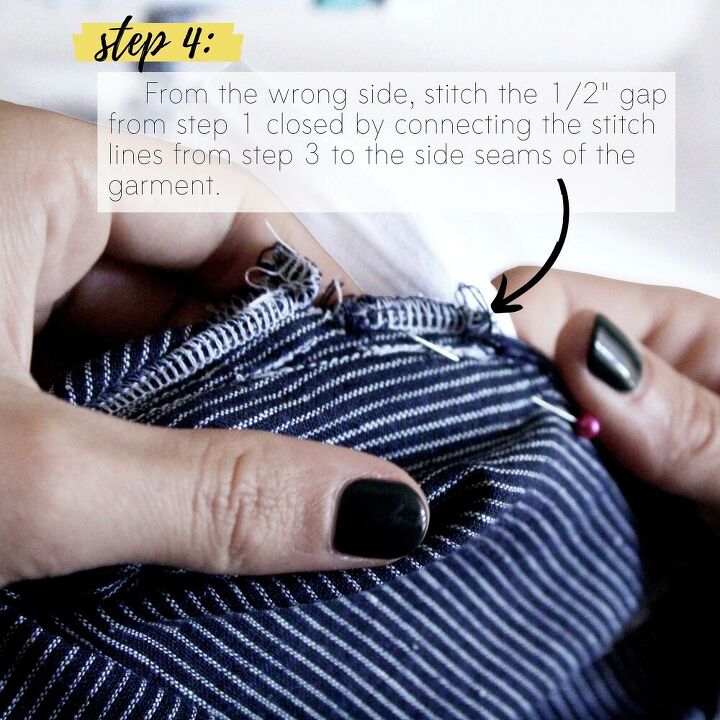
How to sew an invisible zipper sewing tutorial: Step 4
With the zipper fully attached to the garment, it's time to close off that tiny 1/2" gap left open from step 1. From the wrong side of the garment, simply stitch the gap closed, connecting the stitch lines from step 3 to the side seam of the garment. Really--That's it!
Make sure the stitch lines flow well together, and that there isn't any gathering or puckering on the right side of the garment. If there is, adjust the stitch line accordingly.
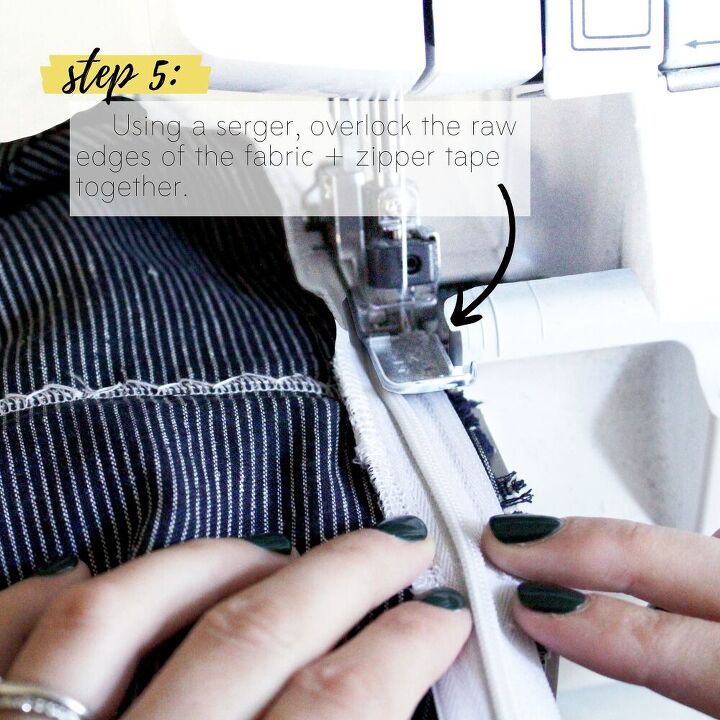
How to sew an invisible zipper sewing tutorial: Step 5
Using a serger, overlock the zipper tape and the raw edges of the fabric together. This simply provides additional stability for the zipper tape, as well as helping to keep the fabric from fraying.
NOTE: If you don't own a serger, you can also use a serger-like imitation stitch for this step. Most modern sewing machines have them, and it will work just as well!

How to sew an invisible zipper sewing tutorial: Step 6
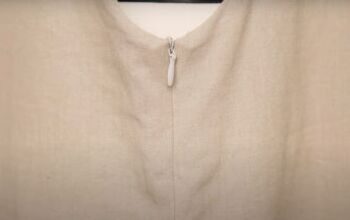
Finally, press the garment from the right side. Take care not to iron over the zipper teeth--No one likes a melted zipper!
If there is a small gap at the top of the zipper (as there was for the zipper on the Teri Dress) hand sew in a small hook & eye. This will simply close up that little gap at the armhole, and will help provide an even cleaner finish. (If sewing a sleeveless garment that will be closed with a bias binding, hold off on adding the hook & eye until step 7.)
If desired--You can also always topstitch along the edge of the invisible zipper tape. This is an ideal option if there is a lot of topstitching throughout the garment, or if the zipper didn't turn out quite as invisible as anticipated. Topstitching can fix pretty much anything!
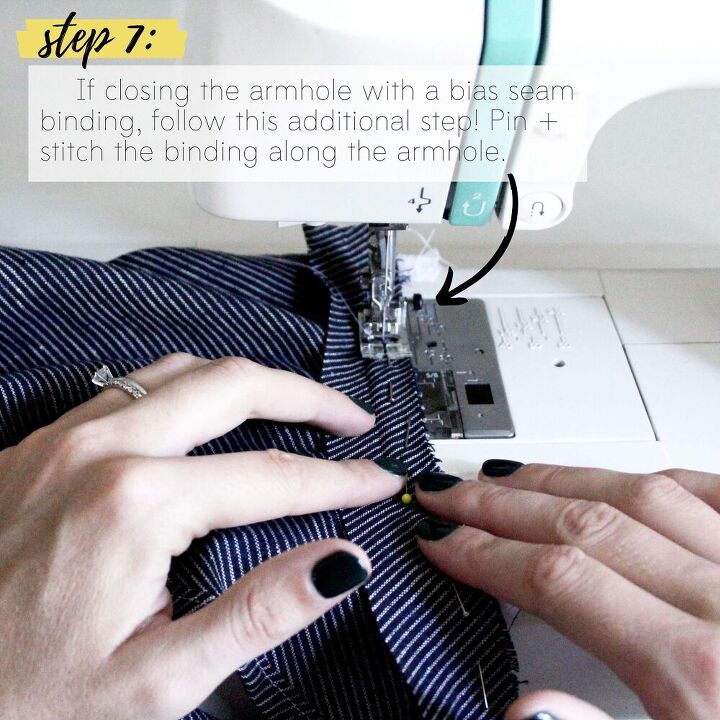
How to sew an invisible zipper sewing tutorial: Step 7 (OPTIONAL)
Now, this last step is optional. It really depends on how your particular sewing project is finished. If sewing a dress with sleeves, then your invisible zipper will be finished in step 6. The same is true if sewing an invisible zipper into the side seam of a skirt.
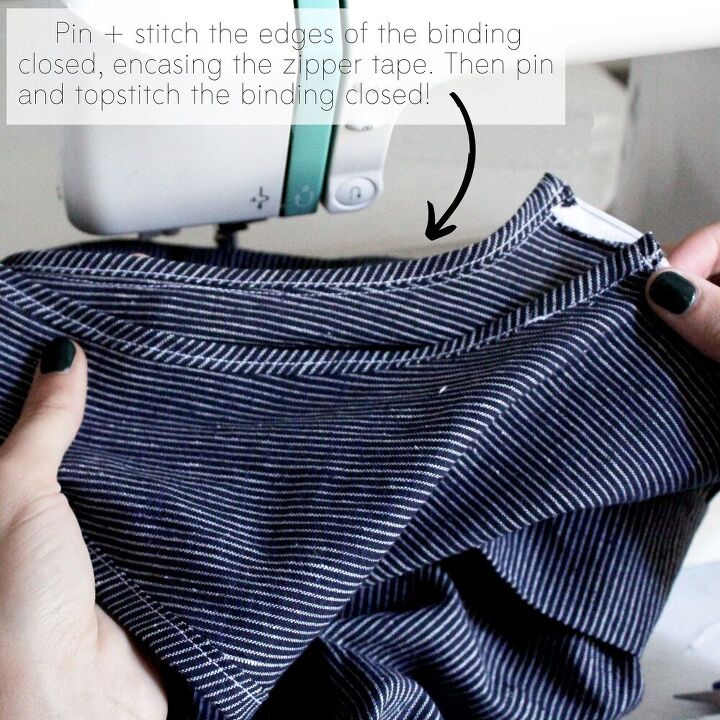
However, if sewing an invisible zipper into a sleeveless dress or top that is close with a bias binding. Then you will need to follow this additional step. Pin & stitch the bias binding along the armhole of the garment. Then pin & stitch the edges of the binding closed, encasing any extra zipper tape inside. (This is why it's always a good idea to leave a little extra tape at the ends!) Finally, pin & topstitch the bias binding closed.
NOTE: If your sewing project includes a bias binding, like on the Teri Dress, then you would add the hook & eye in AFTER finishing up with the binding.

Feel ready to sew an invisible zipper?
So. Not too bad, am I right? I know sewing an invisible zipper for the first time (or the second, or third) can be a bit intimidating. But if you practice, practice and follow the simple steps in this sewing tutorial, I guarantee you will become a pro in no time!
However, if you are still a bit nervous when it comes to invisible zippers, grab some scrap fabric and test out the process. (Actually, I highly recommend this if you've never sewn an invisible zipper before! Always better to practice on scraps than on the real deal.)
Really knowing how to sew an invisible zipper is an invaluable skill when it comes to your sewing education. Because you WILL sew them time and time again.
I can promise you that.
One of the most frustrating aspects of sewing is that you could put together your entire garment perfectly. But if you sew up a final detail wrong (like an invisible zipper) then the entire thing is going to look off. In short, the beauty is in the details.
Imagine spending ALL that time on a project and then having it turn out wonky just because the zipper wasn't stitched in right--You're going to get irritated and feel like you wasted a ton of time. Trust me. I've been there--Entirely too many times.
Go slow, and do it right the first time. As a result, you will thank yourself later--Promise.
xx+
Julia
The author may collect a small share of sales from the links on this page.


Comments
Join the conversation
Good instructions for putting in an invisible zipper. However, I have a zipper foot made to do just that. It rides over the teeth of the zipper, left or right side, so you don't have to do too many of the steps you had to do. I don't know if it is still sold, but it is a wonderful tool to have for sewing.