Make a Tiered Dress With Lace Trim!

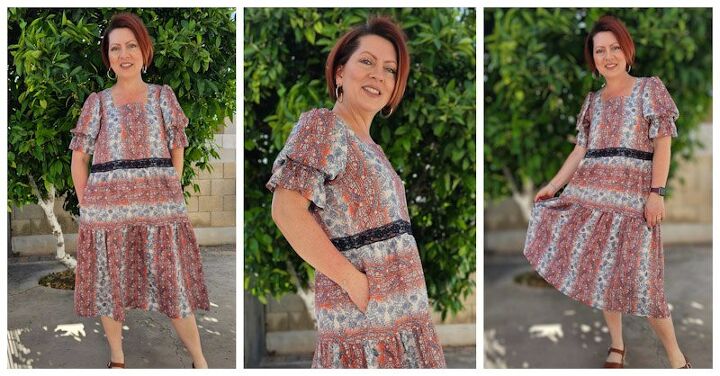
I love adding little details like, trims, pockets and ruffles to the dresses I make. It’s helps me customize the things I wear to fit my style. This newest dress of mine was such a fun project. I started with one idea, then rapidly changed. I absolutely LOVE the results!
The Pattern….
The Saltwhistle Top and Dress is a cute and flirty pattern ideal for your Spring and Summer wardrobe. It is meant for woven fabrics and features a stylish square neck design. The unique scalloped hem adds a beautiful feminine touch. Pair the peplum top with jeans for a casual day or colorblock the layered dress to turn heads. Take it down a notch and make a simple dress using just one layer. Easy to fit and wear with a slightly blousey silhouette and elastic to cinch the waist. Ladies sizes XS -5X with optional Full Bust pieces. This pattern is meant for woven fabrics.
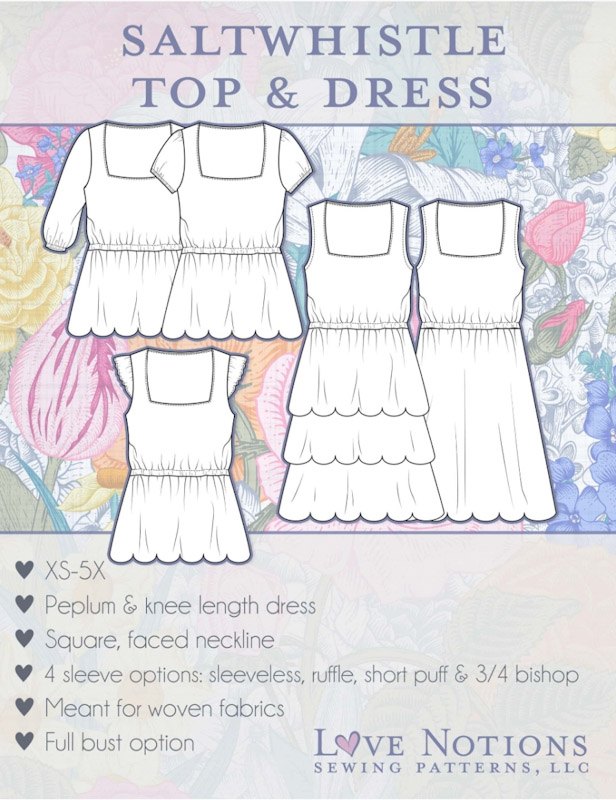
Saltwhistle Top & Dress Features:
- Meant for woven fabrics
- 2 views: Peplum and knee length dress
- 4 sleeve options: sleeveless, ruffle, short puff & 3/4 bishop
- Square, faced neckline
- Three tier options
- Full bust option
Sizes: XS-5X (See Size Charts here)
Skill Level: Intermediate
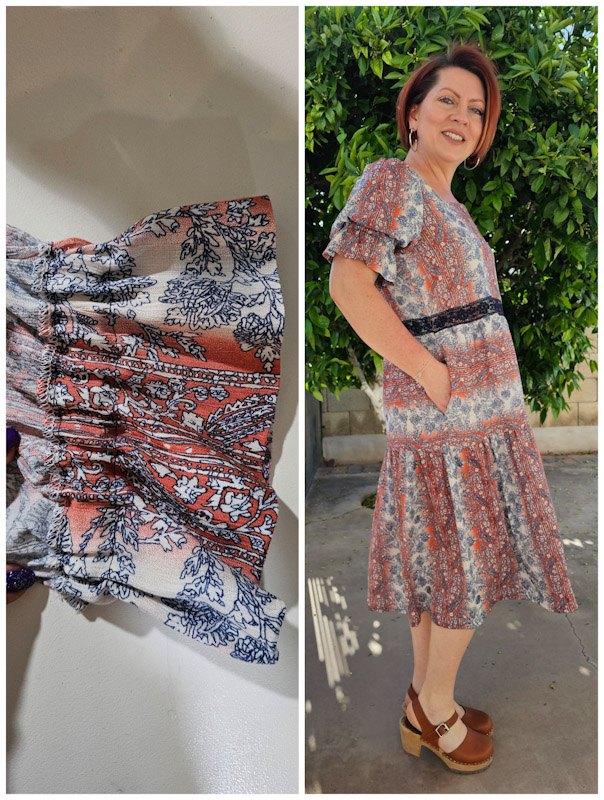
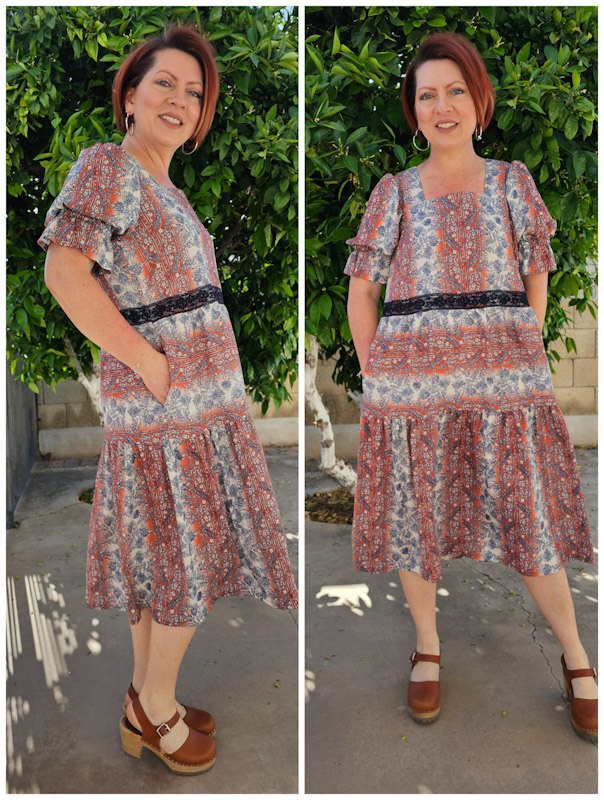
I originally wanted to make the layered dress view with a bishop sleeve but was going to skip the scalloped hem and do a straight one instead. However, I wanted to make ties for my boys to match and quickly realized I wasn’t going to have enough fabric to do both. So I improvised.
Turning Layers to Tiers…
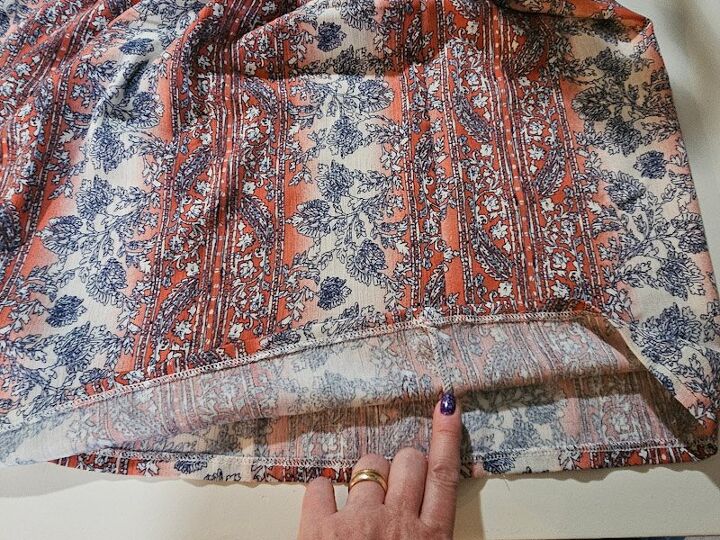
I could have chosen to make the simple, no layered dress option, but I had already done that. Check this post for that dress. I decided to turn the layers into tiers. Instead of cutting the three layers I cut the top and middle. I would attach the middle layer to the bottom of the top layer to create the tiers. But I added some width to the middle so I could gather it and attach it to the bottom of the top layer. I tried to keep the design of the fabric uniform where I added in the width for gathering. I think I turned out really nice. You don’t even notice it!
Adding Some Lace Trim…
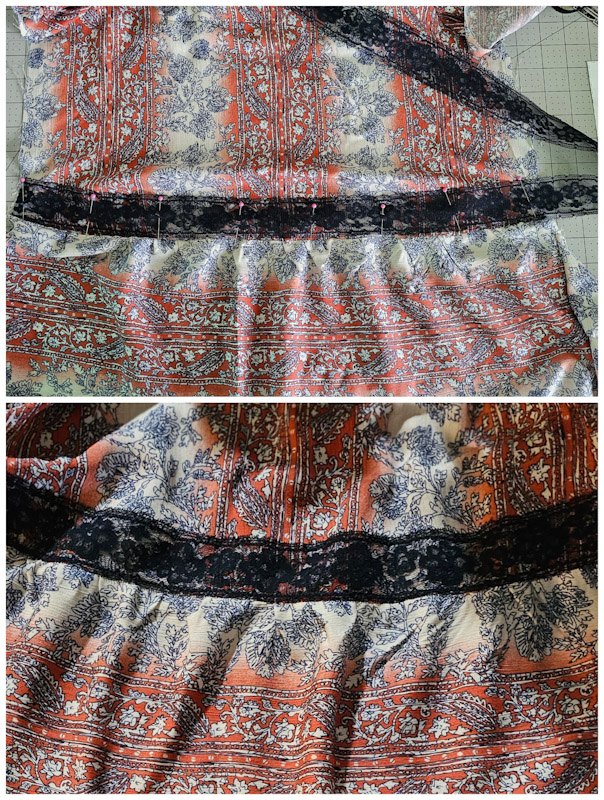
Then I found some wide, navy blue, lace trim in a stash of goodies I inherited from my mom. I thought it might look cute attached around the waist. My husband and boys really liked that detail too.
Changing the Sleeves…
I love a bishop sleeve, but when I tried the dress on, the fabric design and the long sleeve was a bit overwhelming. So I improvised there too. I hemmed the sleeve 4 inches and created a channel for some ½ inch wide elastic while doing so. Then I inserted the elastic to create a ruffled, puff sleeve look. I am so in love with how it turned out.
Dont’ Forget the Pockets!!!
Of course I had to add pockets. Making a dress and not adding pockets just seems like a waste of time. So I added some to this dress. They are super functional and big enough to fit my phone, a pack of gum and snacks.

So glad I decided to make this dress this way. I’m especially glad I had enough fabric to make my boys ties to match me. Maybe someday I will make this dress again and do the layered look. I really love it and think it would be so fun!

Let’s be friends!
If you are looking for a fun dress pattern, hopefully this post helps you figure out what will work best with your wardrobe needs. Let’s be friends on all the socials! Come follow along on Pinterest, Instagram, Facebook and TikTok so we can chat about all our sewing projects!
The author may collect a small share of sales from the links on this page.


Comments
Join the conversation