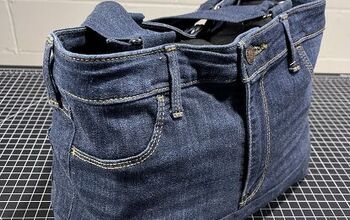
How to Easily Make DIY Produce Bags Out of Different Thrifted Items

In this tutorial, I'll show you how to make DIY produce bags. Every time you buy produce, you probably put it into those plastic bags they have at the store. Think about how many plastic bags you get when you shop and how that adds up!
Reusable produce bags have fantastic benefits for yourself and the environment. They cut down on plastic waste and help keep your fruits and veggies fresh. I like to be even more eco-conscious by using fabric from thrift store finds.
DIY produce bags made of fabric do weigh more than those thin plastic bags. If you like to buy lots of different fruits and veggies, you’ll need different weight bags. Some will need to be sturdier like for potatoes and onions, and others will need to be lightweight, like for lettuce or herbs.
Tools and materials:
- Fabric from thrift store finds
- Sewing machine
- Serger (optional)
- Twine
- Elastic
- Scissors
- Rotary cutter
- Ruler
- Marking chalk
- Iron
1. Decide on the size of your bag
I chose my produce bags to be 10 X 12 inches.
That means when the fabric is open, it is 20 inches wide before sewing up the side seam.
2. Decide on the type of fabric
I bought several different types of fabric items from the thrift store to make the produce bags e.g. polyester curtains and cotton shirts. First, make sure to wash everything really well.
Polyester fabric is super lightweight but it does fray. If you do decide to use this fabric, you’ll need to serge or overlock the edges so your veggies don’t get caught up in the threads.
For larger, airier, and sturdier bags, I found a loose weave sleeveless dress and tank top. The best part of repurposing these old clothes is that they have the “handles” already built in!
3. Make the bags
I’ll start with the shirt. This shirt had holes and pit stains but the bodice was fairly OK.
Lay the shirt down so the front and back are together and as flat as possible. It doesn’t need to be super precise. Cut on the fold, including the hem at the bottom, to measure 10 by 12 inches.
Then I flip it and lay the shirt flat again and cut again to get 2 bags!
To make the strap tunnel for the shirt-based bags, fold the hemmed bottom up about ⅝ of an inch. Iron to make it as flat as possible. Then pin the edge down and sew just at the edge, creating a tunnel to thread through.
Once the casing is stitched, put the right sides of the bag together so they are kissing. Pin and then sew together, leaving the very top of the casing open.
When I cut the curtains, they already had a larger hem that is perfect to place the elastic or twine through to ruche or pull the bag in, so they won’t need as much work as the cotton shirt. Place the right sides together, pin, and then sew in place.
I cut the bottom off of the dress and stitched the front and back together to make a larger, stronger bag.
I simply sewed the bottom of the tank tops front and back together.
Cotton fabric requires a straight stitch, but polyester, open weave, or stretch fabrics need a zigzag stitch, so be aware of what type of fabric you’re using.
5. Make the closures
I want to know exactly how much each bag weighs including the closure material. When you buy produce and the price goes by weight, you want your bag to be as light as possible! I tested out both cotton twine, like kitchen or butcher’s twine, and standard elastic.
I lay the twine or elastic over the top of the bag, let it flop over a few inches on either side, and then double it. I cut it and then threaded through the twine or elastic into the cotton and polyester bags.
6. Weigh the finished bags
The time has come to weigh the bags! The cotton bag with twine weighed 0.4 ounces.
The cotton bag with the elastic weighed 0.5 ounces. The twine was the winner!
The polyester bags made of curtain weighed 0.3 ounces without the twine. The cotton string/twine weighs about 0.1 ounces so if you’re concerned about the additional weight, you can do a tie-less bag.
Some people only prefer to use cotton bags because of the particulate matter in polyester.
The bigger, sturdier produce bags weighed significantly more. The dress weighed 1.8 ounces.
The tank top came in at a whopping 2.8 ounces.
DIY produce bags tutorial
I love the idea of reusable produce bags. They are a responsible choice for you and your family for sustainable and healthy living! Let me know what you think and which bags you made!
Enjoyed the project?
Suggested materials:
- Fabric from thrift store finds
- Sewing machine
- Serger (optional)
- Twine
- Elastic
- Scissors
- Rotary cutter
- Ruler
- Marking chalk
- Iron
The author may collect a small share of sales from the links on this page.


Comments
Join the conversation