Quick and Easy DIY Tote Bag Idea

Another of my DIY tote bag ideas is this simple, easy-to-sew, eco-friendly shopping bag.
My step-by-step tutorial will help you finish this bag in under an hour. There are no gussets, linings or inner pockets to worry about and just 4 pieces of fabric to cut.
So let’s get started!
Tools and materials:
- Cotton or canvas non-stretch fabric
- Ruler
- Fabric marker
- Pins
- Scissors
- Iron
- Sewing machine
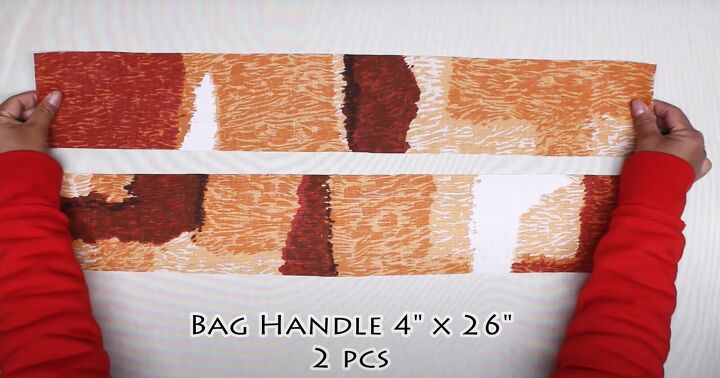
1. Make the handles
Cut two strips of fabric, each 26 inches long by 4 inches deep.
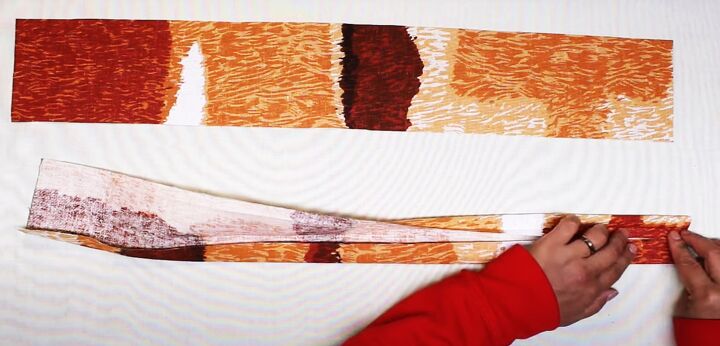
Fold one strip in half lengthways with the wrong sides together and press the fold.
Open out the handle and turn the long edges in to meet at the centerfold. Press in place.
Fold the strip in half again lengthways and sew both the long edges.
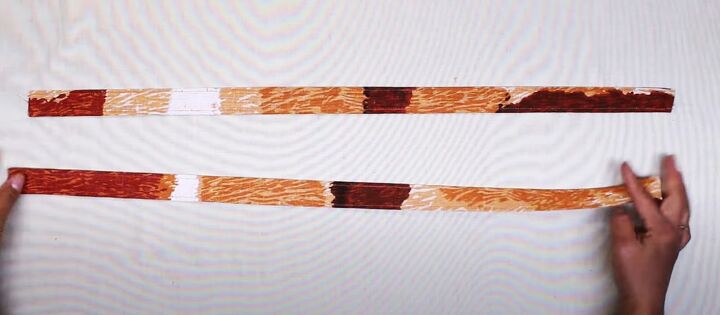
Make the second handle in the same way.

2. Assemble the bag
Cut two rectangles, each 19 inches by 17.5 inches.
Place them with the wrong sides together and join the two long edges and one of the short edges, taking a quarter inch seam allowance.
Turn the bag inside out and push out the corners. Press the bag.
Sew the same seams from the inside, this time taking a three-quarter inch seam allowance.
3. Attach the handles
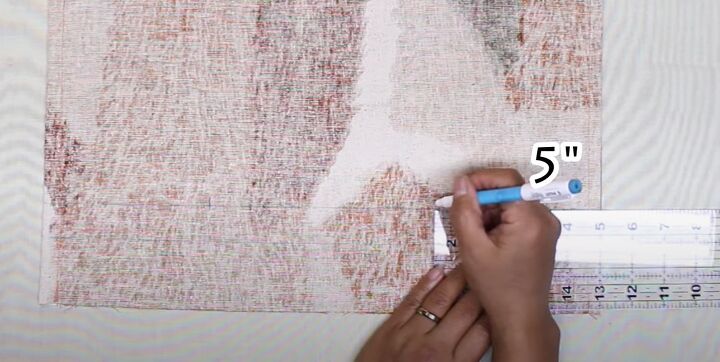
Draw a line across the bag, 2 inches up from the open edge.
Draw a second line 1 inch up from the first line.
Measure 5 inches in from each side edge and mark on the top line.
Repeat on the other side of the bag.
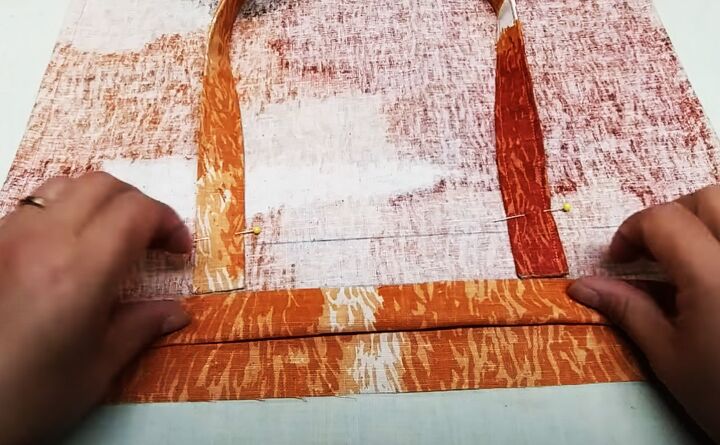
Place the end of one handle centrally over the 5 inch mark and slide it down so it touches the first line. Pin in place.
Repeat for the other end of the handle.
Pin the second handle in place on the other side of the bag.
Fold the open edge up to meet the first line.
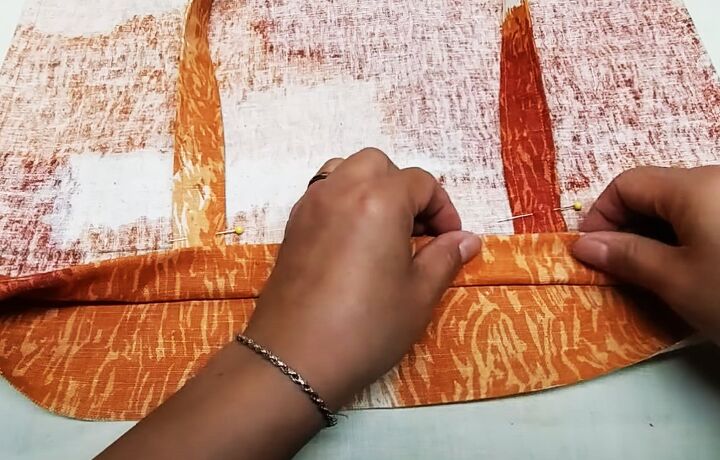
Fold it up by 1 inch again to meet the second line and enclose the ends of the handle.
Continue folding up the lower edge around the bag, lining up and enclosing the second handle in the same way.
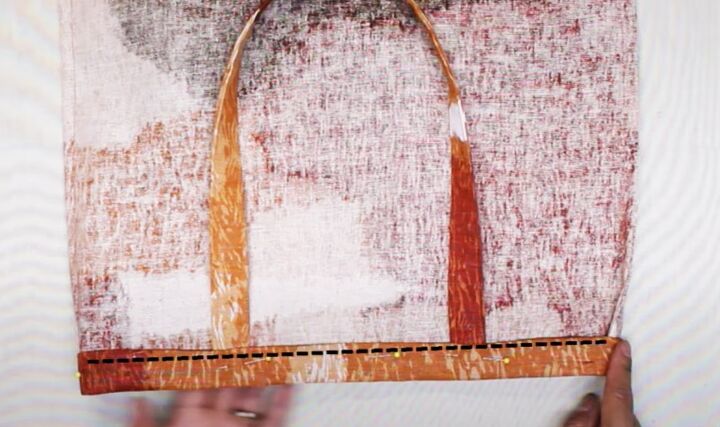
Sew in place along the second fold.
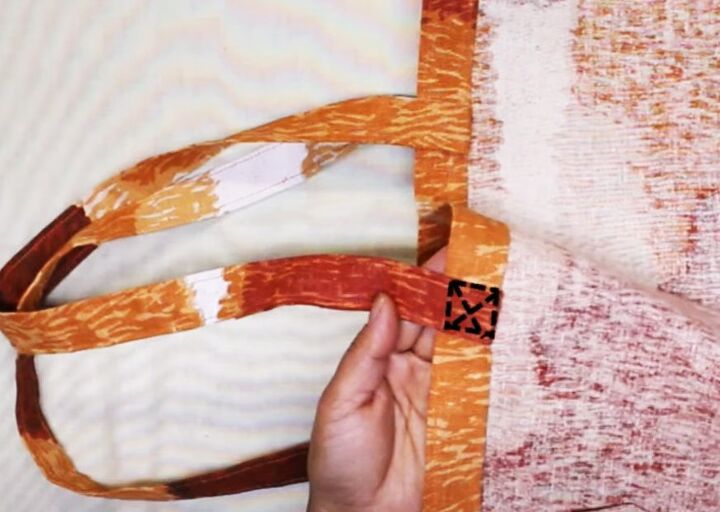
Fold the handles upwards towards the open edge of the bag and pin in place.
Sew around the top edge of the bag.
Further secure the handles by stitching a square and diagonal cross at the point where each end is attached to the upper edge of the bag.
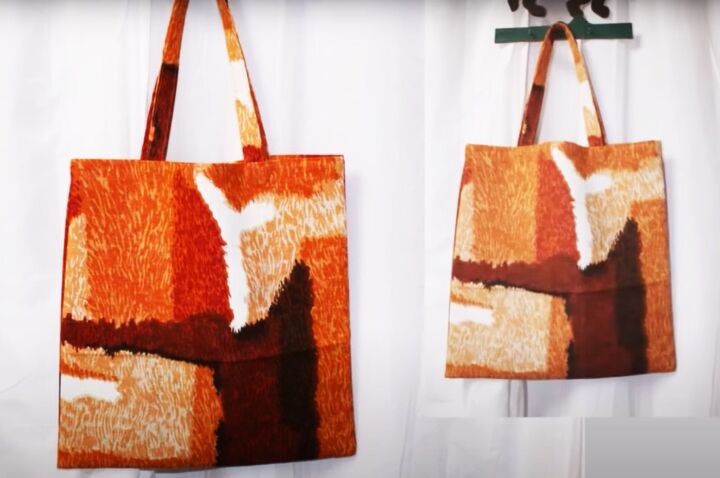
DIY tote bag idea
Turn the bag right side out - and you’ve finished your easy DIY shopping bag!
It’s lightweight and easy to fold up to fit into a purse, so you always have it with you.
It’s so much better for the environment than using plastic or paper bags each time you go shopping.
Although this bag won’t hold a week’s shopping, it’s certainly strong enough to carry a few necessities.
What do you think of it? Drop me a comment below and let me know if you’ll be making this.
Next, learn How to Sew a Cute and Easy Tote Bag With a Flat Bottom.
The author may collect a small share of sales from the links on this page.


Comments
Join the conversation