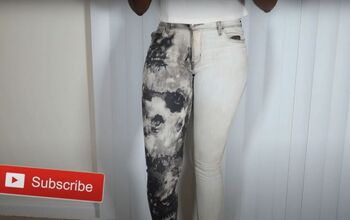
DIY Bleach Stenciled Jeans

Follow this simple tutorial to learn how to customize your old jeans into something exactly your taste and style using stencils and bleach.
Tools and materials:
- Old jeans
- Plastic stencils
- Washable glue stick
- Bleach
- Small bowl
- Rag
- Permanent marker
- Washing machine
Prepare the jeans
Cover a piece of cardboard with plastic wrap and place it inside your jeans so that the bleach doesn’t soak through to the other side of your denim.
Position the stencils
Position the stencils on your jeans where you’d like the pattern to be. If you have spray adhesive, secure the stencils in place with that. If you don’t have spray adhesive, you can use a jumbo washable glue stick, like I did in the video at 2:02. The washable glue stick washed out very well and was easy to clean off the back of the stencils too!
Apply the bleach
Dip a rag into a small bowl of bleach, just so the rag is damp, but not completely wet. Blot the bleach on the jeans over the stencil. Apply the bleach a little at a time to keep the lines of the stencil nice and crisp. Repeat with all stencils. Let the bleached jeans set overnight.
Wash the jeans
Remove the stencils. Wash the jeans in a washing machine to remove and excess bleach and the adhesive you used on the back of the stencils.
Define the pattern
If, after washing, the outlines of your stenciling on your jeans are not as clear as you’d like, you can make the patterns more defined by tracing around the stenciled patterns with a permanent marker.
This may turn out to be your favorite pair of jeans!
Pop on over to my Confessions of a Refashionista channel & subscribe for loads more upcycling tutorials & sustainable lifestyle tips & tricks!
Enjoyed the project?
Suggested materials:
- Jeans
- Stencils
- Washable glue stick
- Bleach
- Small bowl
- Rag
- Permanent marker
- Washing machine
The author may collect a small share of sales from the links on this page.


Comments
Join the conversation