Beautiful DIY Flower Earrings

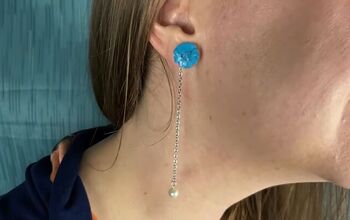
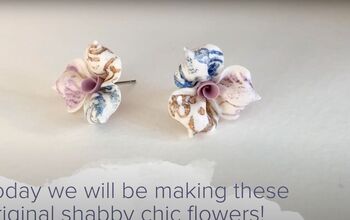
Welcome! In this DIY flower earrings tutorial, you’ll learn how to make DIY polymer clay flower earrings. These DIY flower earrings are super pretty and detailed. Also, you’ll learn a cool technique to add some pattern and depth to the earrings by using dotting tools. I’m so excited to show you how these lovely and easy DIY flower earrings turn out, so let’s not waste any time and jump right into it.
Tools and materials:
- Polymer clay- various colors
- Acrylic roller
- slicer/knife
- Needle
- Ball stylus ( dotting tool) - two different sizes
- Paper
- Toilet paper
Create a two-colored cane
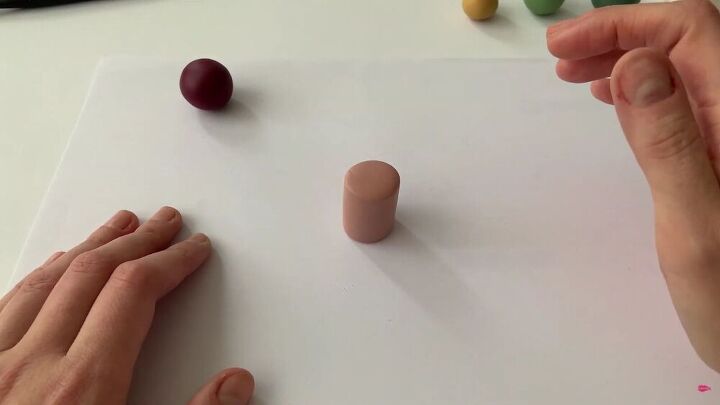
Start by creating a two-colored cane for the flower petals. Take one color and simply roll it until you have a thick and short tube-like structure, as pictured above.
Next, take your second color and roll it out with your acrylic roller. Roll it out until it shapes into a mini-pancake structure.
It should have a nice thickness to it in the end.
TIP-
When rolling out the polymer clay ball, switch sides so that it spreads out evenly.
Now, lay it out on your working table and cut the sides. Start from the top and the side.
Place your other polymer clay tube on top and cut the other side to fit the width accurately.
Now, roll both the flat clay and the tube together to encase the tube, as shown. Then, cut the bottom part and stitch the ends (gently) together.
Now, roll out the tube, slowly and carefully to reduce the size and elongate it. Cut it in half and roll it again. Put both tubes aside; you’ll need them later.
Prepare the slab base
This step is fairly simple; roll the white polymer clay until it’s flat. It should be almost the right thickness. Leave it a little thicker as you’ll be rolling it again afterward.
Prepare the leaves
Take two tones of green polymer clay and prepare the clay for the next step. Gently roll the first color with your fingers until it shapes into a thick tube-like structure.
Then, cut a ¼ piece from this tube and carefully roll it into a longer, elongated tube.
Next, cut the clay into small, equal pieces, as shown.
Repeat with the second color.
Create the DIY flower earrings
Ok, here’s the fun part! It’s time to create your beautiful masterpiece. Start by shaping each leaf with the green clay you just cut into tiny pieces. To shape the clay into a leaf, firmly press it and flatten it between your fingers. Then, lay it on the white slab.
Continue this process and alternate between the green hues, thus achieving a lovely leaf look. I added three leaves for each flower and spaced them out accordingly.
Now, it’s time to create the petals. For this, cut the multi-colored tube you made in the beginning.
Gently flatten each piece and pinch one of the ends to create a petal shape. Then, press it gently on your white slab.
Continue this design throughout the whole surface of the white slab. Isn't it so pretty?
Here’s the result! I also added some individual leaves in the empty spaces.
There is, however, something missing, and that’s the yellow circles for the flowers. To do this, roll a piece of yellow clay into an ultra-long snake-like structure, and cut tiny pieces, as shown.
Next, flatten each piece a little and center it in the middle of each flower.
Flatten the slab
Now that the slab is filled with pretty flowers and your design is set, it’s time to give it a good roll one more time. Remember we initially made the slab a little thicker than usual? That’s because the flowers need to be set in clay. Roll it out gently using your acrylic roller.
Add some intricacy
With a pin or toothpick, create some indentations in the leaves so that you achieve a more 3D effect. Also, add some tiny dots in the middle of the flowers.
Now, with a dotting tool, carefully press it down in the white areas of the slab. This gives great structure and dimension.
Then, with a smaller dotting tool, do the same and place it closer to the larger ones for a lovely pattern.
Cut the DIY flower earrings
With a circle cookie cutter, cut the earrings from the slab.
You should have some lovely circles! Also, go ahead and use a smaller cutter for the studs.
There you have it; you’ve made a bunch of stunning, easy DIY flower earrings. It’s so fun to make these, and the whole process is somewhat therapeutic. Even though it is a lengthy process to make, the result itself makes the duration so worth it!
Enjoyed the project?
Suggested materials:
- Polymer clay
- Acrylic roller
- Knife
- Needle
- Ball stylus
- Paper
- Toilet paper
The author may collect a small share of sales from the links on this page.




Comments
Join the conversation
I love this! I'm going to try this...Thanks for the idea. Your Earrings are beautiful and unique.
Lovely, thank you for sharing :)