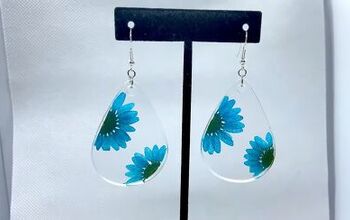
How to DIY Beautiful Pearl Flower Earrings

I’ve been seeing these pearl flower earrings all over the place. I saw a friend of mine wearing them and actually asked if I could look behind her ear to see how it was made.
It sounds a little crazy but you can’t learn without being curious, right? We’re combining the world of UV resin and beaded jewelry to get this gorgeous earring. Let’s get started.
Tools and materials:
- Round nose pliers
- Long nose pliers
- Silicone tool
- Tweezers
- UV flashlight
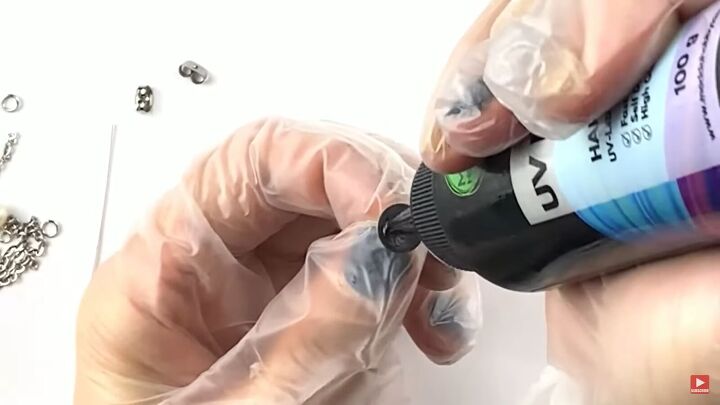
- UV resin light
- UV resin
- Dried flowers
- 2 jump rings
- Earring posts
- Small chain
- 2 Pearls (Or any bead you want to use)
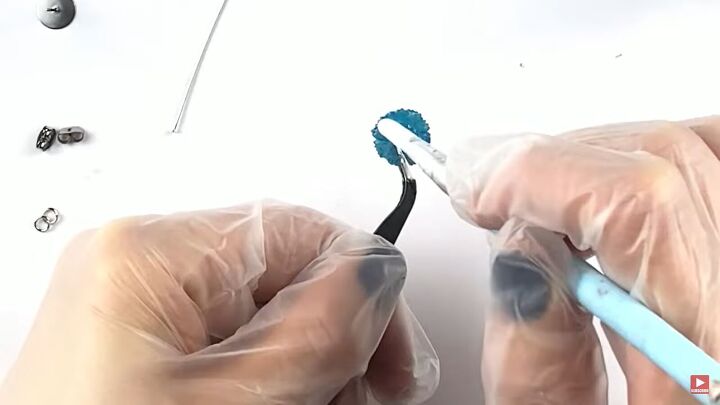
1. Apply UV resin to your flower
The first thing we’re going to do is cover our flower with resin.
If you don’t do this, the flower will come apart really quickly. We want to make sturdy earrings that will last.
Hold your flower with some pliers and spread a small amount of resin all over the flower.
Be careful not to put any resin near the pliers because then the flower will stick to the pliers.
Now, take your silicon tool if you have one. If not, use a small paint brush or a Q-tip to apply the resin carefully.
Use a UV flashlight to do a quick dry so you can put the resin on the other side and then put it under the lamp.
Shine it on there from 10-30 seconds.
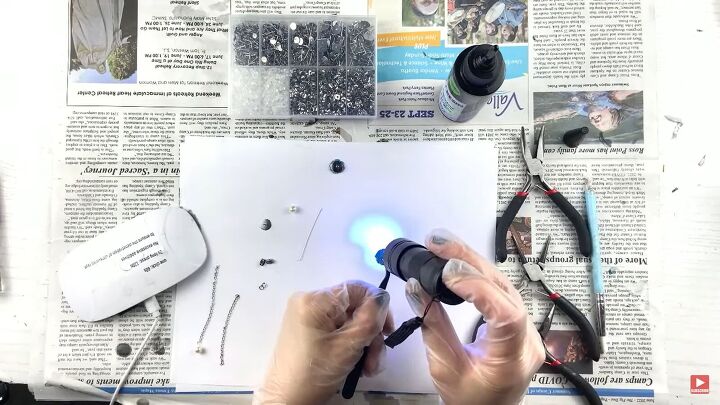
Once you’re finished applying the resin to both sides, put the flowers under the lamp for one minute on each side.
Another reason I use the flashlight before the lamp is to prevent any extra resin from dripping. You don’t want the resin drying with drips because that will bring attention to the resin, and we really want the attention to be focused on the flower.
When the resin is dry go back to the flower and apply resin to the areas that were covered with the pliers during the first application. Then dry it under the light again.
2. Attach flower to earring back
Take your earring back and spread some resin on. Then put a tiny drop of resin on the back of the flower. Use your pliers to take the flower and put it on the earring back.
Take your flashlight and dry it at the angle you want before placing it to finish drying under the UV lamp. The flashlight just helps you get a little more control over the way the resin dries.
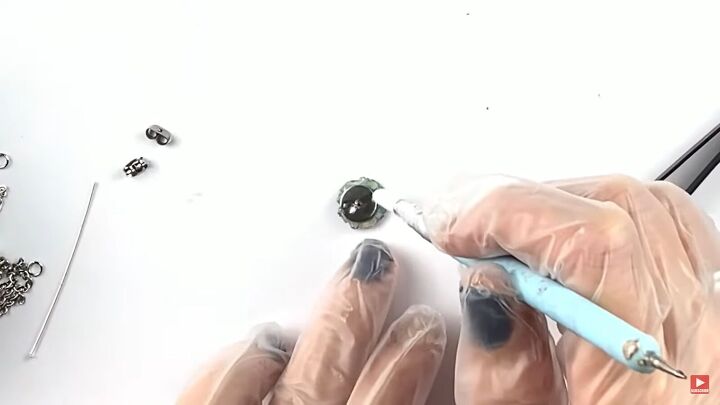
Once that dries, you’re going to apply some more resin to the earring back just to make sure everything is nice and secured in its place.
You just need a couple of very small drops of resin to spread from the earring back onto the flower. Then dry it under the lamp again.
3. Assemble the rest of the earring
Now we’re going to assemble the rest of the earring, and this is where we’re going to combine beaded jewelry making with resin.
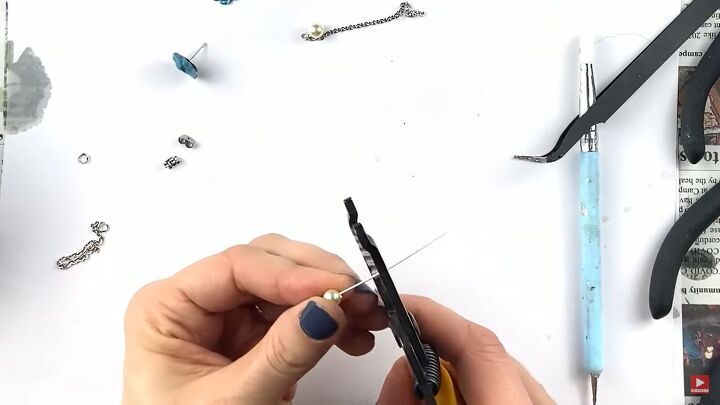
Put your bead on a head pin and take your cutter tool to cut the head pin. You’re going to want to make a small loop, so you wont need to leave too much wire.
Use your round nose pliers and bend the wire back at a 90-degree angle.
Then hold the wire with the tip of your pliers and curl it around to make a small loop.
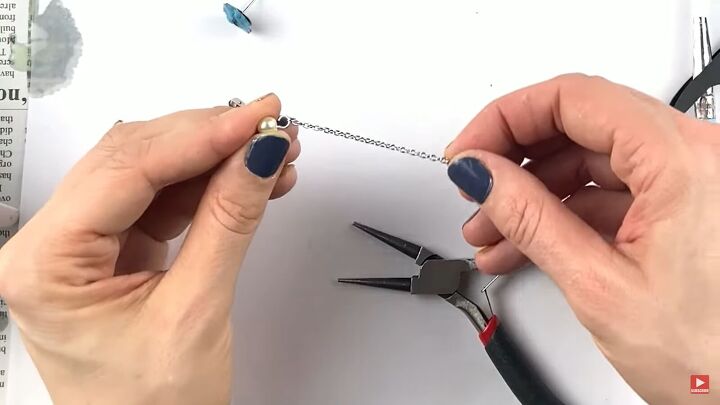
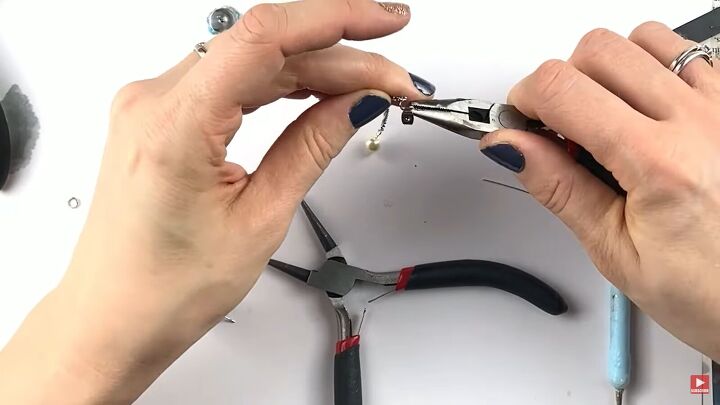
Open the loop a tiny bit to attach it to the last link of your chain and close the loop back up.
There are two ways to attach the chain. One way to attach the flower to the chain is, you can hook the top loop on the chain to the earring back and stick it on with resin.
Another way to do it, which I think makes the earring a bit more interesting is to take a jump ring, open it up and connect it to your chain and your earring back. Then close the jump ring.
I feel like this is a really cool way to connect the chain. When it’s attached to the earring back it almost looks like the chain is going through your earring hole.
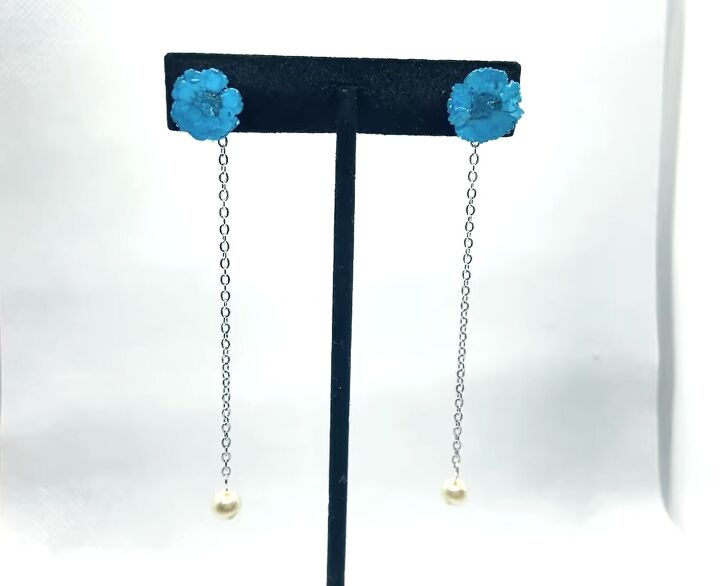
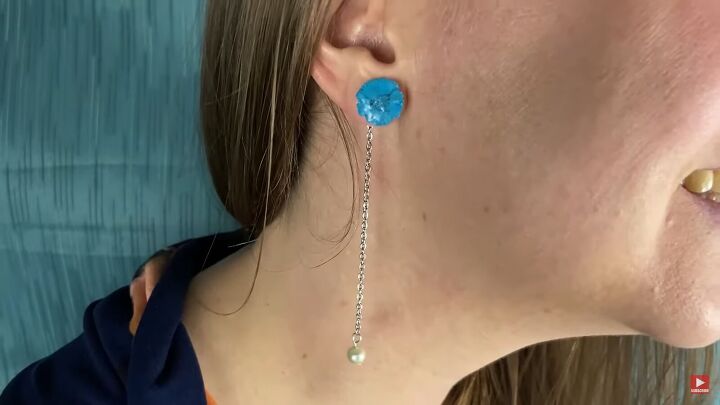
DIY pearl flower earrings
Now you’re all done. You have yourself a pair of beautiful dangling earrings. I love that this is so delicate looking.
I also love the way it looks with the dangling part of the earring attached to the earring back. It’s so unique and interesting.
What do you think? Leave me a comment and let me know.
For more jewelry-making content, check out my post on How to Make an Awesome Resin Pendant With Coffee Beans.
The author may collect a small share of sales from the links on this page.


Comments
Join the conversation