Resin Chocolate Frog Earrings
If you like Harry Potter, you will love wearing these magical Chocolate Frog Earrings made of resin!
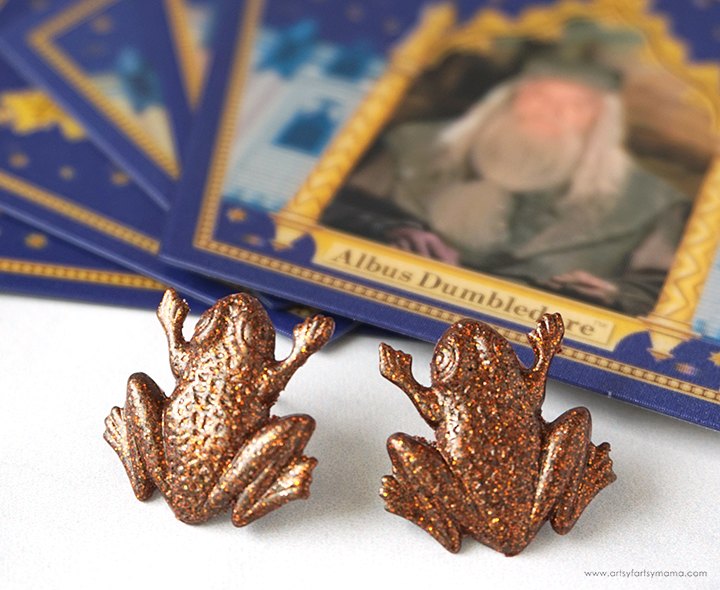
One of my favorite Harry Potter moments is when Harry first opens up the Chocolate Frogs on the Hogwarts Express. The chocolate frogs are just so fun and memorable, and are actually one of my favorite treats that I've brought home and enjoyed from the Wizarding World! As a fun way to show my love of this magical treat, I've made a custom set of Chocolate Frog Earrings using resin and glitter! I love how they turned out, and am so excited to show you how to make a set for yourself.
New to resin? Be sure to check out these other Resin 101 posts: Getting Started with ResinSilicone Putty Mold in Minutes
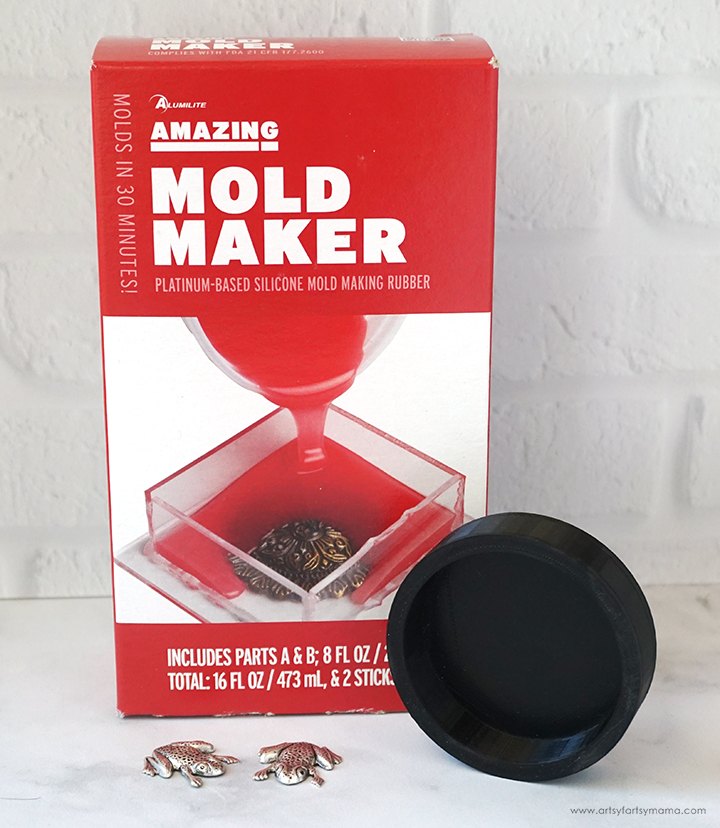
Before creating with resin, you need to first have a mold to work from. There are all kinds of pre-made frog silicone molds you can purchase, but I found these little frog charms that I wanted to work from instead. Making your own molds can feel intimidating, but it's really quite a simple process!
Here's what you need to make your own custom silicone molds:
First you will need your item to put in a mold, like my metal frog charms. This can be practically anything: jewelry charms, cabochons, wood pieces, polymer clay projects, 3D printed objects, and SO much more! When choosing the item you want to make a mold of, keep in mind that the texture of the item is exactly how your project will come out in resin. For example, if the item is glossy, then your project will come out with a gloss finish. Same for matte. Wood and other porous materials will need a coat of sealant to keep the silicone from seeping in.
Next you will also need some kind mold form. You can use plastic disposable containers, metal cookie cutters, or you can build it yourself. Make sure that your item fits into it and that the container isn't made of silicone.
Last, but certainly not least, you will need silicone rubber to make your mold. There are all kinds out there, but they are not necessarily equal. I recommend using either EasyMold Silicone Rubber or Amazing Mold Maker.
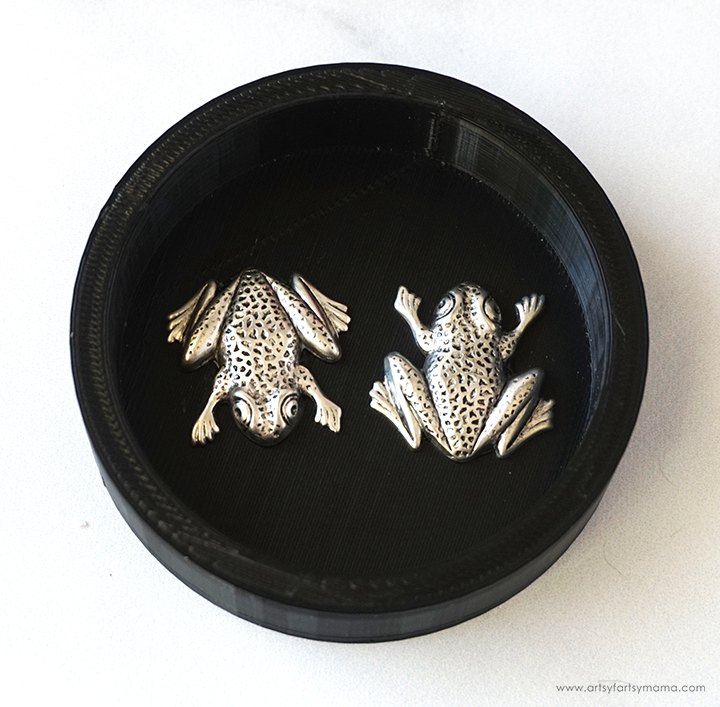
Lay the pieces face-up in the center of the mold form, but be careful not to place the pieces too close together or too close to the edges. Use some kind of adhesive (I used hot glue) to hold the pieces in place, and press them down well. You don't want any gaps between the bottom of the pieces and the mold form base, otherwise the silicone can seep through.
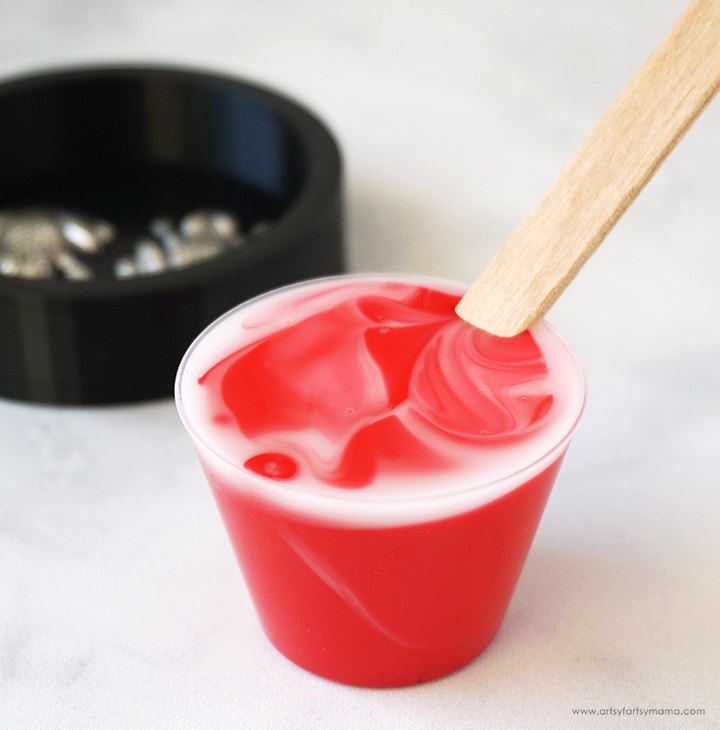
Amazing Mold Maker comes in two parts: Part A (red) and Part B (white). You need to use equal amounts of each part for your mold project. Be sure to read the complete package instructions, and always remember to wear gloves!
Tip: If you pour some rice or water into the mold form, you can use that measurement to determine how much silicone rubber you will need to mix.
Measure equal amounts of part A and part B into clean measuring cups and stir them well. Pour them both into a larger cup and use a stirring stick to stir, making sure to scrape the edges. Mix until you have a consistent color with no streaks. There should be no marbling effect in the mixture (see image above). The mixing time should take about 3 minutes, but be careful to not mix too quickly so that you don't create extra air bubbles.
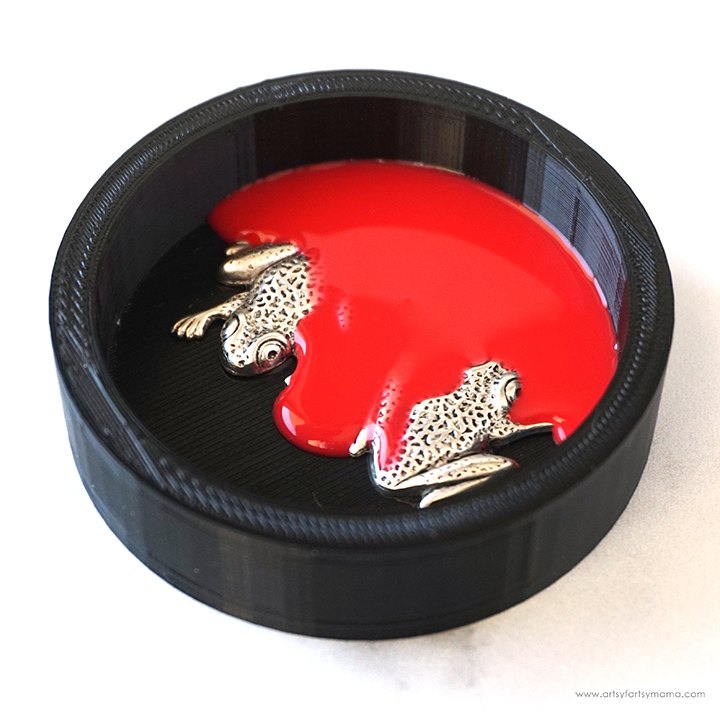
Pour the mixed silicone into the mold form slowly, holding the cup high and adding silicone to the lowest points first to avoid trapping air bubbles in the mold. Take your time, and pour consistently in a thin stream.
Fill your mold up until it reaches about 1/2" - 1" above the object. Tap the sides of the mold and gently tap it on a counter to bring any trapped air bubbles up to the surface.
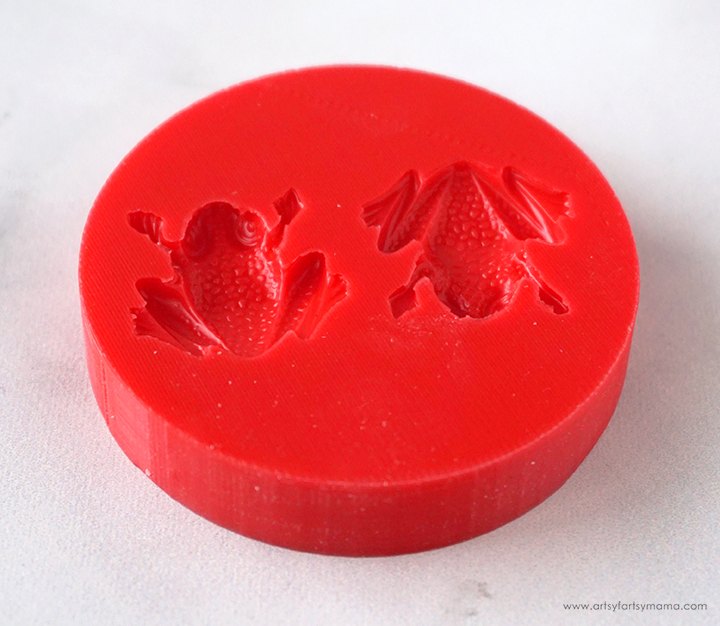
The nice thing about Amazing Mold Maker is that the mold can be taken out of the form after just 30 minutes! Carefully remove the silicone from the container starting at one edge. Sometimes the objects will come out with the mold, but they should be able to be removed without an issue. Now your custom mold is ready to use!!
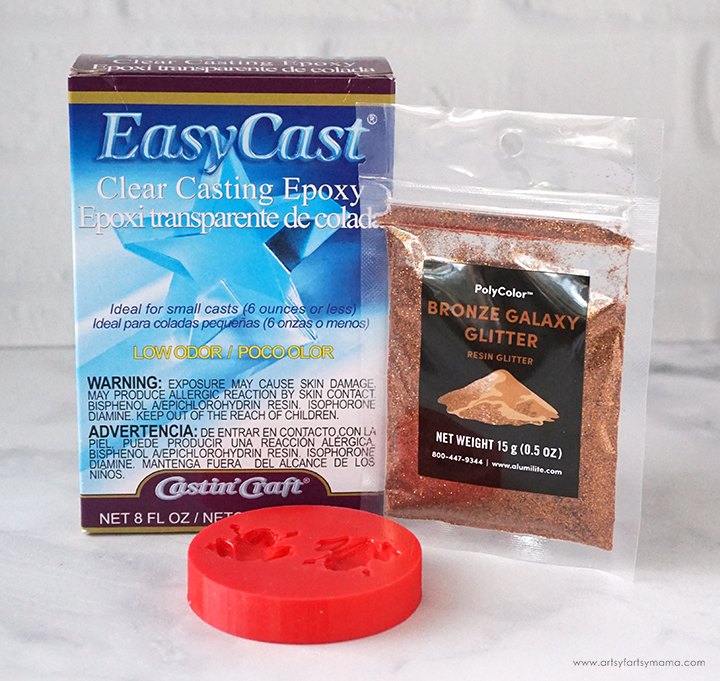
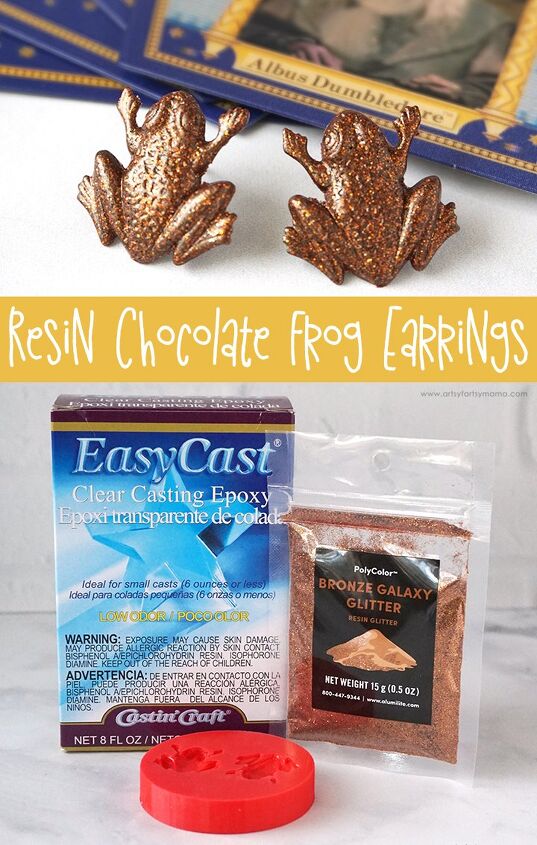
To make your own Resin Chocolate Frog Earrings, you will need these supplies:
- EasyCast Clear Casting Epoxy
- Mold Conditioner and Release Spray
- Measuring Cups
- Stirring Sticks
- Disposable Gloves
- PolyColor Bronze Galaxy Glitter
- Frog Silicone Mold
- 2 Earring Posts and Backs
*Save 10% on resin supplies when you shop ETI with code AFM
SAFETY FIRST: Before getting started, wear disposable gloves, protect your workspace, and be sure to work in a well-ventilated area!
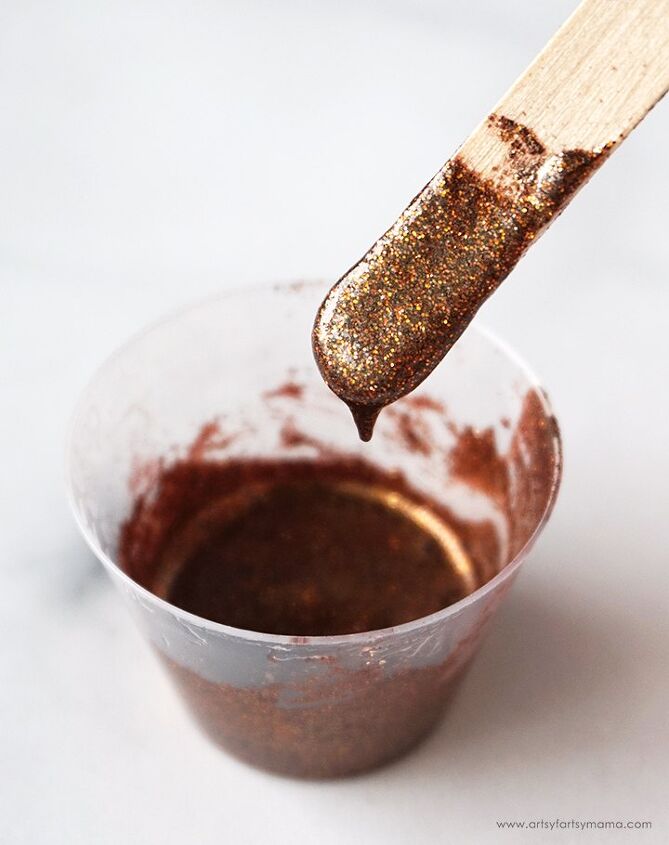
Prepare about 5 ml of EasyCast Clear Casting Epoxy according to package directions. Pour in equal parts of resin and hardener to the mixing cup. Slowly stir the resin mixture together with a stir stick for two minutes. Pour the resin into a clean mixing cup, and then stir the resin mixture again for another minute or two with a clean stir stick until evenly incorporated.
Add in a generous amount of Bronze Galaxy Glitter to the resin. Stir the resin mixture slowly until the glitter is combined with the resin.
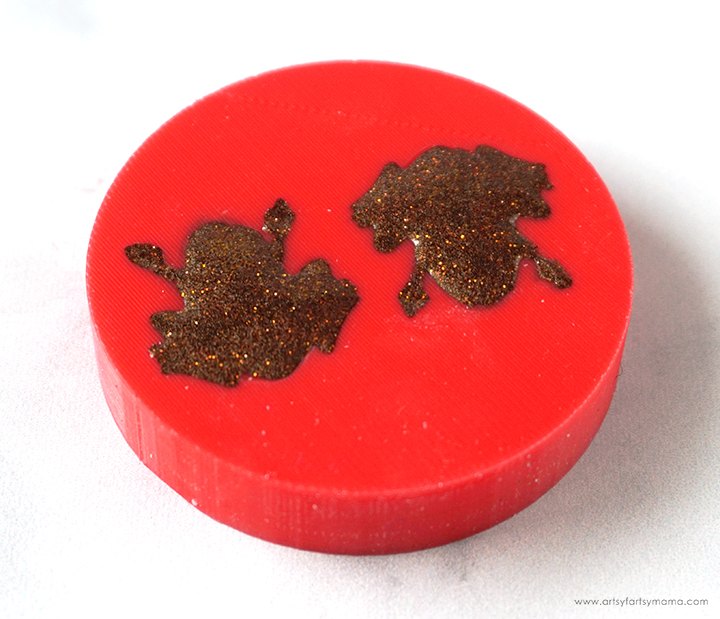
Use a stir stick to carefully fill the frog mold with the bronze resin, but be careful to not overfill the mold. Pop any bubbles that rise to the top using a heat gun or by blowing through a straw. You could also lightly spritz the mold with 91% alcohol to remove surface bubbles.
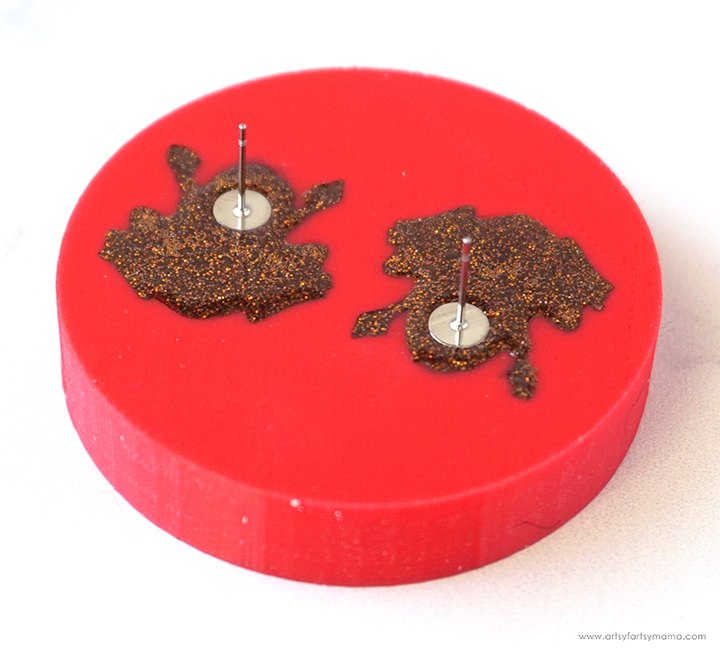
After about 3 hours, gently place an earring post into resin on the frog heads. The resin should be a gel-like consistency, so the posts will stick in easily. Doing this eliminates the need for adhesive later and will have a more permanent hold on your earrings.
Leave the resin to cure in an undisturbed, well ventilated area for 12-24 hours. You will know that the resin is completely cured when it is no longer tacky to the touch.
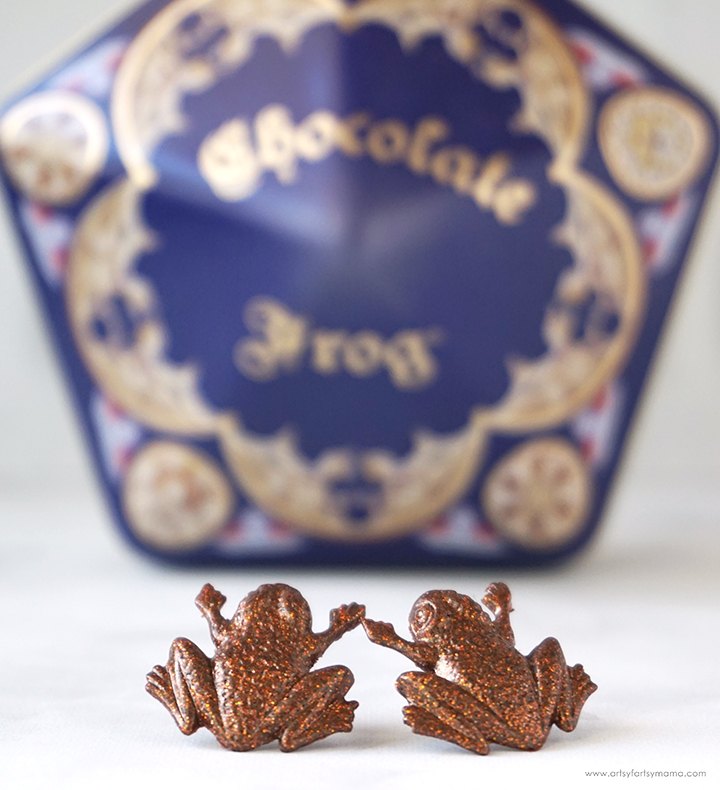
Carefully remove each of the frog earrings from the mold. Trim away any excess resin with scissors or a craft knife. I am loving how the frogs have that chocolatey color, but have glitter that shimmers in the light! These earrings are SO fun to wear, and add a bit of magic to any outfit!
I would love to hear what you think about these resin Chocolate Frog Earrings! As always, if you make any of these projects for yourself, I'd love to see your creations! Tag me on Instagram and Facebook, or leave a comment/photo on the project pin on Pinterest!
The author may collect a small share of sales from the links on this page.


Comments
Join the conversation
Can you make a mold from a plastic or rubber item?
OR Does the object have to be a certain material to create a mold?
Many years ago, I made rubber molds and then objects by pouring plaster of paris into the mold. I would like to try this new method.