How to Make Cute Clip-On Earrings & Easily Convert Earrings to Clip-On

Today, we’re making earrings, but more for the technique than for the design. That’s because I’m going to teach you how to make dangle clip-on earrings, as well as how to convert pierced earrings to clip-ons and vice versa for shepherd’s hook earrings.
This is the perfect tutorial for people who don't have pierced ears, or who are making jewelry for those who don't have pierced ears.
If you’re wondering where to get the clip-on fastenings, I recommend Michaels, as not all Walmarts have the clip-on findings. You can find them in the findings section.
Tools and materials:
- Cutter tools
- Round nose pliers
- Flat nose pliers
- Earrings
- Head pins
- Beads
- Clip-ons
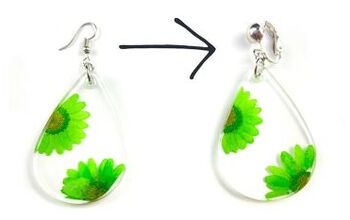
How to convert pierced earrings to clip-ons
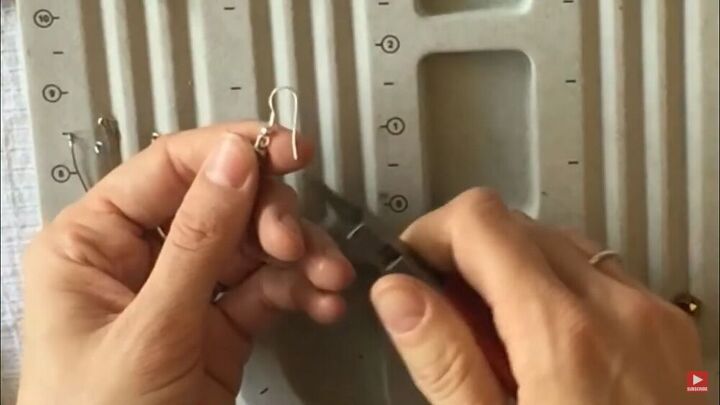
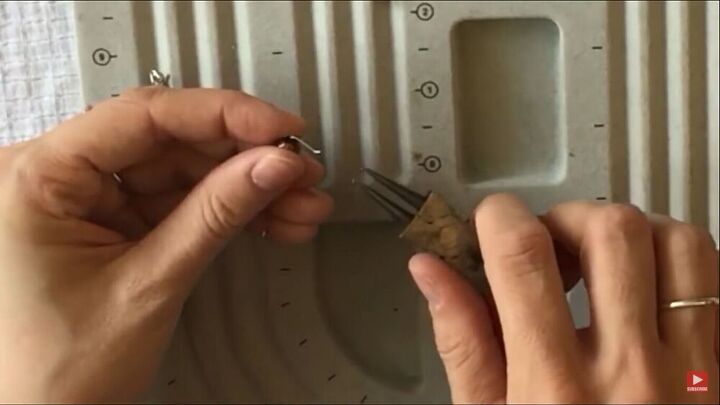
1. Disconnect the shepherd’s hooks
With every shepherd’s hook, the loop at the end of the hook is not a whole loop, it’s actually disconnected. So, you can use your pliers to open the loop and disconnect the shepherd’s hook. Don’t throw the shepherd’s hooks away - you can use them to convert or make other earrings.
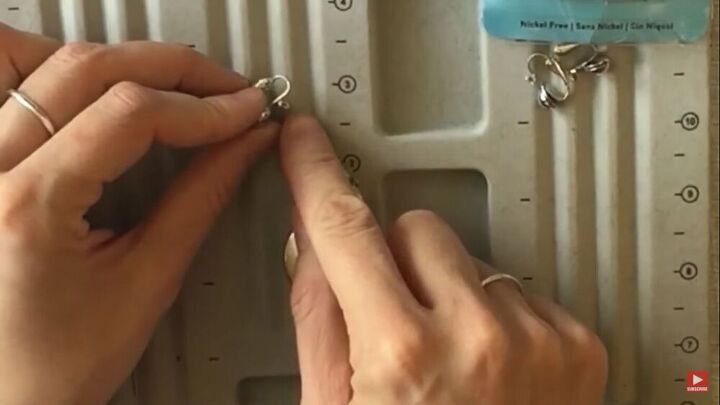
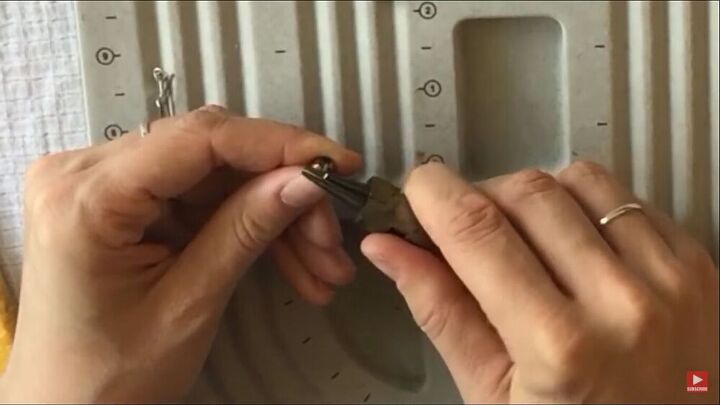
2. Attach the clip-on to the open loop
Now, these clip-ons that I bought at Michaels have an opening already, so it’s easy to attach the earring. This will literally be the easiest thing you will ever do. Simply feed the open loop into the opening.
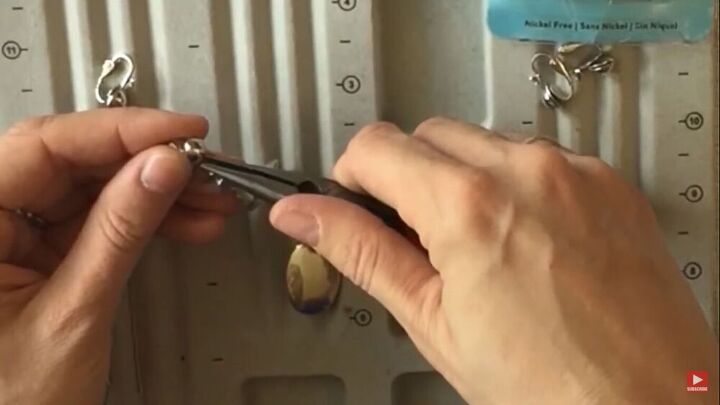
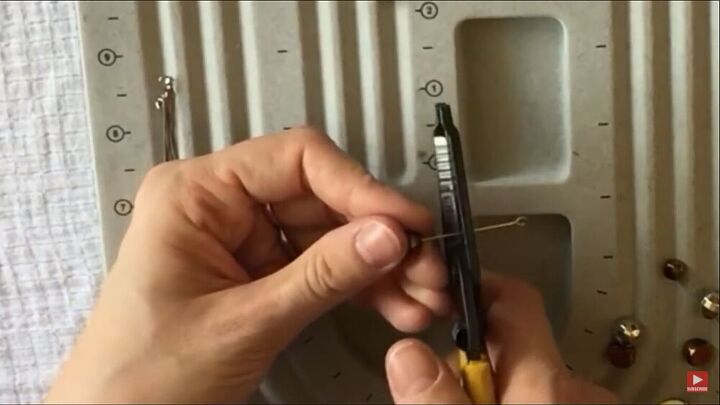
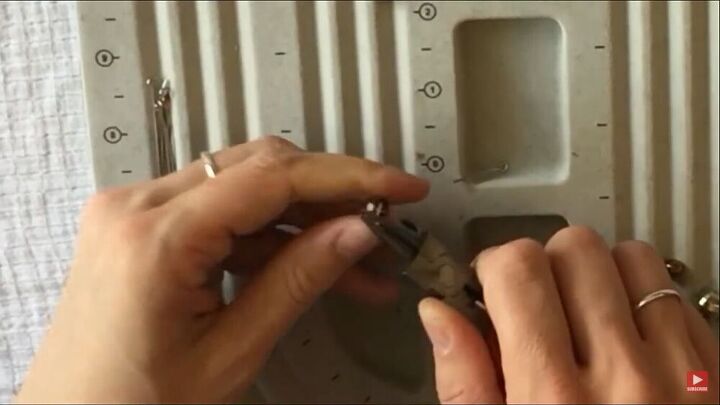
3. Close the loop
Now, grab your flat nose pliers and make it so there’s no gap. How easy is that? You just converted a pierced earring to a clip-on earring!
How to make dangle clip-on earrings
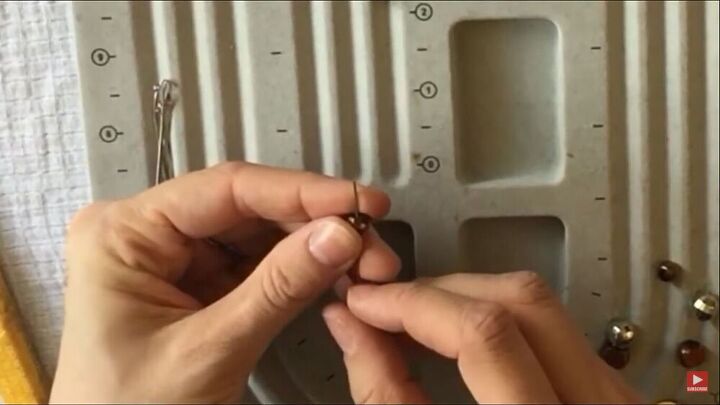
1. Thread a bead onto head pin
Next, I’ll show you how to make dangle clip-on earrings from scratch, using a beaded design. First, thread your first bead through a head pin.
2. Bend the head pin
Bend the pin at a 90-degree angle using your round nose pliers.
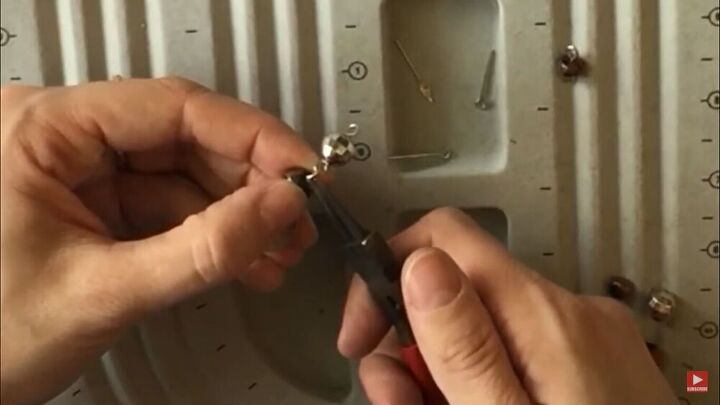
3. Create a loop
See how the pliers are smaller at one end than the other? Well, where you use the pliers results in how big the loop is. Use the tip for a small loop and the bottom for a larger loop. I’m using the middle to create a medium-sized loop.
4. Cut off the excess pin
Cut off the rest of the wire after the loop because you don’t need it.
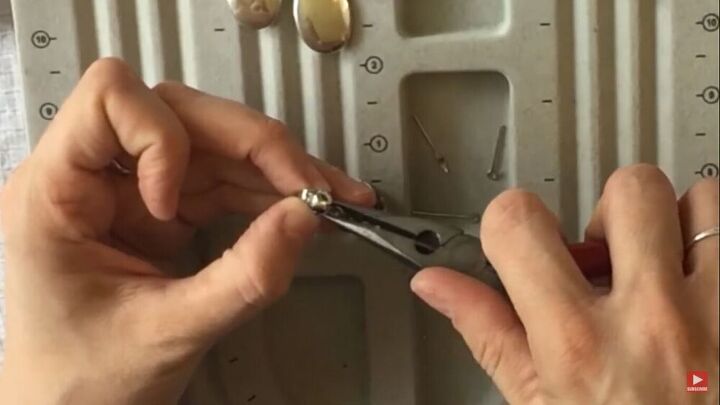
5. Create a second loop on the other side
Bend the other side of the pin to a 90-degree angle, then create another loop on the other side. You should have a loop on either side of the bead. Repeat for your other beads.
6. Connect the beads together
To create your design, connect the beads together through the loops. Open the loop with the round nose pliers and feed the loops through each other to connect. Make sure you don’t have any gaps.
7. Attach the beads to the clip-on finding
Finally, attach the end loop of the bead design to the opening in the clip-on earring. Just like we did in the conversion above, open the loop with the pliers, feed it through the opening on the clip-on, then close the gap. Repeat the process for that second earring.

How to make clip-on earrings tutorial
Your earrings are complete! I hope you found this tutorial on how to make clip-on earrings and how to convert pierced earrings to clip-ons (and vice versa) helpful.
If you love making jewelry for other people, you’ll likely come across people who don’t have pierced ears, so this easy hack on changing pierced earrings to clip-ons is perfect. Plus, it’s so easy to do, right?
The author may collect a small share of sales from the links on this page.


Comments
Join the conversation