How to Make a Jumpsuit - Easy Sewing Tutorial for Beginners

I loved making this tutorial on how to make a jumpsuit. The hardest part is making the pattern, but I will show you how to make a jumpsuit sewing pattern step by step. I’m using this striped stretchy fabric, so it's easy for you to see where I start.
Let’s get started making a jumpsuit at home!
Tools and materials:
- Fabric
- Marking chalk
- Measuring tape
- Ruler
- Scissors
- Sewing machine
- Pins/clips
1. Make the front pattern
I am making two separate patterns for the front and back. Make sure you have enough fabric for the same length and width for both.
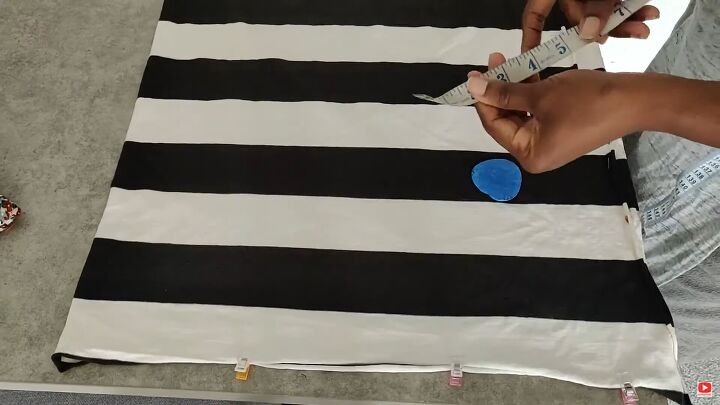
Fold the fabric in half lengthwise. Clip the open ends at the top and the sides. The first step is to mark at the top of the black stripe.
Measure 3 inches in from the folded edge. This will be the center front.
From that line, I measure 11 inches for the neck measurement. This includes a 2-inch dart allowance. Connect the two lines.
From the edge of the fold, I measure 14 inches for the width of the jumpsuit. Mark the 14-inch width down the length of the fabric.
From the black line starting point, I measure 23 inches. That’s the measurement from the neck to the crotch. Then, I mark 1½ inches outward from the 23-inch mark to curve out the front crotch area.
Then, draw a straight line from the top to the crotch line. Then curve out the crotch.
At the bottom of the fabric, I measure how wide I want the legs to be. I use 10 inches, then connect it to the crotch line on a slightly diagonal line.
Then I mark where I want the darts to go. I mark 4 inches in from the front center line. Then I mark ½ an inch on the side of that for my dart. The darts will be 3 inches deep.
Then I connect the dart lines to the 3-inch point.
I measure 5 inches on the neckline and then 4 inches for the depth and connect the two on a slight curve for the armhole.
Add a ½-inch seam allowance to the entire pattern. Clip the fabric together. Then cut out the front pattern.
2. Make the back pattern
Use the front pattern as the pattern for the back piece. Everything is the same except for the crotch area.
Fold the fabric in half lengthwise. Pin the front pattern to the folded fabric to secure it.
At the crotch, extend the measurement by 1 inch to give enough room for the backside. Place the dart measurement for the back.
Then cut out the back portion.
3. Sew the jumpsuit
Start by sewing the darts on the front piece. Pinch and then pin the darts. Sew them in place.
Cut a 1-inch wide fabric piece long enough for the facing for the arm and neckline area. Pin it on the seam allowance on the right side.
Fold the facing to the wrong side, catching any raw edges, and sew with a straight stitch.
Join the middle together on the front piece. Clip it in the place. Sew the center front up to the crotch point. Repeat the sewing sequence for the back piece.
The front and back pieces are ready to be sewn together! Match the two side seams and pin them in place. Match at the crotch and inside leg seams as well. Sew all the pinned areas. Hem the bottoms by folding once and sewing with a straight stitch.
4. Make the straps
Make the straps to attach to the shoulders. They should be 9 inches long with a 1-inch seam allowance. You can use the same technique to make an optional belt as well.
How to make a jumpsuit tutorial
There you have it! An easy tutorial on how to make a jumpsuit at home, even if you’re a beginner! This is so cute to wear anytime. You could even make this in different fabrics and embellish it to wear as a costume for Halloween if you wanted to!
Please let me know in the comments if you made this or are planning to make it. I love hearing from you!
Enjoyed the project?
Suggested materials:
- Fabric
- Marking chalk
- Measuring tape
- Ruler
- Scissors
- Sewing machine
- Pins/clips
The author may collect a small share of sales from the links on this page.


Comments
Join the conversation