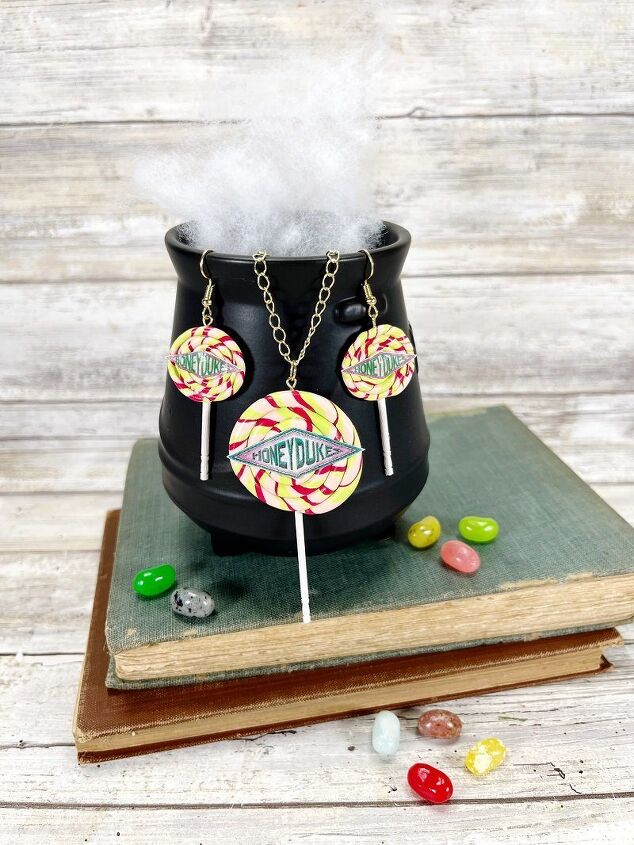
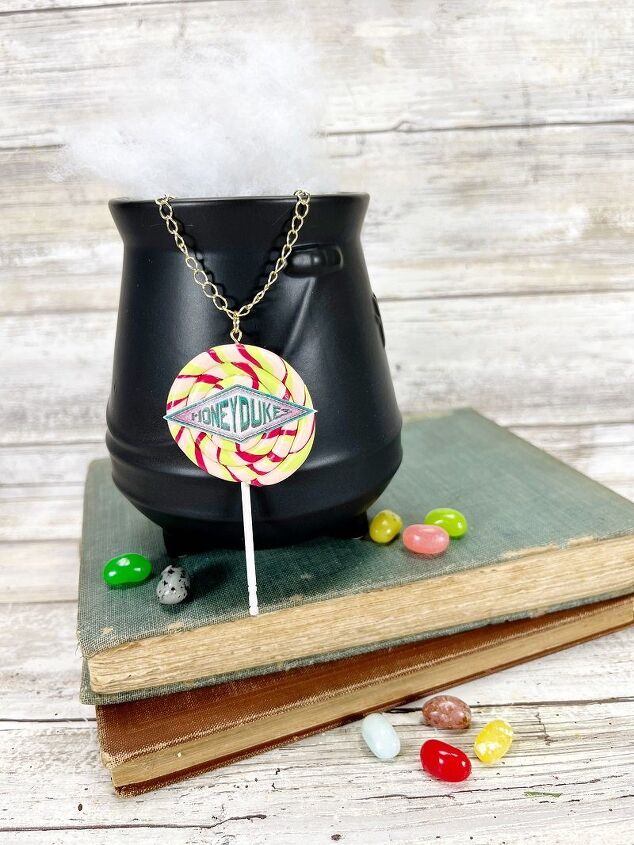
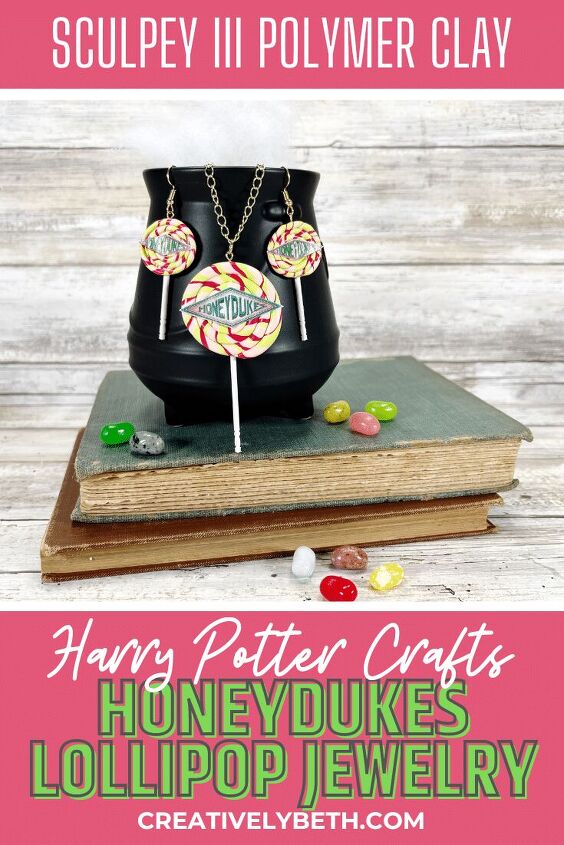
Polymer Clay Honeydukes Lollipop Necklace
Use Sculpey III to create a sweet set of Polymer Clay Honeydukes Lollipop Necklace complete with free printable labels.
No trip to the Wizarding World is complete without a stop at Honeydukes Candy Shop, and now you can wear the iconic lollipop as a necklace, and earring set. These brand-new colors of Sculpey III in Spring Green, Berry, and Peach match the Honeydukes logo colors perfectly. If you can roll a snake, then you can make this jewelry. Polymer clay is an easy medium to create magical craft projects with and requires just a few supplies.
See what other Harry Potter Crafts will cast a creative spell over you and transport you directly to Hogsmeade!

DIY Honeydukes Polymer Clay Lollipop Necklace
This post, Polymer Clay Honeydukes Lollipop Jewelry, contains affiliate links. Using links to these sites means I will earn a percentage of the purchase at no extra cost to you.
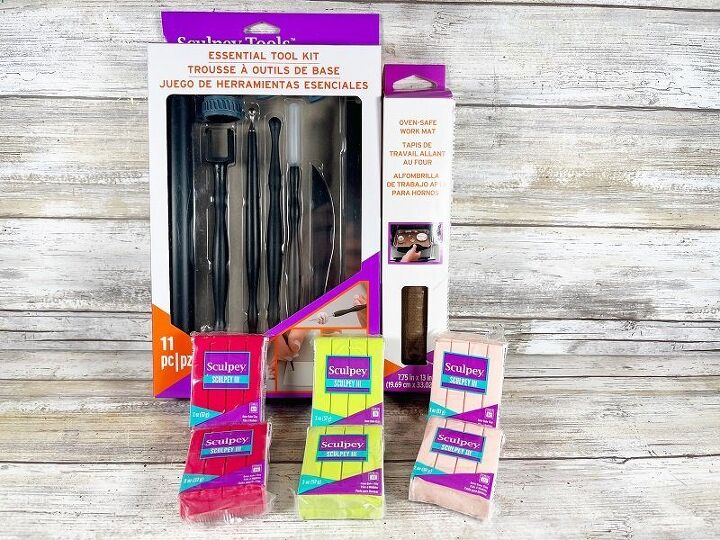
What You Need to Make Honeydukes Jewelry:
- Sculpey III Polymer Clay – Spring Green, Berry, Peach
- Sculpey Tools Oven Safe Work Mat
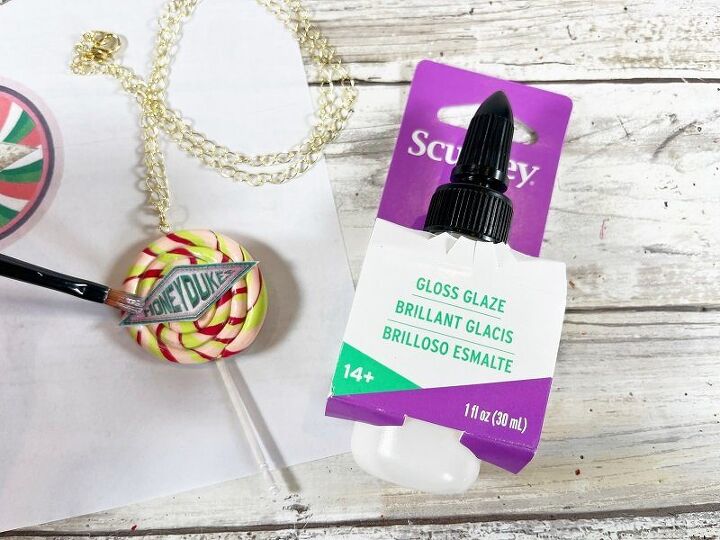
- Sculpey Gloss Glaze
- Oven – pre-heated to 275 degrees
- Metal Baking Sheet – Dollar Tree
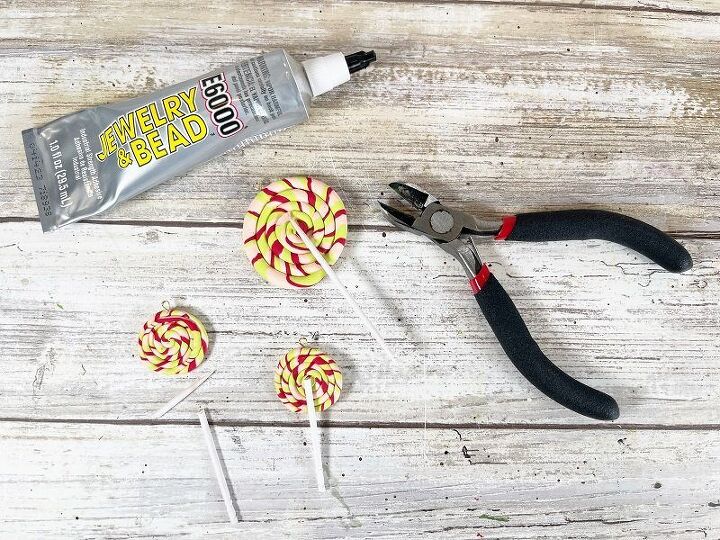
- E6000 Jewelry & Bead Adhesive – Precision Tip
- Jewelry Findings – Chain (24″), Jump Rings (2), Clasp (1), Earring Wires (2), Eye Pins (3)
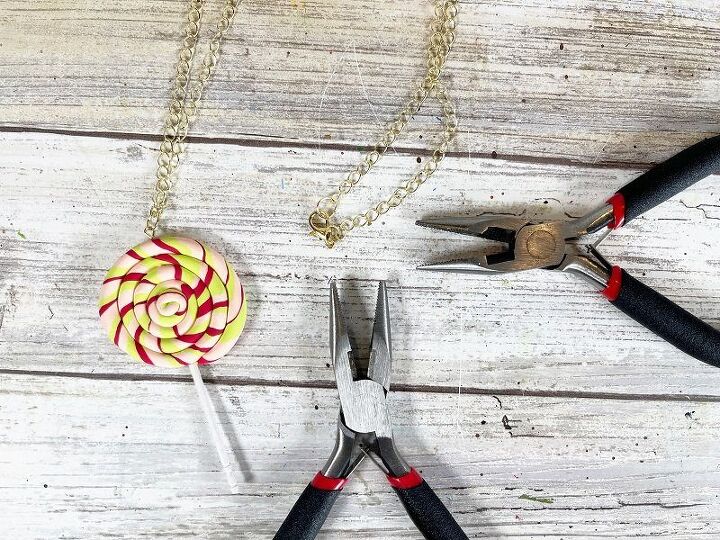
- Needle Nose Pliers – Two
- Wire Cutters
- Wooden Toothpicks, Round – Three
- Americana Acrylic by DecoArt – Titanium White
- Basecoat Paintbrush Set – DecoArt
- Scissors – I love my Fiskars!
- FREE PRINTABLE HONEYDUKES LABELS – download on the website
How to Make Jewelry Inspired by Harry Potter:
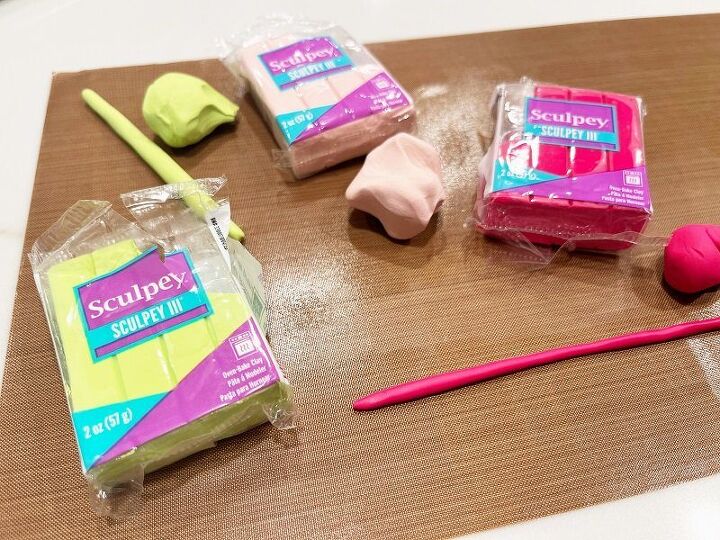
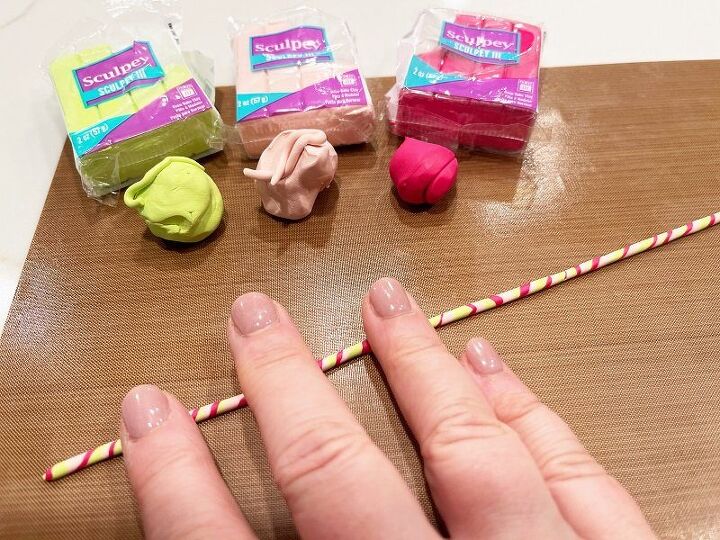
STEP ONE
Pre-heat the oven to 275 degrees. Open the three packages of Sculpey III Polymer clay in Spring Green, Peach, and Berry. Pinch off a bit as big as your thumb, and knead once or twice. Using the Sculpey Tools Work Mat as a base, roll out each color, with your fingers, into a long snake. Make sure that each snake is the same thickness.
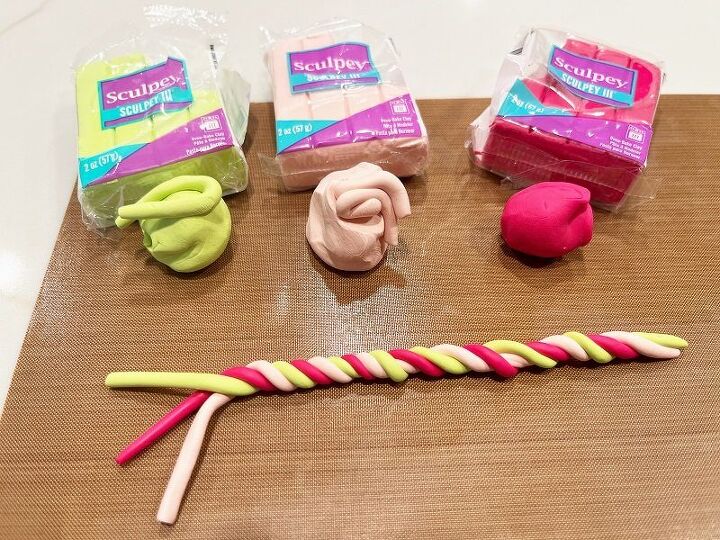
STEP TWO
Carefully twist the three colored snakes together to create a swirled design.
Roll the twisted section into a thin smooth snake with your fingers. Take your time when rolling to create an evenly shaped snake.
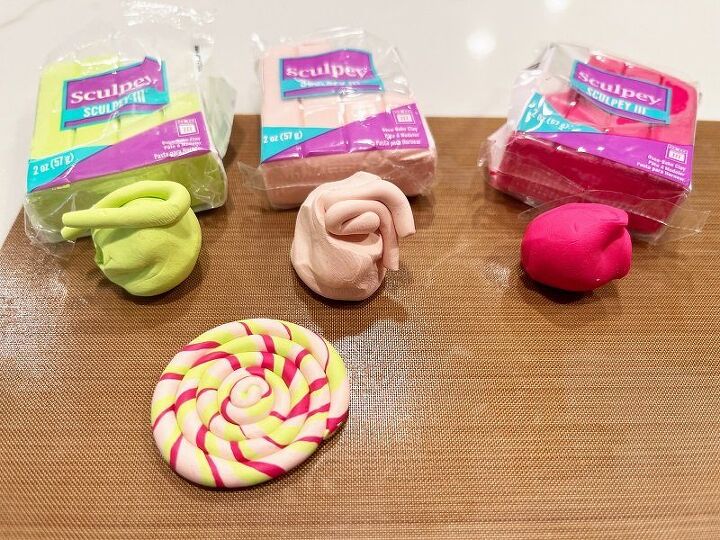
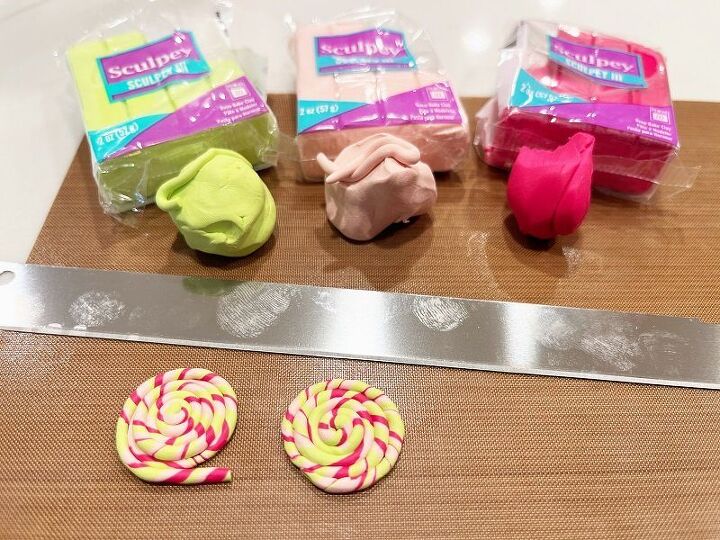
STEP THREE
Starting in the center, carefully coil the snake to create the lollipop necklace shape. Pinch the end flat and smooth it onto the edge of the coil. The lollipop necklace is approximately 2″ wide. Repeat the above steps with a second twisted snake, rolling it out even skinnier. Starting at both ends, coil the snake into two smaller lollipop earring shapes. Cut the snake, then pinch and secure the ends. The lollipop earrings are approximately 1″ wide each.
STEP FOUR
Insert an eyepin into the top center of the necklace lollipop. Carefully transfer the Work Mat to metal baking sheet and bake according to the directions on the Sculpey III package. Paint one round wooden toothpicks with Titanium White acrylic craft paint.
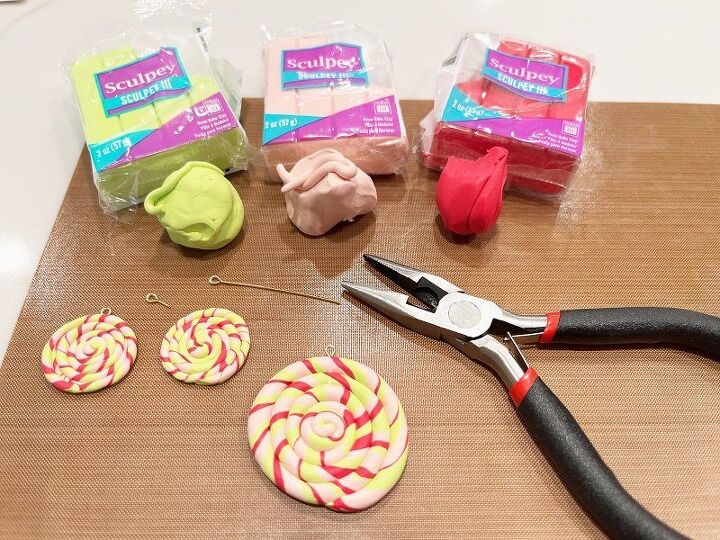
Once baked, allow to cool before handling. For added security, remove eye pins with pliers, add a dot of E6000 Jewelry & Bead Adhesive then insert back in the original hole.
Glue the toothpicks to the back of the lollipops.
STEP FIVE
Add a jump ring to the necklace eye pin along with a length of chain. This chain is 24″ long. Add a jump ring to one end of the chain and a clasp to the other.
STEP SIX
Download, print, and cut out the HONEYDUKES LABELS from the free printable sheet below. There are a variety of sizes, so select the ones that fit best on your lollipops. To finish the Polymer Clay Honeydukes Necklace and Earrings, attach the labels and seal the lollipops by brushing on a coat of Sculpey Gloss Glaze.
Sculpey III Polymer Clay is a great introduction to oven-bake clay because it is soft, easy to use, and comes in 44 vibrant colors. Great for beginners, general crafters, and kid/parent projects due to its soft, easy-to-use texture. Sculpey III stays soft until baked, it does not air dry. Remains soft and flexible until it is baked in your home oven. Extra clay can be stored and reused, it won't dry out! Great for a variety of projects such as jewelry, DIY home décor, mixed media, and more. Safe and non-toxic.
Hogsmeade's sweet shop, Honeydukes is crammed with shelves upon shelves of delicious sweets and treats. Although the shop sells ordinary confectionaries, such as nougat, coconut ice, and toffees, the shop specializes in magical treats like Fizzing Whizzbees and Bertie Botts' Every Flavour Beans, making it extremely popular amongst visiting Hogwarts students. Honeydukes also offers a secret passage back to Hogwarts, leading from its basement to the third floor of the castle behind a large stone statue.
Sharing is Caring!
Too busy to make this right now? Pin it for later! I’d love for you to pin this project to your favorite craft board on Pinterest and then it’ll be waiting for you when you’re ready.
Visit my website Creatively Beth for a TON of Craft Tutorials, Home Decor DIYs, and FREE Printables.
Thanks for stopping by!
Creatively, Beth
The author may collect a small share of sales from the links on this page.


Comments
Join the conversation