Simple Rhinestone Eye Makeup Tutorial

Today, I have a simple rhinestone eye makeup look to show you that is perfect for the festive season, a date night, or a special occasion.
Who doesn't love a bit of sparkle around their eyes? Follow along as I show you what to do!
Tools and materials:
- Primer
- Foundation
- Beauty blender
- Eyeshadow
- Makeup brushes
- Liquid eyeliner
- Highlighter
- Rhinestones
- Rhinestone picking-up tool
- Cosmetics glue
- Bobby pin
- Pencil eyeliner
- Mascara
- False lashes
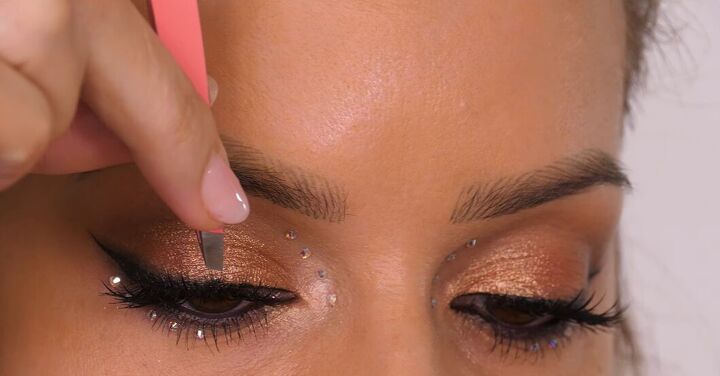
- Tweezers
- Bronzer
- Blush
- Setting powder
- Lip pencil
- Lipstick
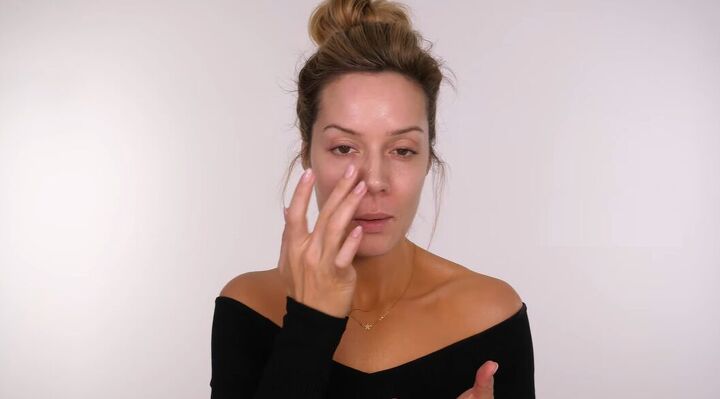
1. Primer
Start by applying a primer.
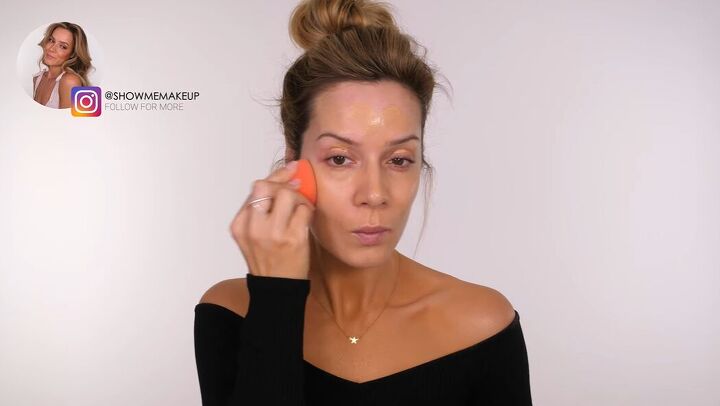
2. Foundation
Then, go in with a foundation.
I'm going to apply three thin layers so that I get the coverage that I need.
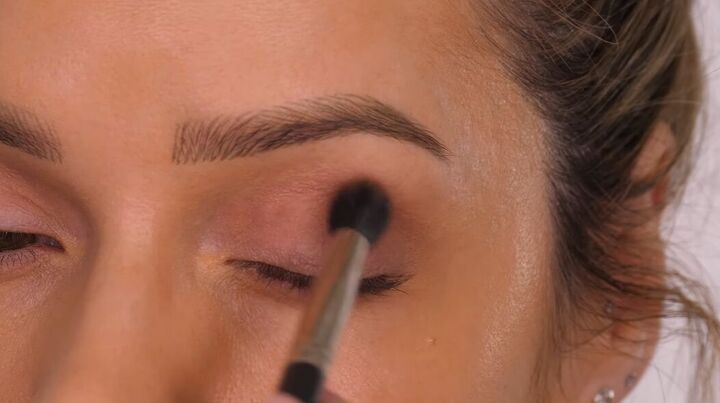
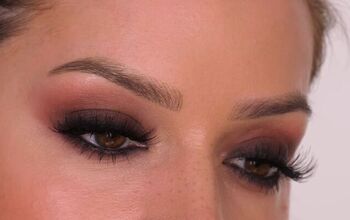
3. Eyeshadow
Take a matte brown eyeshadow and blend it into your eyelids.
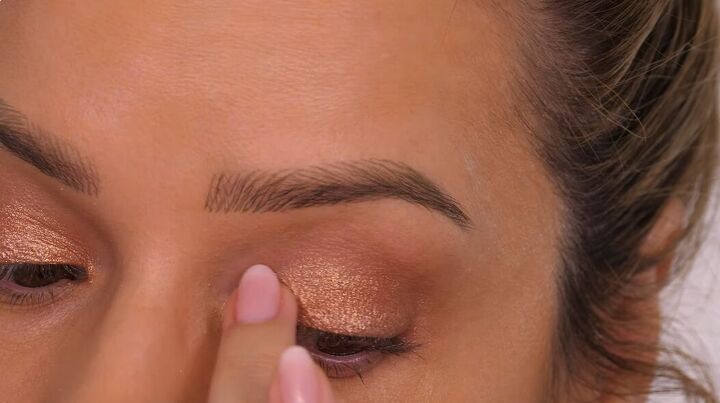
Then, using your finger, apply a shiny bronze shade.
Because it has that metallic finish, if you swipe it rather than just pat it, you'll get more of a reflective finish.
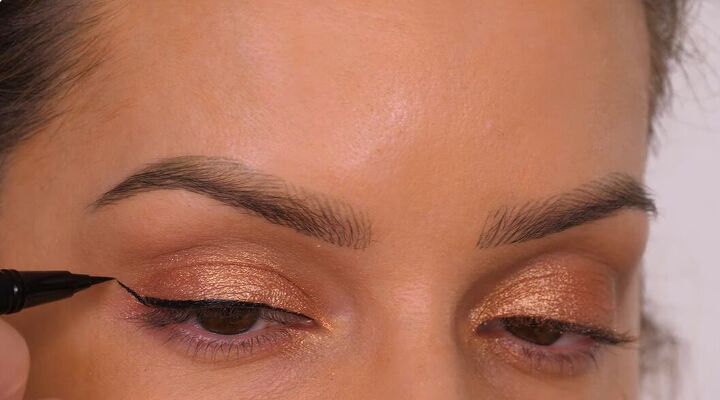
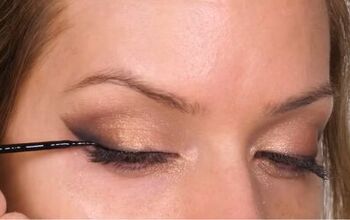
4. Eyeliner
Next, go in with a liquid eyeliner with a fine nib and line the bottom of your lid. Then, wing the ends.

5. Eyeshadow
Go in with some dark brown eyeshadow over the top of the eyeliner to give it a smoky effect.
Apply it with a small smudger brush, pat it on, and gently build it up to create a gradient.
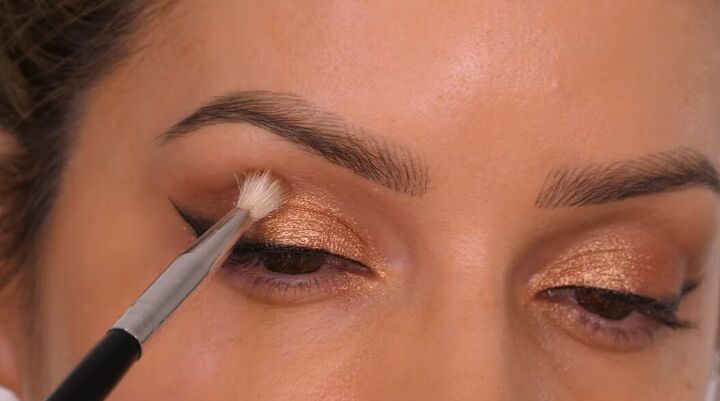
Once you’ve done the wing, go back in with the brow shade on a small blending brush and darken the socket on the outer edge.
6. Highlighter
Apply some highlighter to the inner corners of your eyes.
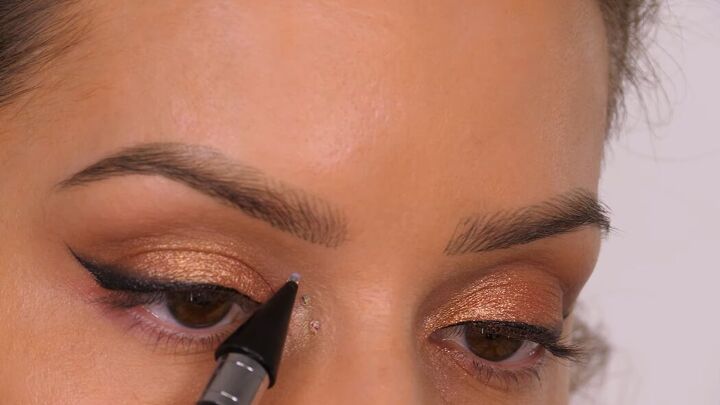
7. Rhinestones
Apply small dots of glue on the inner corner of your eyes with a bent, out-of-shape bobby pin.
Then, pick up some rhinestones with your picking-up tool.
Apply four of them in a slight arc, just following the natural curvature of the eye
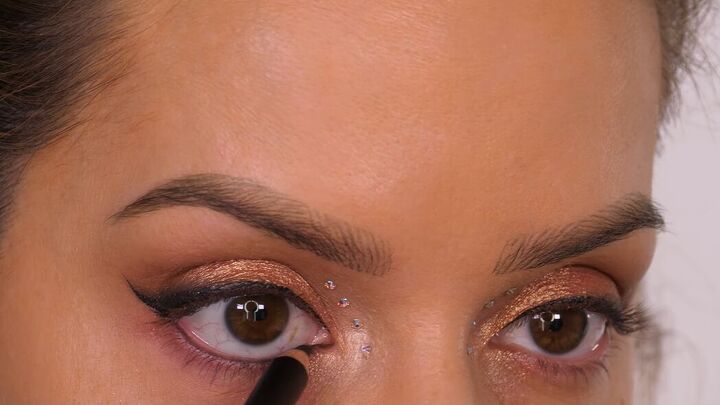
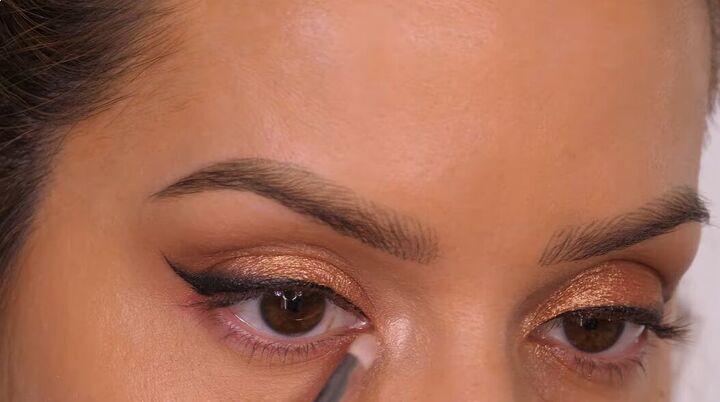
8. Eyeliner
Next, apply some eyeliner under your eyes.
9. Eyeshadow
Then, go in with some brown eyeshadow. Work it in with a small brush backward and forwards under the eyes to create a very subtle, smoky finish.
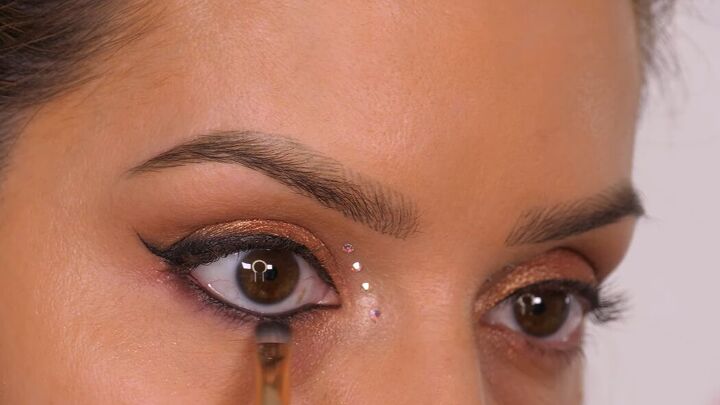
10. Rhinestones
Apply some more glue under your eyes and stick the rhinestones on top.

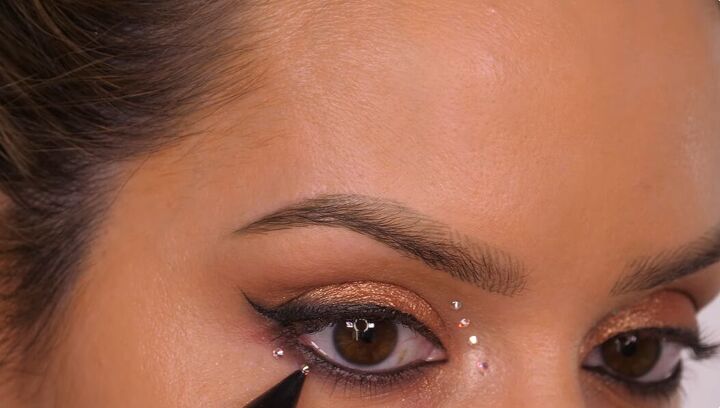
11. Mascara
Now, apply some mascara.
12. False lashes
Next, I wanted to create some spiky lashes with a fluffy finish to them.
Take some individual lashes in a range of sizes from 9mm to 12mm and apply them to your lashes.
Add some cluster lashes as well.
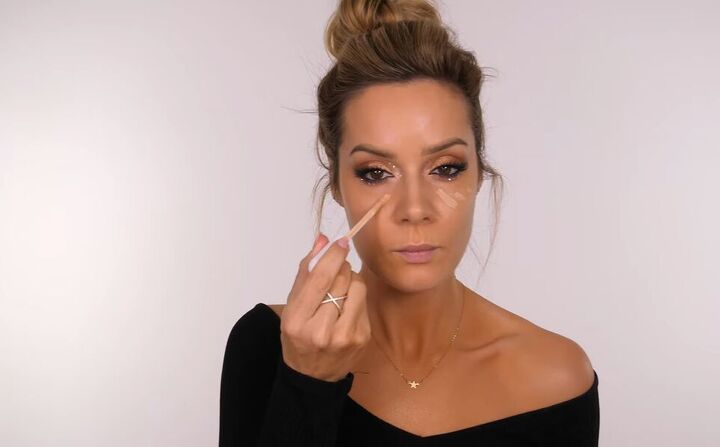
13. Concealer
Add a bit of concealer to brighten and clean up underneath the eyes in case you've got any eyeshadow fall down.
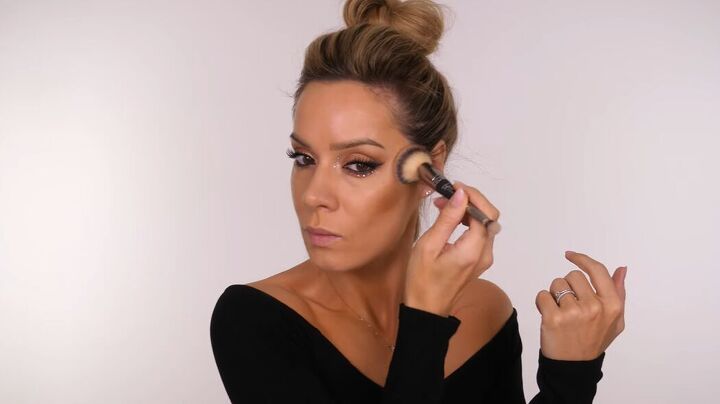
14. Bronzer
Go in with some bronzer to sculpt your face by applying it to the cheekbones.
Take it around your hairline as well.
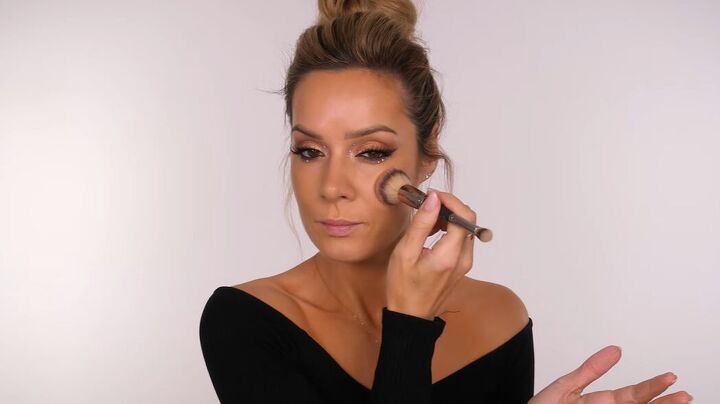
15. Blush
Next, apply some blush in a peach shade to add a hint of color to the cheeks.
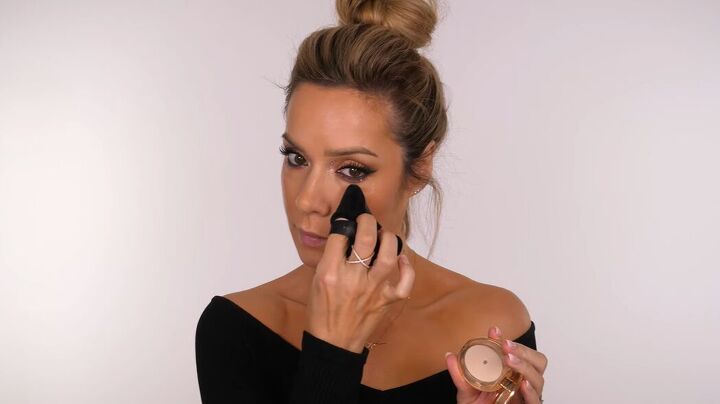
16. Setting powder
Apply setting powder along the center of your face to diminish any shine.
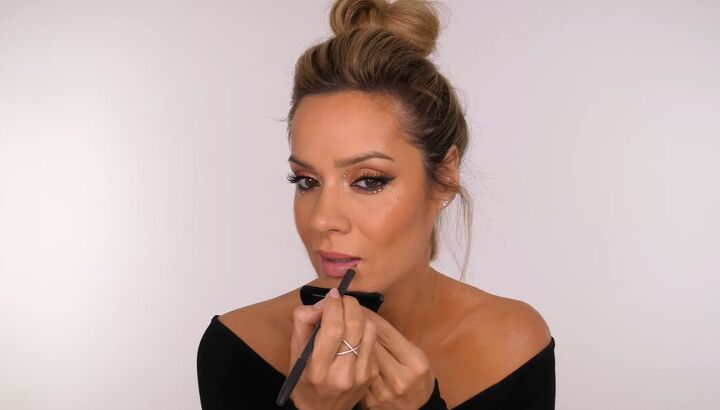
17. Lips
Finish by lining your lips with a matte pencil in a warm-toned light-medium coral shade.
Then, fill in your lips with lipstick in the same color.

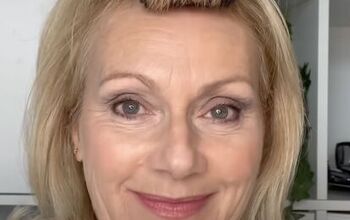
Simple rhinestone eye makeup
This is the final makeup look. I love the warm, natural-looking glow that the makeup has created.
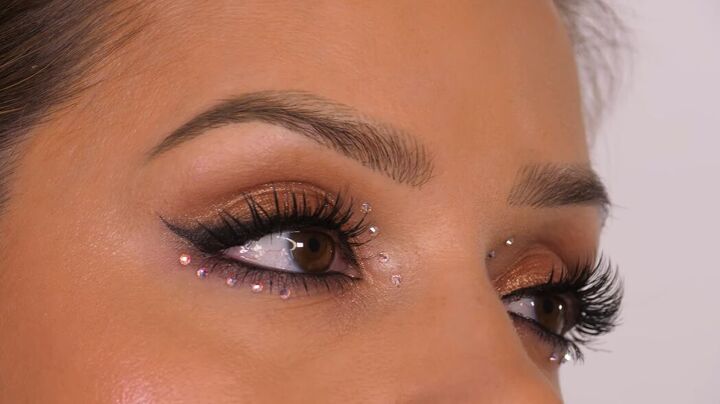
The rhinestones around my eyes are so beautiful, and they catch the light at different angles as I move.
I also love the warm bronze eyeshadow and the big, voluminous lashes.
I hope you like this makeup look as much as I do, and you’ll give it a try this holiday season!
Next, check out this Easy Metallic Silver Eye Makeup Tutorial.
The author may collect a small share of sales from the links on this page.


Comments
Join the conversation