2 in 1: Flowy Top and Bottom

Anyone who knows me, knows I love a good versatile piece. This garment can be a shirt or a flowy skirt, making for more unique styling opportunities! To learn how to make one of your own two-in-one pieces, check out this tutorial!
Tools and materials:
- Fabric
- Scissors
- Tailor’s chalk
- Elastic
- Pins
- Thread
- Sewing machine
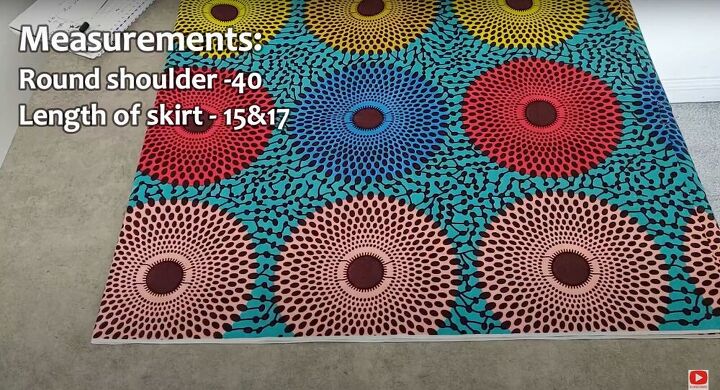
Take your measurements
Follow the measurements above. To find your diameter, divide your round shoulder measurement by 6.289. Next, fold your fabric over twice (big enough to cut out your skirt length) and place your measuring tape by the folded corner (where there are four layers of fabric). Then cut out a circle by drawing out a quarter of a circle in your folded corner. To do this, place your measuring tape on the corner and stretch along the edge, using chalk to trace, bring your measuring tape across to the opposite edge. Next, measure from the edge of that line to the length of your skirt and create another curved line parallel to the first one. Connect the two lines and cut. (For a better explanation on how to do this, watch the beginning of the video).
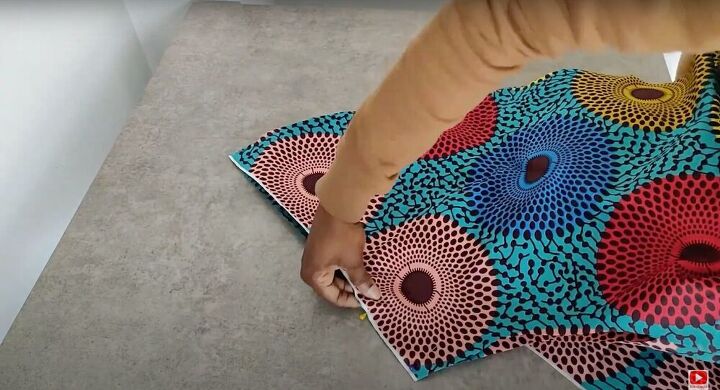
Sew the skirt
Place the cut-out skirt onto empty fabric and use it as a pattern to cut out a second skirt. This will give you two identical pieces to make one skirt. Now, for the second layer of the skirt, use the same pattern again, but this time make it longer. Cut out two pieces. Once that’s done, line up the matching pieces (two short and two long). Align and pin the edge and sew to secure. Only do one side of each so you’re left with a large piece of fabric as opposed to a completed skirt. Finally, fold the bottom in, to hem the skirt. Keep in mind that a circular hem can be tricky so take your time.
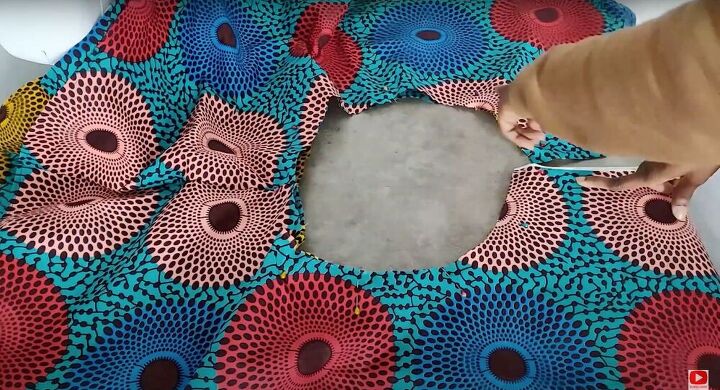
Connect the skirts
To connect the two skirts, place the shorter one over the longer one, right sides facing you. Align the top edge and pin them in place. Sew to secure. We are still not securing the side seam, so do not sew over it.
Create the waistline
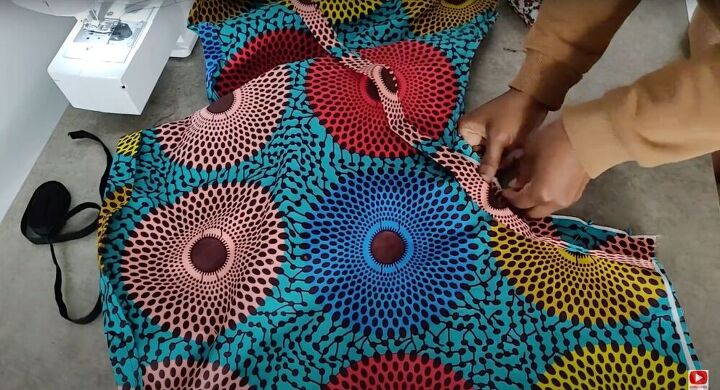
Measure the circumference of the skirt and cut out a piece of fabric that is that length. The fabric should be five inches wide and then folded and ironed down. Fold in both ends so it meets in the middle and there are no raw edges showing. Sew together the side seams and then use this piece of fabric as bias tape, by wrapping it around the top of the skirt and pinning it down. Sew in place, right sides together, and keeping a small opening for the elastic. Wrap the fabric over and repeat on the other side. Make sure the band catches the raw edges!
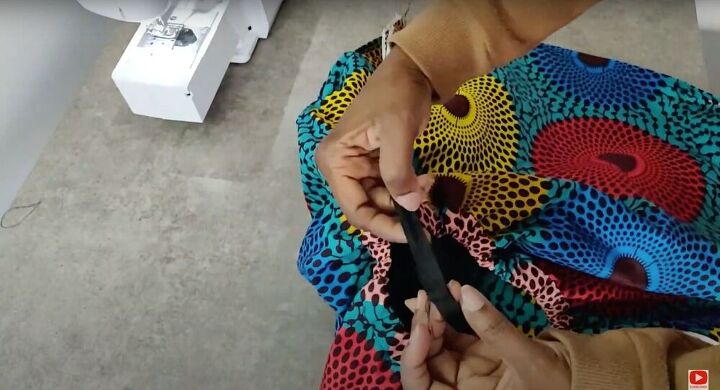
Insert the elastic
Cut out a piece of elastic that is the same measurement as your waist and feed it through the bias tap we just put in place. Once the elastic comes out of both ends, sew them together to secure. Close the gap we left and your skirt is finished!
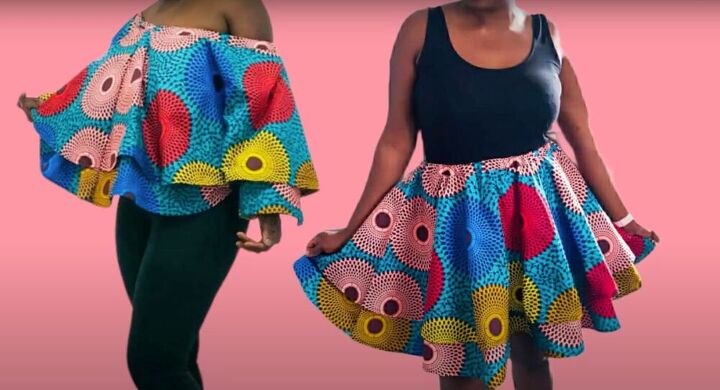
To wear this top and skirt in one piece, use the elastic band as either a waistband or shoulder band. Adjust it as you see fit and get to styling!
The author may collect a small share of sales from the links on this page.


Comments
Join the conversation