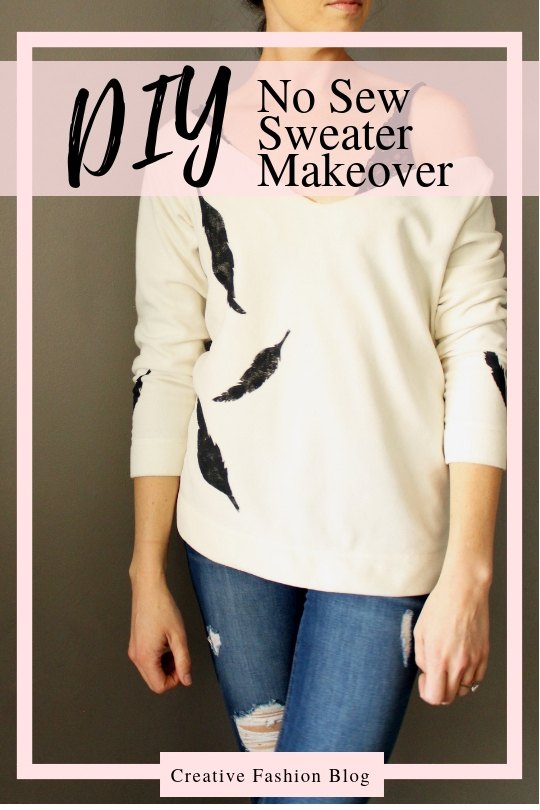
DIY No-Sew Upcycled Sweater Refashion
This post may contain affiliate links for products I love and recommend.
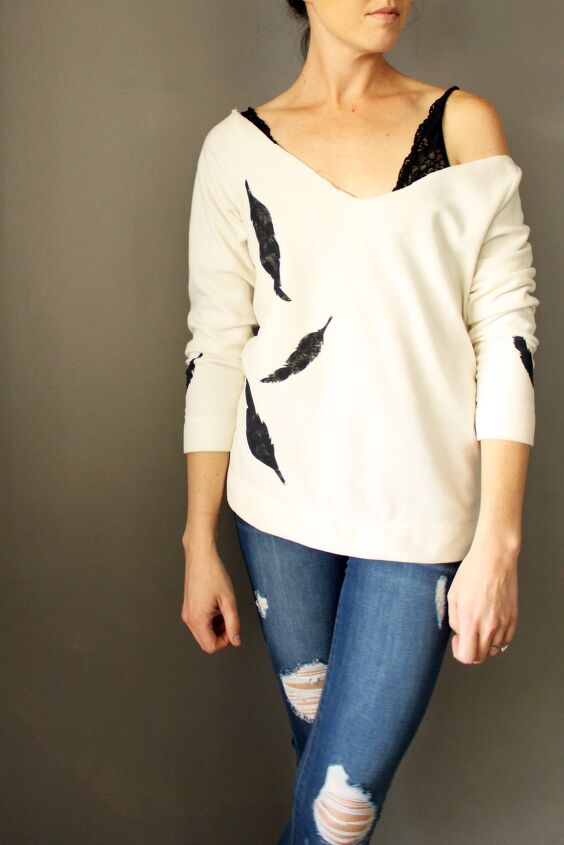
Awhile ago, I posted about how to score at thrift stores and came away with several brand new sweaters for less than $3 to use in some upcoming refashion projects. Isn’t making something unique and one-of-a-kind just so much more fun? I love this slouchy, cozy sweater design and it’s feather stenciled details.
This no-sew sweater design is quick and easy, to the point, and nearly impossible to mess up. I promise! I’ll include the link to print and make your own feather stencils and even the links to purchase the exact DIY tools I’ll be using to make this project as simple as possible.
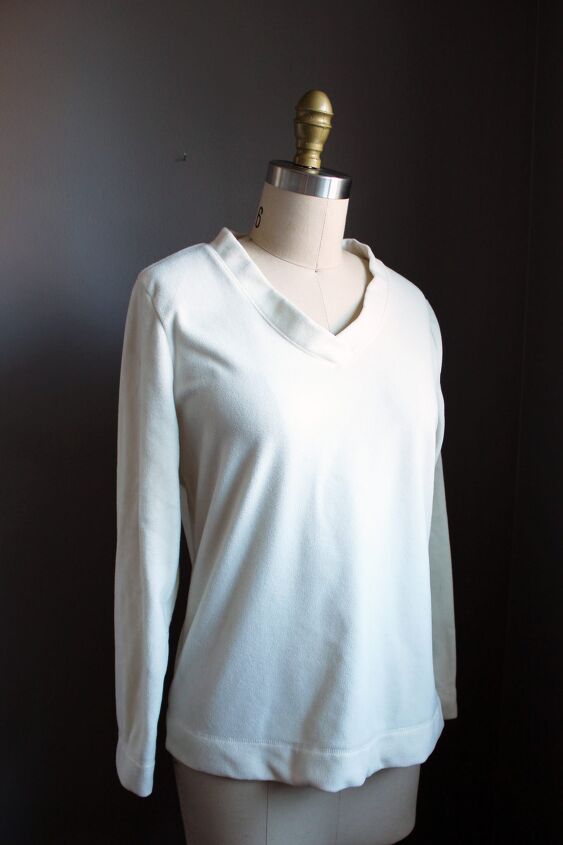
Before:
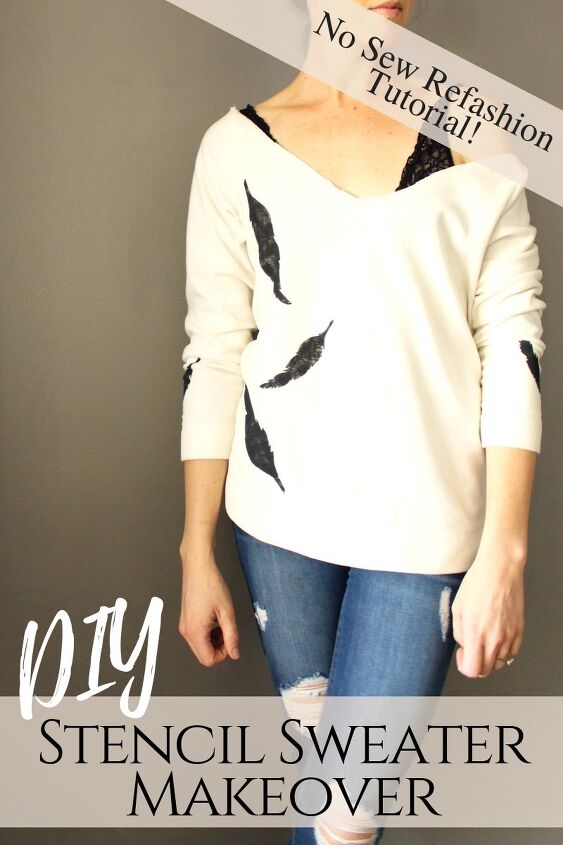
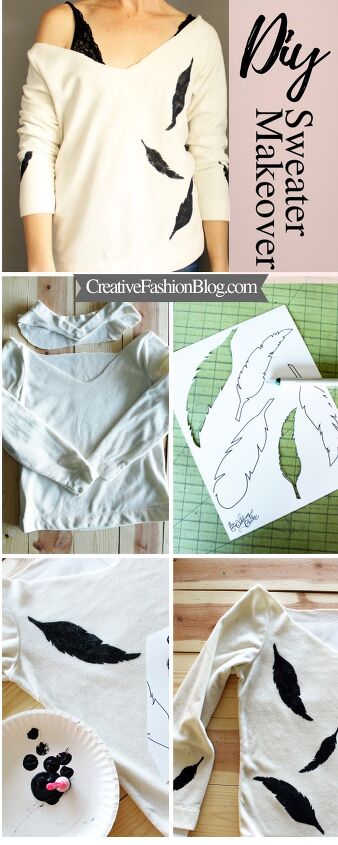
This sweater was a brand new, fuzzy find when I bought it for $2.49 during a thrift store trip here. The size and fit were great and I loved the cozy texture. But, the neckline was boring and the sweater as a whole lacked character. In about 20 minutes, it got a total transformation and now I’m excited to wear it all the time.
The Process:
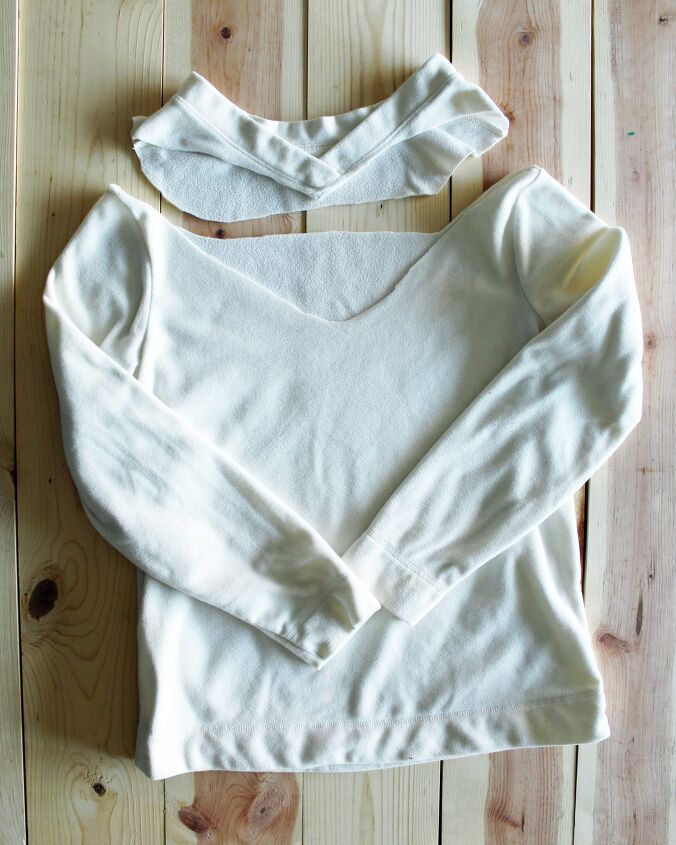
First, cut the neckline from the top and throw it away. You won’t be needing that anymore.
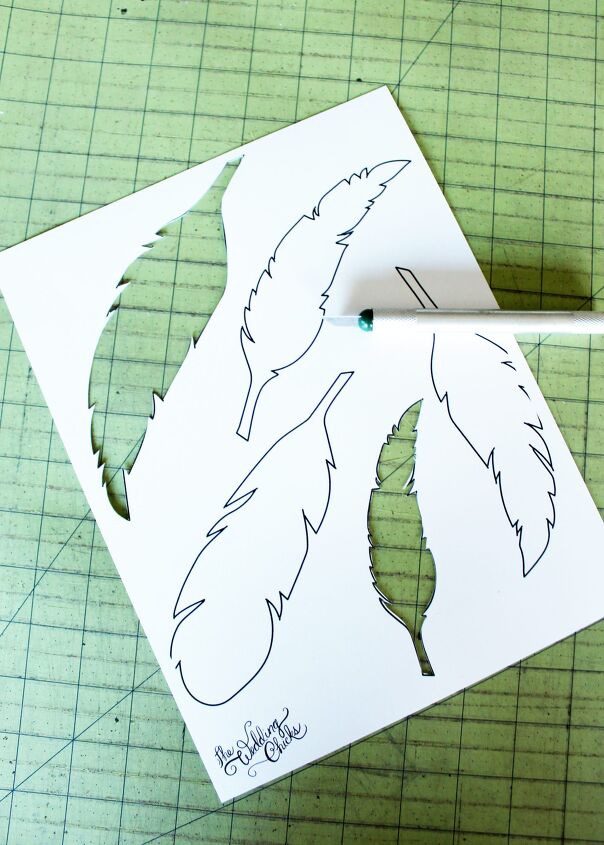
Now that the basic shape of your upcycled sweater is done, it’s time to make some templates for your stencil. I used this incredible free feather template here and easily printed it out on cardstock paper. Cut out the shapes you like using an X-acto knife. I’ve used this one from Amazon
for years and love it.
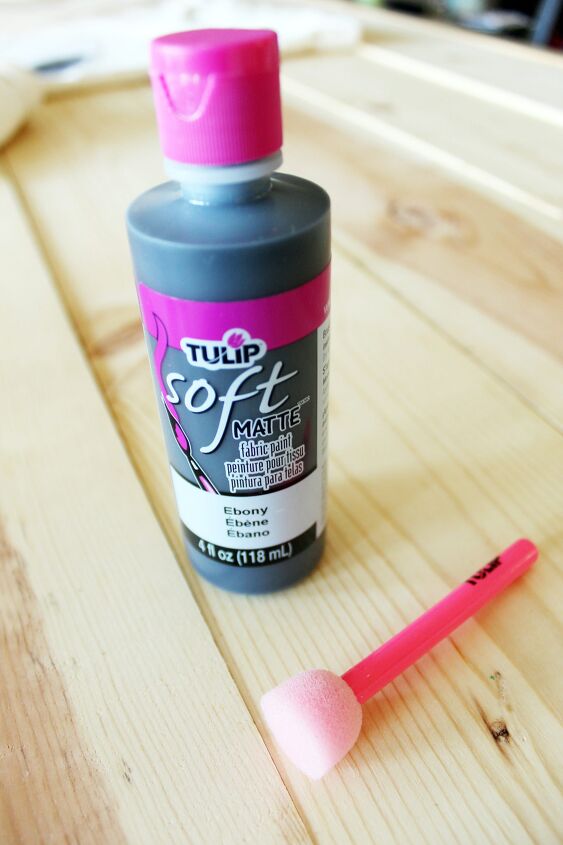
Once your template and stencil is done, it’s time to start painting! All you need for this step is some black Soft Fabric Paint, a basic Round Paint Sponge
, an extra sheet of cardstock, and a paper plate. Once you have decided where you’d like to place your stencil, slide the extra sheet of cardstock inside the sweater to prevent any bleed-through. Next, pour some paint onto your paper plate and get the cardstock stencil ready. Firmly press the cardstock onto your sweater and apply the paint using a careful up and down motion with your paintbrush- never gliding the brush along the fabric. This prevents bleeding and gives your stencil the most crisp edges possible.

When you are done, move on to the next stencil. Don’t be afraid to cut your cardstock paper up to get your stencils closer together. I liked adding feathers to both sleeves as well as in an asymmetrical pattern across the front of my sweater. Let dry.

Ta da! An easy, no-sew upcycled sweater that’s perfectly slouchy and crazy-cozy. I loved these stencils by WeddingChicks.com but you can really use any free printable (or draw your own) to make the look even more unique. I like styling this sweater with distressed jeans and a lace bralette.
Thank you so much for reading this little sweater refashion post. As always, if you have any questions, let me know in the comments below! I’d love to hear how you customize it, what tricks and ideas you know, or any questions in general you have.
The author may collect a small share of sales from the links on this page.


Comments
Join the conversation
How is the neck not unraveling if this is a sweater?
Very pretty re-do. That being said you are going to have to put either seam binding or make a binding that will support the cut for the new neckline. Your not supporting that cut will make it stretch out so that you cannot wear it comfortably.