How to Easily Sew a Flattering Twist-Front Top or Sweater

Twist tops are so feminine and flattering! Even if your waist is undefined, a twist-front top creates an hourglass shape. If you’ve been wanted to know how to sew a twist front top, this is the tutorial for you.
I’ll show you how to make a twist-front sweater or top (depending on the fabric you choose) that’s really simple and easy. Let’s get started making your DIY twist-front sweater!
Tools and materials:
- 1 yard of stretch fabric
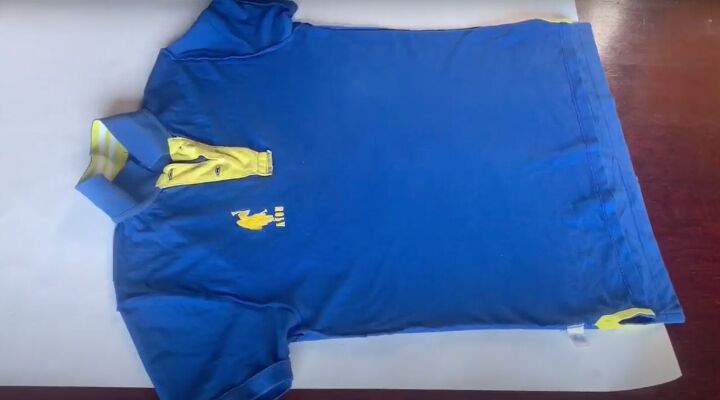
- Your own long-sleeved t-shirt to use as a template
- Tracing/pattern paper
- Pen/marker/chalk
- Scissors
- Sewing machine
- Measuring tape
- Optional: coins or other weights to hold the pattern paper down
1. Make the front pattern
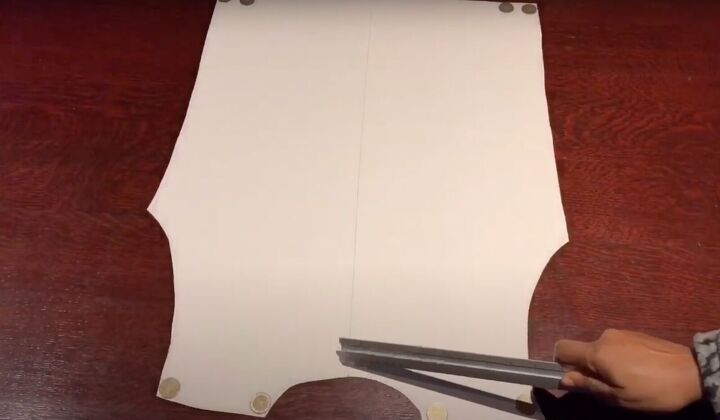
Lay your own well-fitting t-shirt onto the pattern paper. Trace only the bodice for now. Cut the front bodice pattern out.
Use your ruler to draw a straight line down the center.
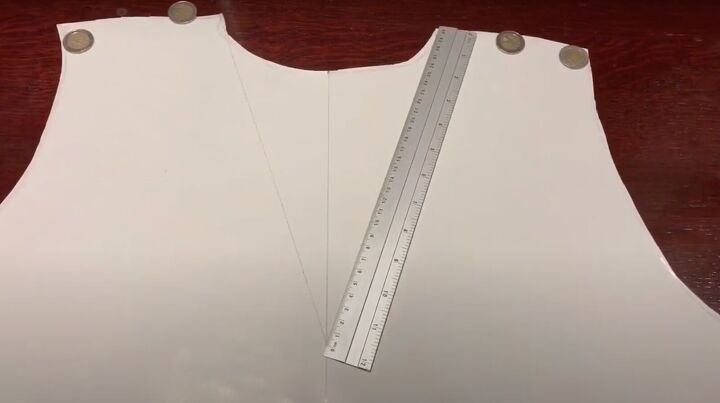
Then use the ruler to draw the V-neck fron the inner shoulder edge. You can choose the depth you’re most comfortable with. Mark the neckline.
2. Mark the twist pattern
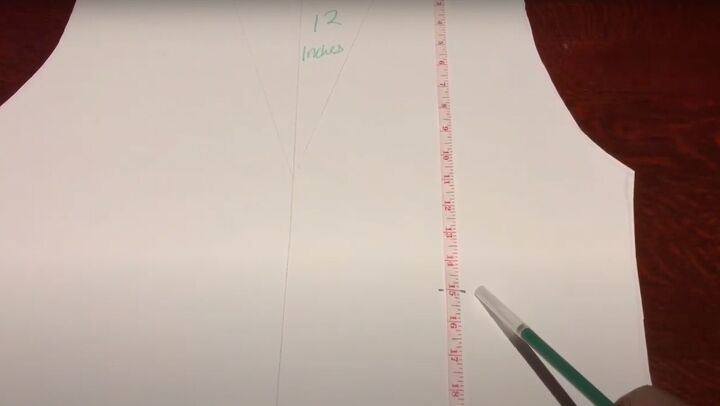
Measure down 15 inches from the top of the shoulder. Mark this area.
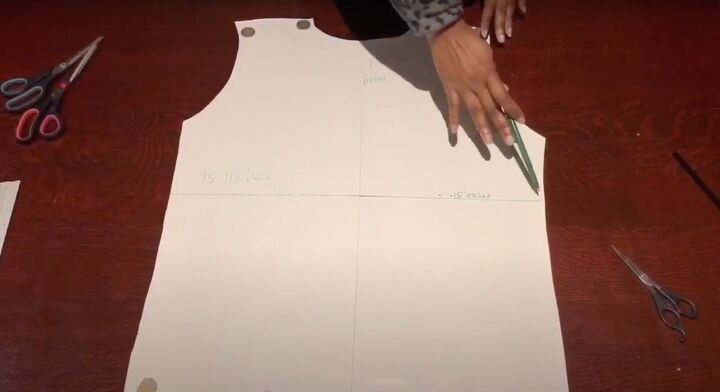
Then draw a horizontal line across the bodice at the 15 inch mark.
Draw the curve of the twist on the pattern towards the bottom starting from the horizontal line.
You can choose the depth of the curve.
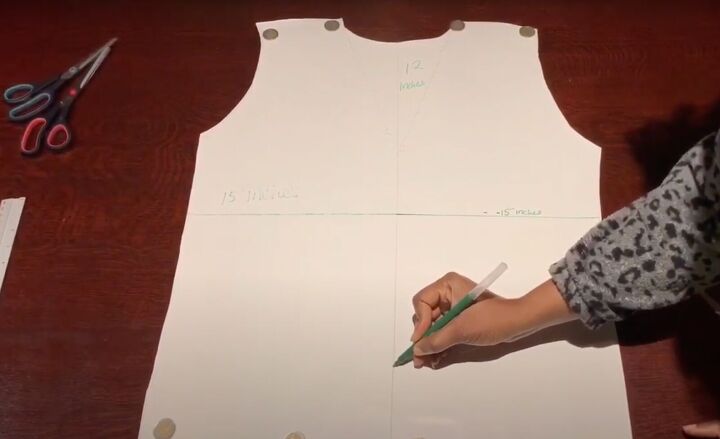
Start cutting the pattern from the right side of the V-neck down following the line through the curve at the bottom. Then do the same for the left side.
When you’re done, it should look like an open vest or waistcoat.
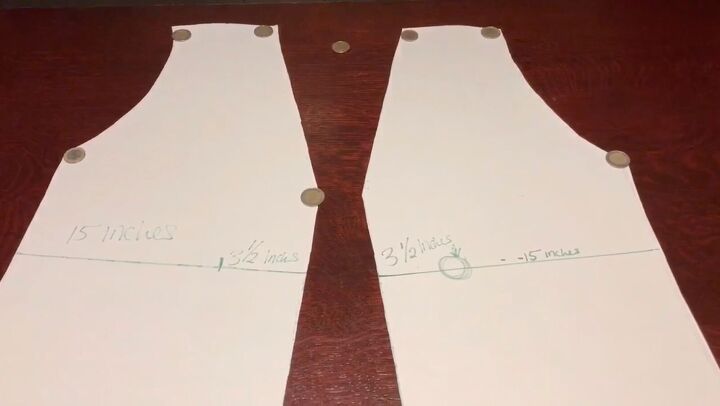
Measure 3½ inches from the inner edge at the horizontal line on the right side. Draw a circle there.
Measure 3½ inches from the inner edge of the horizontal line on the left side and mark with a small line.

3. Cut the fabric
Lay the paper pattern on the fabric with the wrong side of the fabric facing up towards you. Pin the pattern to the fabric. Cut with a ¼-inch seam allowance.
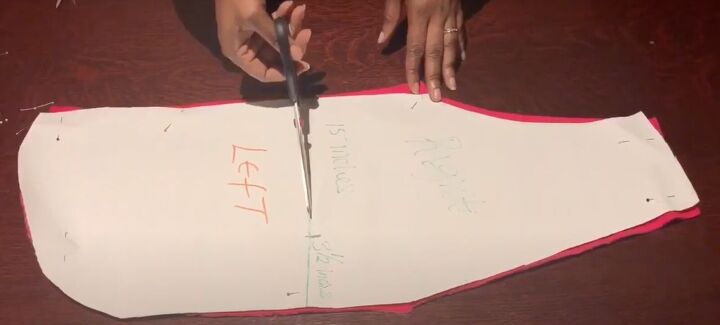
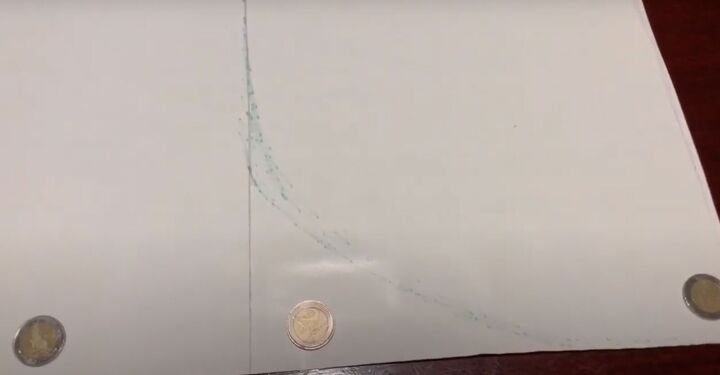
Cut the horizontal line on the left side of the pattern up until the small line you marked before.
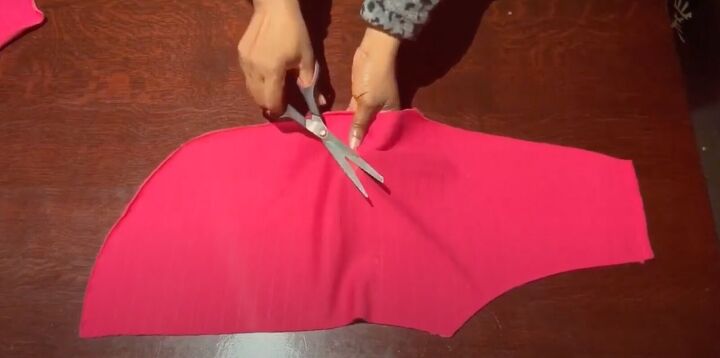
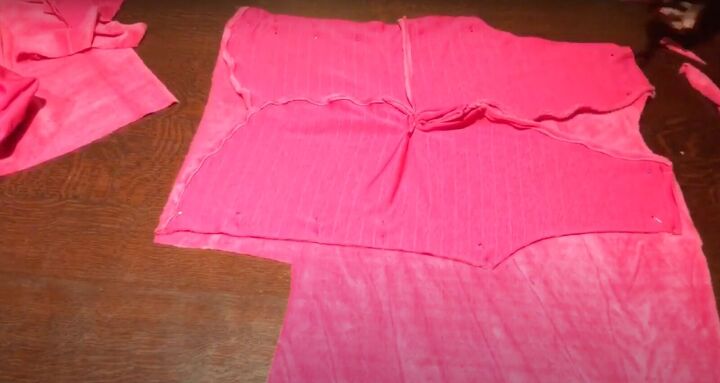
4. Put the twist together
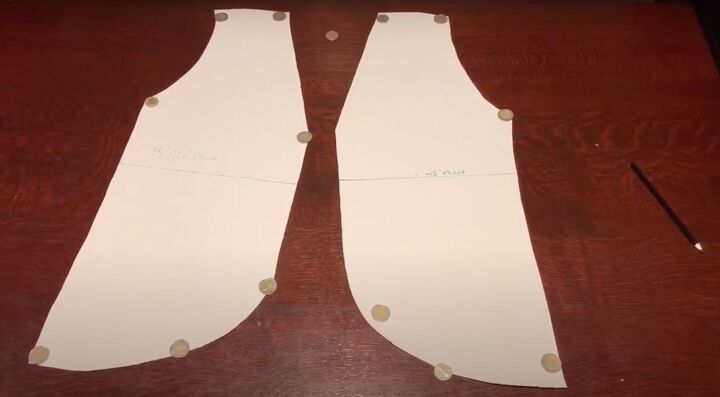
Remove the pattern paper. Lift up the right piece with the circle and snip to create a hole.
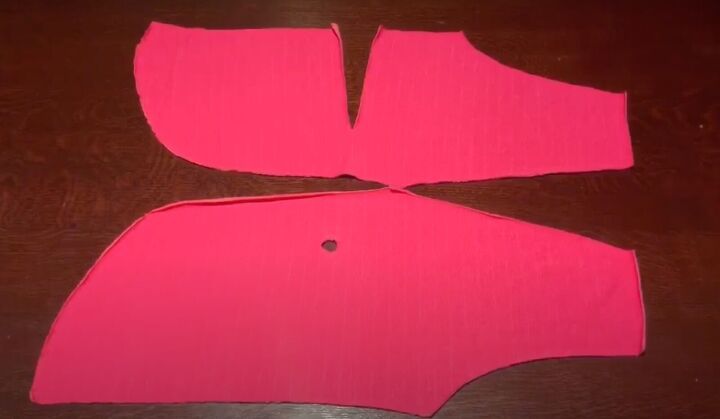
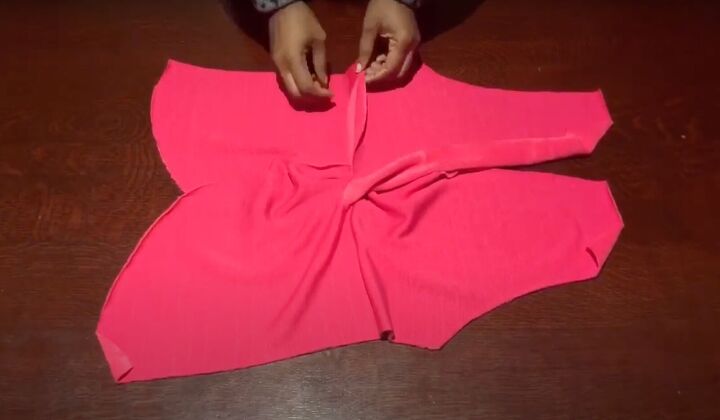
The two pieces should look like this.
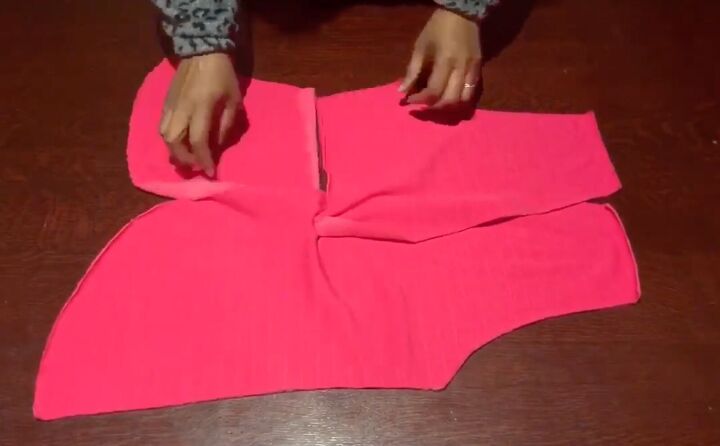
Keep the fabric with the wrong sides facing you. Grab the top part of the left side and pull it through the hole on the right side.
Pin and sew the open seam on the left side with a zigzag stitch. Sew the hole on the right side closed with the same stitch.
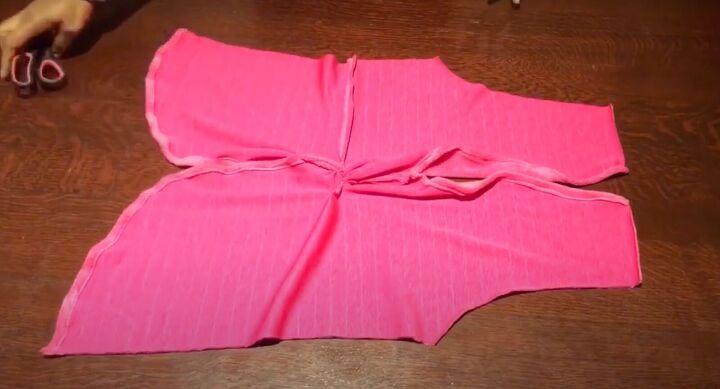
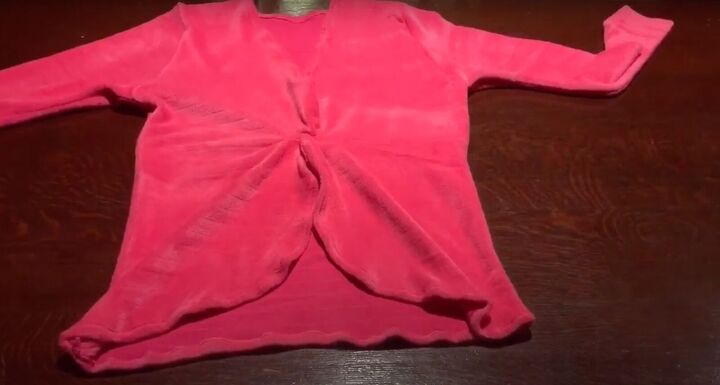
5. Sew the front of the top
Once the twist has been sewn, fold and pin the V-neck, curved bottom, and other raw edges including the hem. Basically, everything except for the side seams and the top of the shoulder.
Finish with a zigzag stitch for a smooth professional finish.
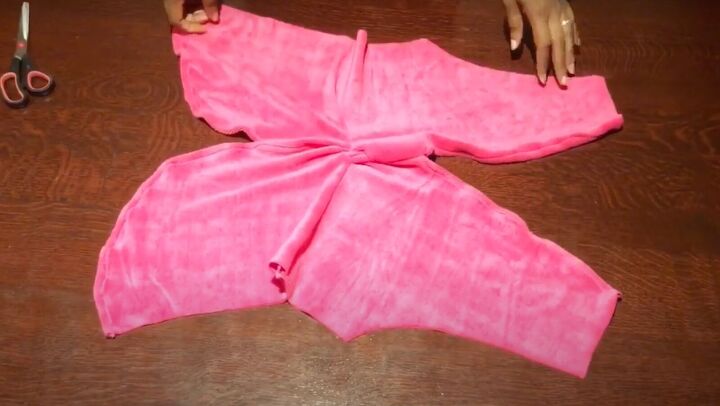
It will look like a butterfly!
6. Make the back bodice
Lay the fabric right side facing you. Lay the front bodice facing down so their right sides are together. Pin in place so the fabric doesn’t move. Cut out the pattern mirroring the sides.
At the bottom, cut straight across for a flat bottom. At the back neckline, cut a small curve. Sew the shoulder and side seams with a zigzag stitch. Hem the neckline and bottom.
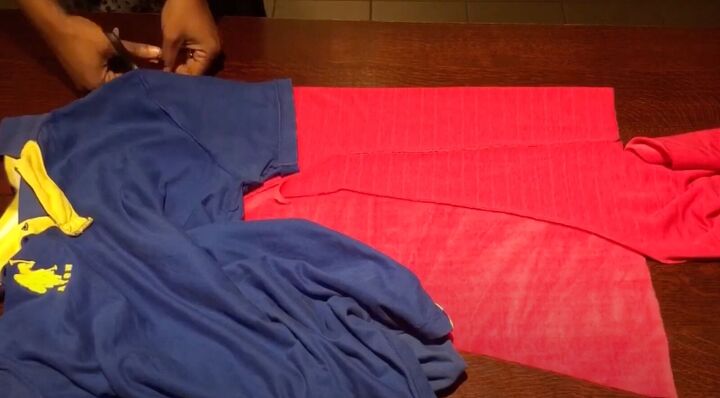
7. Make and attach the sleeves
Lay your long-sleeved t-shirt sleeve on top of folded fabric to use a template. (In this tutorial I used a short-sleeved t-shirt but it’s better if you use a long-sleeved one).
Cut the pattern out and sew up the side seam.
Insert your sleeves into the top. You can check out my other tutorials that show you how to do this if you don’t know how.


How to sew a twist-front top
How sexy is this DIY twist-front sweater?? Please let me know in the comments what you think of this tutorial and the final results. Thanks for joining!
The author may collect a small share of sales from the links on this page.


Comments
Join the conversation
Great job! Looks really pretty!