DIY Faux Fur Santa Hat With FREE Pattern

Everyone needs a soft and fuzzy Santa hat during the holidays! Or even two or three of them! 
This FREE pattern has three sizes so that everyone in the family can have his or her own! And using white faux fur fabric makes this hat even more snuggly and fun!
Materials:
- Faux fur fabric
- Red velour fabric
- Fabric scissors
- Pins
- 110 sewing machine needle. This thicker size of needle helps sew through thick layers of fabric.
- Hand sewing needle
- Polyester thread (red and white)
- Stuffing
- Walking foot (optional, but highly recommended for sewing thick layers of fabric)
- FREE Santa hat sewing pattern (find out how to get the pattern in my original How to Sew a Santa Hat tutorial!)
(The following is an abbreviated version of the original tutorial. Click here for the full tutorial, which includes video!)
Print, assemble and cut out the pattern. Fold the red fabric in half and cut out the main hat pattern so that you have two pieces.
Pin them right sides face and sew up the sides with a 1 cm seam allowance. Finish off the edges with a zig zag stitch or overlock machine.
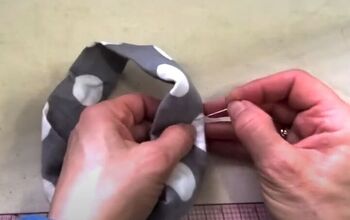
Cut out the rectangle of the brim piece, paying attention to the direction of the fur (which should match the arrow on the pattern). Join the short ends, right sides facing, and sew. Then fold it again to join the two round edges, wrong sides facing.
Mark the brim and the opening of the red hat in quarters (or, even better, 8ths) with pins.
Hold the brim in your hand, making sure that the fur goes down, away from the raw edges (as seen above in I). Slip the red hat (wrong side out) inside the brim and match up the pins marking the 4ths (or 8ths) and pin the fabrics together.
Sew around the edges with a 1 cm seam allowance, and then zig zag the raw edges.
Turn the hat right side out and fold the brim up, as seen above.
Cut the circle pattern piece from the fur fabric. Use the hand needle to sew around the circle with a running stitch.
Pull the threads to gather the fabric. Put a little stuffing inside and continue pulling to gather. Then tie a double knot anad sew back and forth across the opening to close it up.
Sew the fur pompom to the tip of the hat, and you're done! So cute for your DIY Christmas style!
If you'd like to try this project out, click here to download the Santa hat pattern and see the full tutorial with extra tips and tricks!
Or watch this video! Have fun!
Enjoyed the project?
Suggested materials:
- White faux fur fabric (https://amzn.to/2UdXZCV)
- Red velour fabric (https://amzn.to/3nm3Gv1)
- Fabric scissors (https://amzn.to/3ki8bEY)
- Pins (https://amzn.to/3eWua3j)
- 110 sewing machine needle (https://amzn.to/3nmSQVM)
- Hand sewing needle (https://amzn.to/3eNGhQa)
- Polyester thread (https://amzn.to/2UitdbS)
- Stuffing (https://amzn.to/3eNjML6)
- Walking foot (https://amzn.to/3pzBQO3)
- FREE Santa hat sewing pattern (https://www.cucicucicoo.com/2020/11/how-to-sew-a-santa-hat-free-patter)
The author may collect a small share of sales from the links on this page.


Comments
Join the conversation