How to DIY a Super Cute Butterfly Blouse

You really don't need to be a tailor to make this stunning butterfly blouse that's quick and easy to sew.
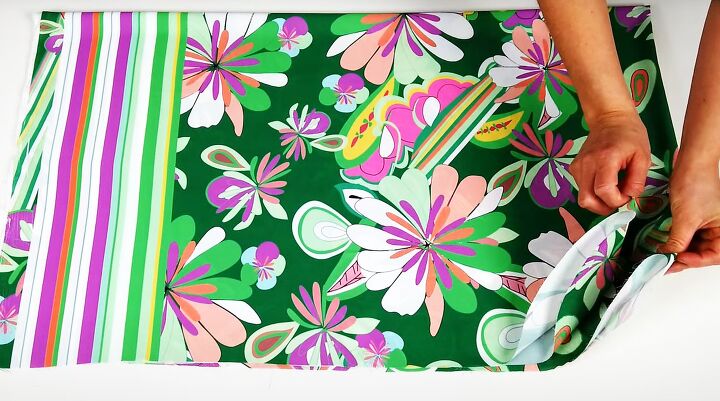
It uses a simple self-drafted pattern and 1.25 yards (1 meter) of georgette woven fabric for size 38 - 40. A narrow edge foot will make it easier to stitch the long edge hem but it’s not necessary.
All the measurements I give are for size 38 - 40 but it's straightforward to scale them up or down for other sizes.
Tools and materials:
- 1.25 yards (1 meter) of non-stretch fabric
- Tailor’s chalk
- Heat-erasable fabric marker (optional)
- Pins
- Scissors
- Sewing machine
- Buttonhole foot (optional)
- Narrow edge presser foot (optional)
- Serger (optional)
1. Cut main shape
Fold your fabric in half widthways and then in half lengthways. Turn it so the edge you want to be at the bottom is on your right and the center front fold is towards you.
For my size, the folded length (left to right) was 28 inches (71 cm) and the width was 18 inches (45 cm).
Place a few pins in the fabric to stop it from slipping.
Mark 4 inches (10 cm) along the left edge and 3 inches (8 cm) along the center front for the neckline. Join the two marks with a curved line.
Freehand draw a deep curve from the top of the left edge to the center front for the overall shape.
Cut out the neckline and the main shape.
2. Edgings
Unpin the fabric and open it out.
Serge or zigzag stitch around the neck edge. Turn in a narrow hem and sew it in place with a straight stitch.
Using a narrow edge presser foot if you have one, turn in and sew a double narrow hem around the entire outer perimeter of the top.
3. Side seams
Fold the top in half widthways with wrong sides together, matching the lower and side edges, then fold in half lengthways.
Using tailor's chalk or a heat-erasable fabric marker, mark 18 inches (28 cm) across the front from the center front towards the side edges in several places on the top layer.
Mark the beginning of the seam at 10 inches (25 cm) from the shoulders and the end 2 inches from the lower edge and draw a straight line connecting them.
Copy the position of the line to the lower layer for the other side.
Join the front to the back by sewing along each line on the right side.
4. Belt slits
Lay the top out flat and measure and mark 16 inches (40 cm) down the side seam from the shoulder on each side.
Mark a further 2 inches (5 cm) down from that point.
Place a 1.25 inch (3 cm) button in the buttonhole foot as a guide.
Make a buttonhole just outside the side seam on each side within the 2 inches (5 cm) marked, through both layers of fabric.
Snip the buttonholes open.
Remove the fabric marker with an iron.
5. Belt
Cut a strip of fabric 3 inches (8 cm) deep and 59 inches (150 cm) long.
Fold it in half lengthways with right sides together. Sew along both short edges and snip the corners.
Turn the belt right side out and fold in the two raw edges. Sew the long edges together on the right side.
Feed the ends of the belt through the slits of your DIY blouse from the back to the front and tie them in the front.
DIY butterfly blouse
And there you have it! A beautiful butterfly top.
Because it's meant to look like butterfly wings, you can use a fabric with a large print or an edge print as I did.
In fact, the bolder the colors and fabric, the better. It would also look amazing in a luxury fabric for evening.
I'd love to know what you think of it and if you make it - please let me know in the comments below.
For more fun, easy patterns, follow me on TikTok https://www.tiktok.com/@tugbaisler.
Enjoyed the project?
Suggested materials:
- 1.25 yards (1 meter) of non-stretch fabric
- Tailor’s chalk
- Heat-erasable fabric marker (optional)
- Pins
- Scissors
- Sewing machine
- Buttonhole foot (optional)
- Narrow edge presser foot (optional)
- Serger (optional)
The author may collect a small share of sales from the links on this page.


Comments
Join the conversation