How to Create Pretty Chevron Nail Designs With Nail Tape

Today, I’m going to do an awesome chevron nail design on my nails and take you all along with me. By the end of this tutorial, you’ll know how to create chevron nail designs by using nail tape, so stick around if you’re interested. Let’s get to it!
Tools and materials:
- Nail polish
- Matte top coat
- Nail tape
1. Apply your base color to two nails
Pick out any beige color of your choice for the base and apply it to only two of your nails. In this tutorial, I’m applying polish to my index and middle finger.
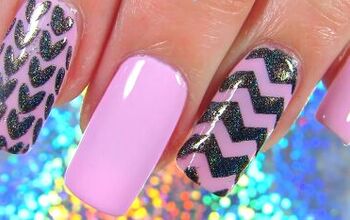
2. Apply a second color to the rest of your nails
Pick another color for the rest of your nails. I’m going with this gorgeous, sparkly blue. It’s such a unique color and it’s so pretty.
Don’t worry about your nails looking perfect with just one layer - it’s going to take at least two coats for this to look perfect.
Tip: Most nail polishes need two coats and, if they don’t, I prefer to apply two coats anyway as it balances out the colors and everything looks much prettier.
So apply two coats of the new color, and if you haven’t already, apply an additional coat to the beige-toned nails. Let your nails dry before moving on to the next step.
3. Apply nail tape
Add golden nail tape in an upside-down V shape on your two beige-toned nails. Again, make sure your nails are completely dry before this step as we’ll be removing them in the next step, and this can ruin your nail polish if it’s not fully dry.
4. Paint over the nail tape and then remove it
After the nail tape is applied, fill in the V with your second color.
Then, remove the nail tape while the second color of nail polish is still wet. This is going to help us get those sharp chevron nails.
5. Reattach the nail tape and apply a matte top coat
Reattach the nail tape in the same place before adding a matte top coat over it. This time, the nail tape is going to be permanent, so be more precise about their placement.
You can also apply a matte coat over the remaining nails. I love matte - it’s so pretty and gives everything that velvety feel.
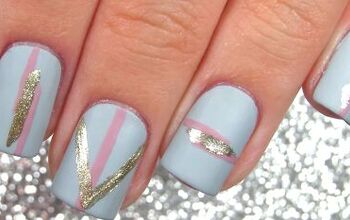
DIY chevron nail design tutorial
Here’s the finished chevron nail art look! This was so easy to do and they look so beautiful. If you enjoyed this chevron nails DIY, let me know down below!
Products used:
- Nail polishes used:
- China Glaze - Sorry I am latte
- OPI - Tomorrow Never Dies
- OPI matte top coat
- Nail tape
The author may collect a small share of sales from the links on this page.


Comments
Join the conversation
Nice! I love these! Thanks for sharing!