This DIY Geometric Necklace is Cool, Simple & So Easy to Make

Geometric necklaces are so mesmerizing. They give that extra edge to your look and style, and of course, they just look ultra-modern and cool. You can make your own geometric necklace with this easy DIY geometric necklace tutorial.
Before we get started, look at the tools and materials section so that you have everything needed to create this 3D geometric necklace.
Tools and materials:
- Needle
- Metallic tube beads
- Medium-sized beads
- Nylon string
- Thread
- Jump rings
- Pliers
- Necklace chain
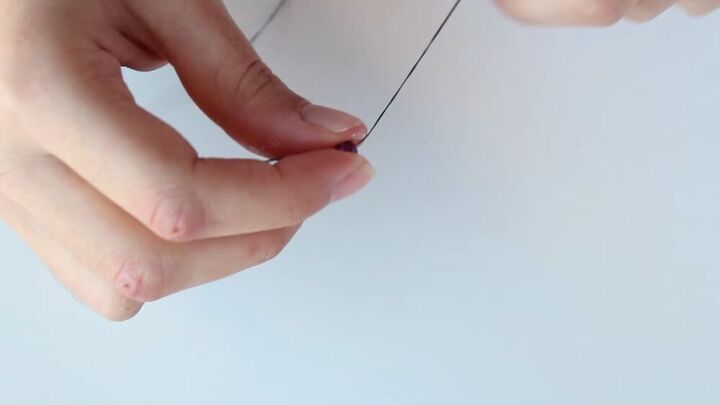
1. Add the beads
Thread your nylon into your needle. Get a medium-sized bead and place it a little before the end, then tie a knot to hold it in place.
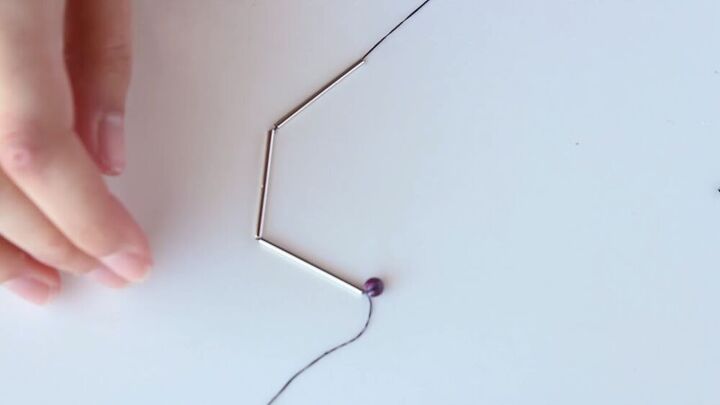
Next, thread three of these metallic tube beads onto the nylon.
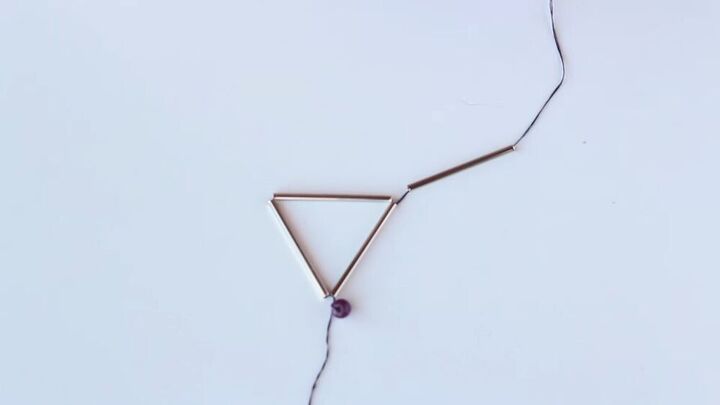
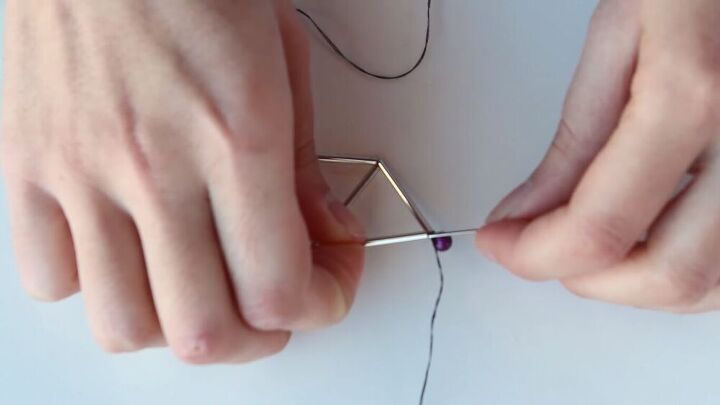
2. Create the first triangle
Insert the needle back through the bottom tube, as shown.
You should now have a triangular design.
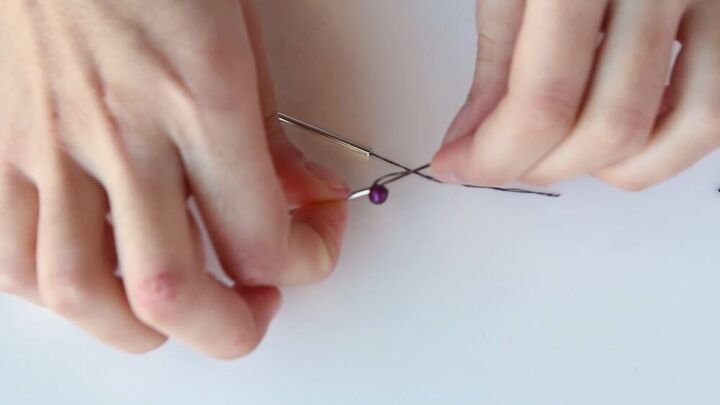
3. Create a second triangle
Thread two more metallic tube beads onto the nylon.
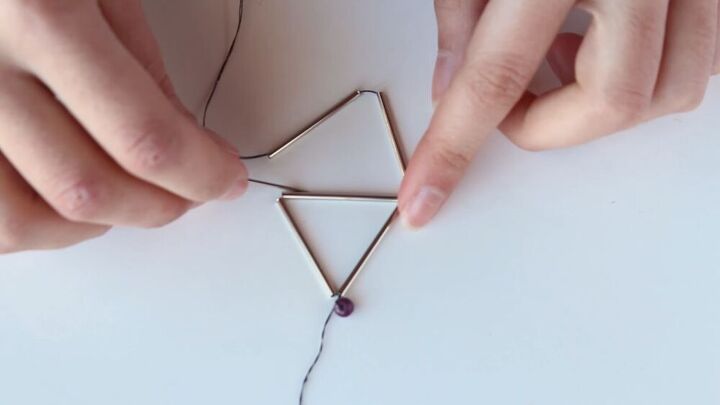
Then, insert the needle through the side of the triangle that’s facing you, as shown.
And insert the needle back again through one of the side beads.
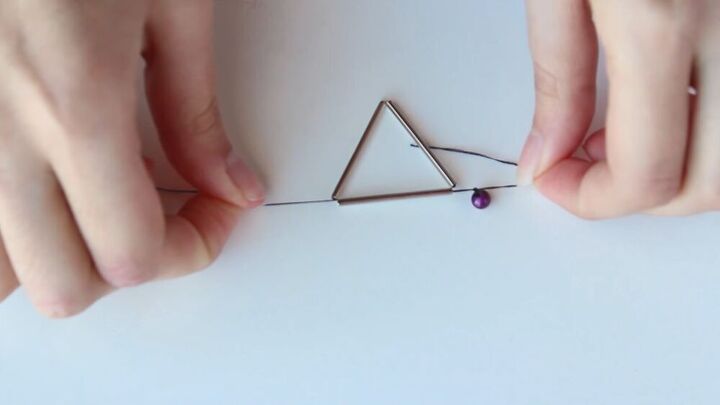
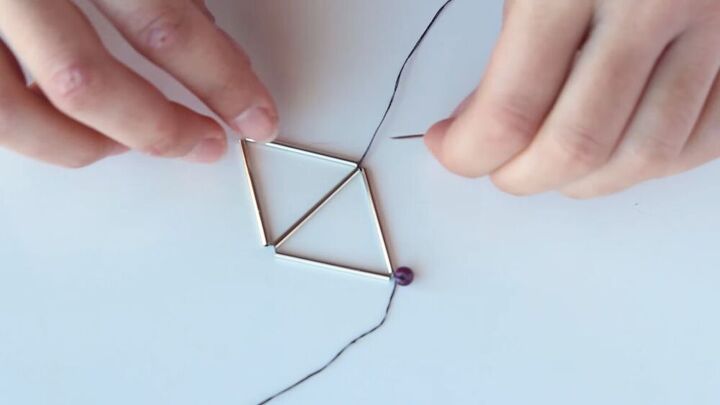
4. Create a 3D pyramid shape
Thread one more tube bead.
Thread the needle through one of the bottom tubes, starting from the bead, as shown.
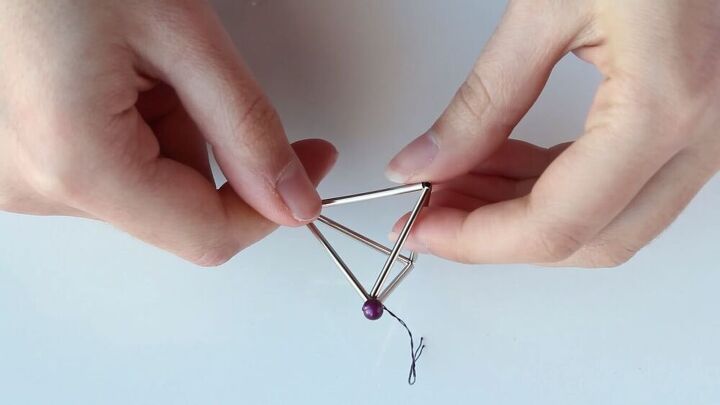
Pull the thread tight and you've made a 3D geometric necklace with a pyramid design! You could stop here if you like this shape, but I'm going to keep going to create a 3D diamond necklace.
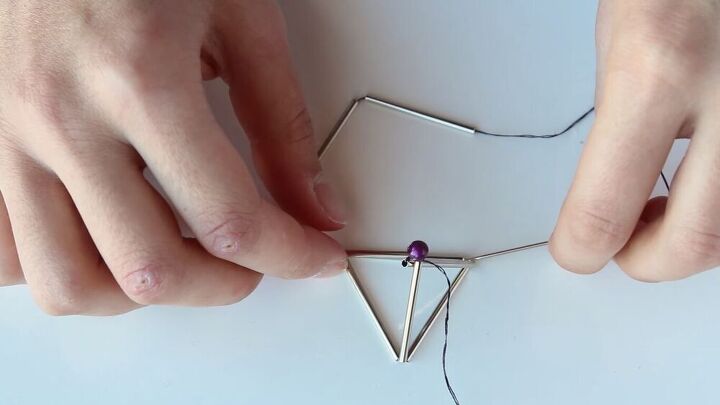
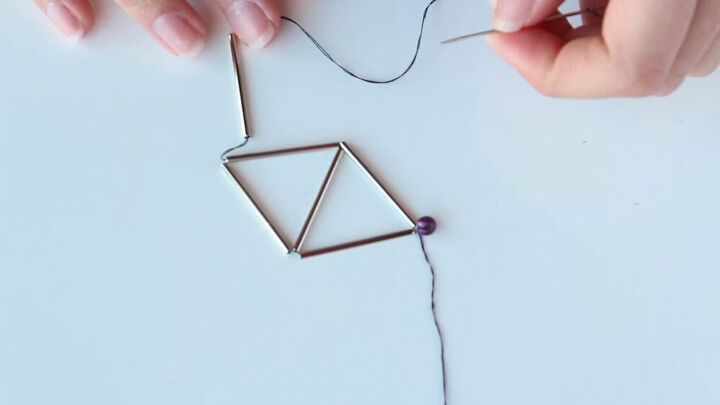
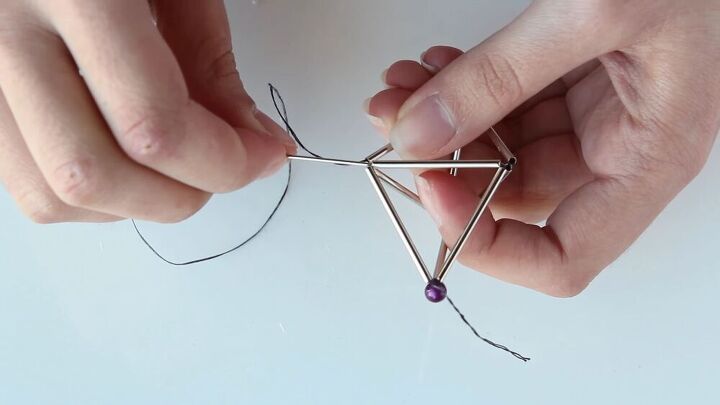
5. Create a 3D diamond shape
Thread two more tube beads onto the nylon. Feed the needle through the base of the triangle, then through the connecting tube at the corner, to bring the needle to the opposite triangle point.
Thread one more tube onto the nylon and feed the needle through a tube on the opposite point. Pull tight and you have your diamond shape!
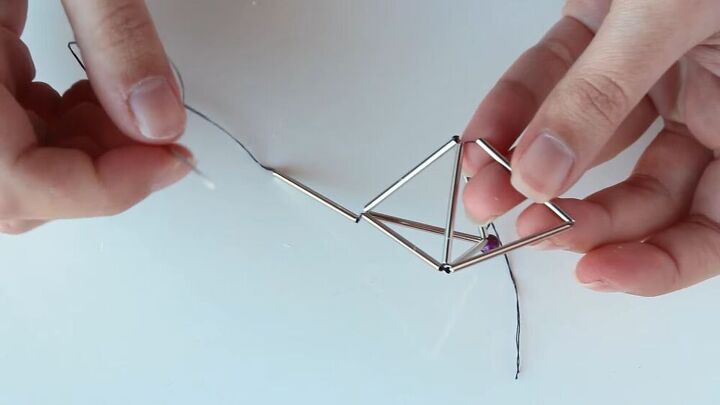
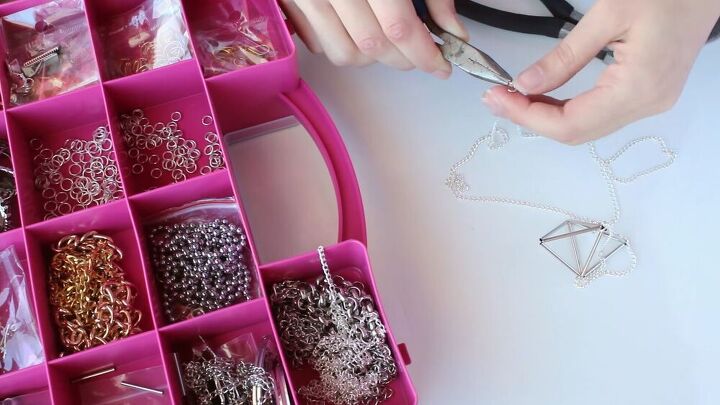
6. Make the geometric shape sturdy
To ensure the geometric pendant stays in place, insert the needle through the middle again. Do this a couple of times on either side.
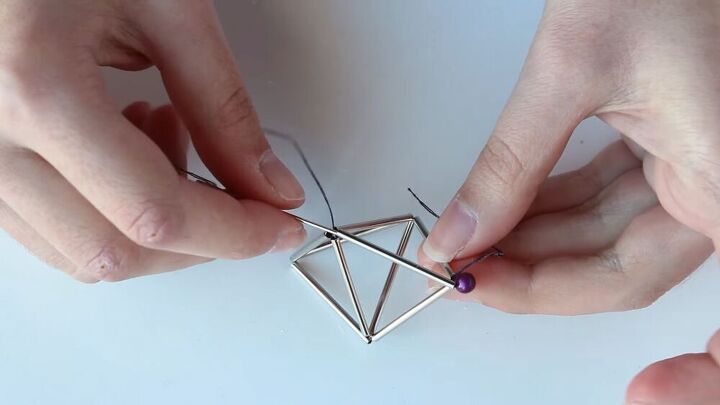
Finally, insert the needle through the first tube so that you revert to the point where you first started (by the bead).
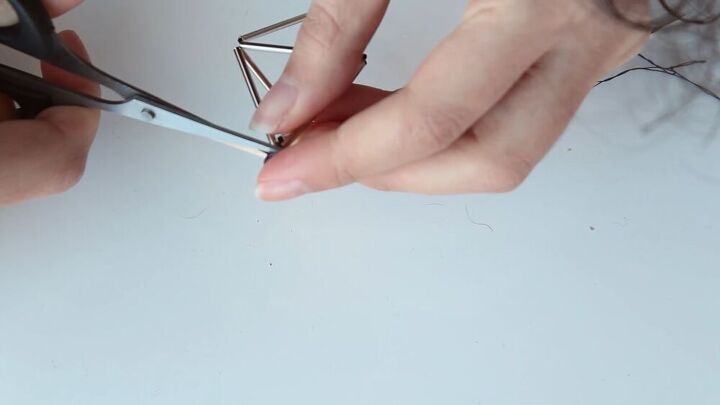
Tie a knot around the bead, then carefully remove it, so the shape is kept in place by the knot.
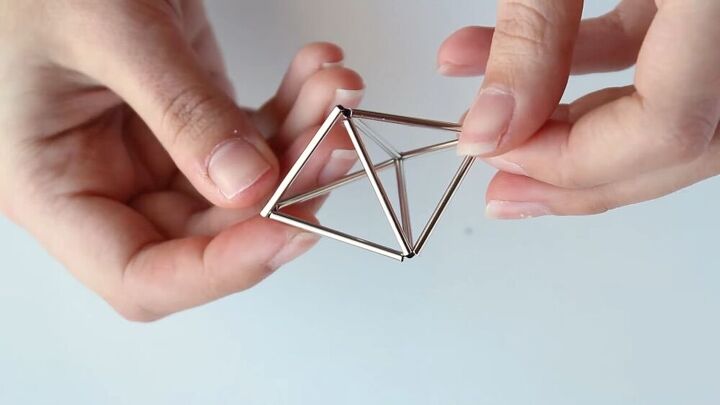
Here’s your beautiful geometric pendant.

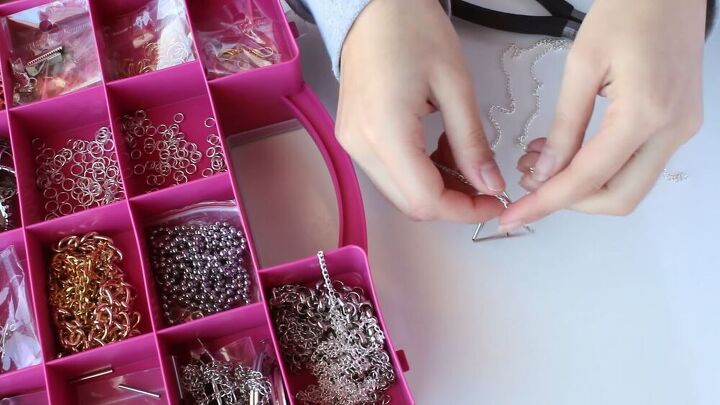
7. Attach the geometric pendant to a necklace
Attach a jump ring to the knot using a pair of pliers.

Cut around 30 inches of necklace chain.
Insert the necklace chain through the jump ring.
Finally, add the ends of the chain to another jump ring, and tighten it in place to secure it.
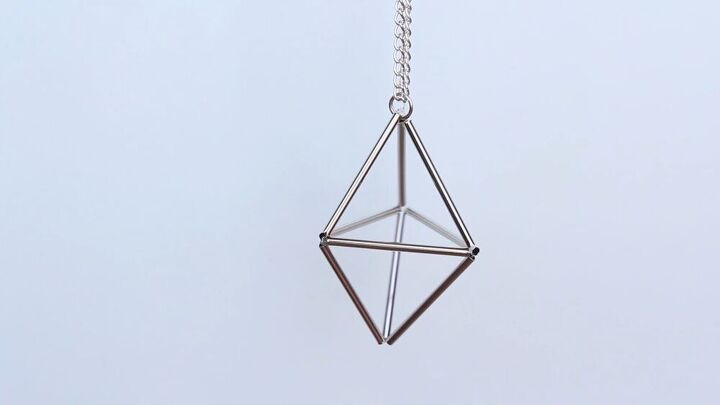
DIY geometric necklace tutorial
Ta-da! Your geometric necklace is finished and ready to wear! I really hope you enjoyed this fantastic geometric necklace tutorial - it's super quick and so satisfying to create. Let me know what you think of this 3D necklace pendant tutorial in the comments below.
The author may collect a small share of sales from the links on this page.


Comments
Join the conversation