DIY Wrap Dress Pattern | How To Draft A Pattern For A Wrap Dress From

Drafting a sewing pattern for a wrap dress is a very important step in making the wrap dress. The process of drafting a pattern can be daunting and complicated, but with the help of this video tutorial, it doesn’t seem all that bad. I will show you how to make a sewing pattern for a wrap dress from knit fabric.
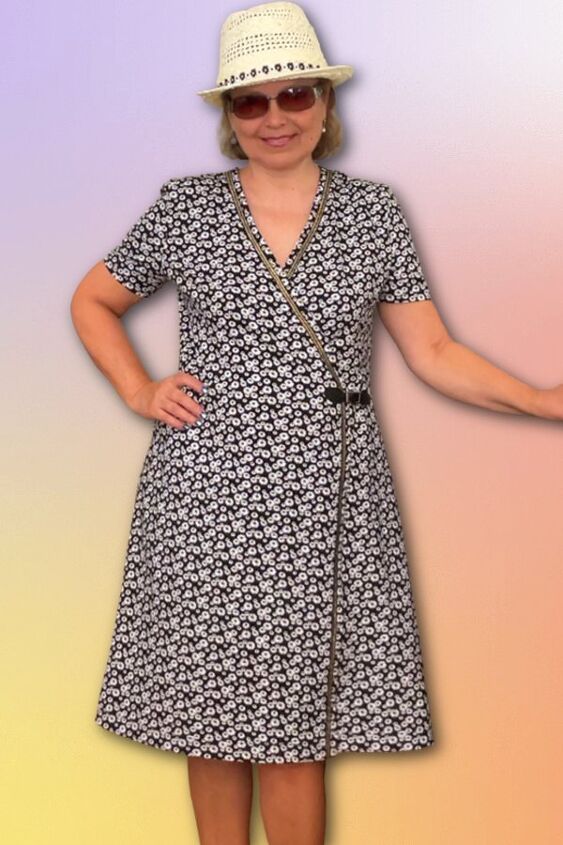
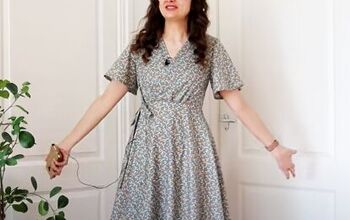
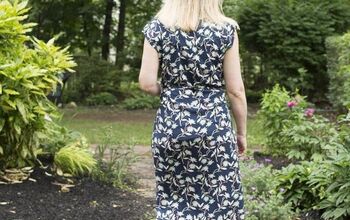
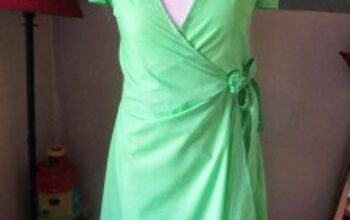
Below is the image of the wrap dress for which we are making the pattern. You can read all about this wrap dress in my tutorial DIY Wrap Dress.
The first step is taking your measurements.
You need to take the following measurements:
- Bust
- Hips
- Waist
- Shoulder
- Shoulder to waist (front)
- Shoulder to waist (back)
- High bust (measure at the front above bust from arm to arm)
- Back width (measure from arm to arm)
- Length of the dress from waist to hem
- Width of the arm (measure close to underarm)
- Length of the sleeve (in this case measure from underarm)
- Width of the arm 2 ( measure at the place where you want your sleeve finished)
Write the numbers on a piece of paper.
If you are not sure how to take your body measurements check out my tutorial How to take body measurements for sewing.
Note: Some of the links on this page are affiliate links. This means I will receive a commission if you order a product through one of my links. I only recommend products I believe in and use myself.
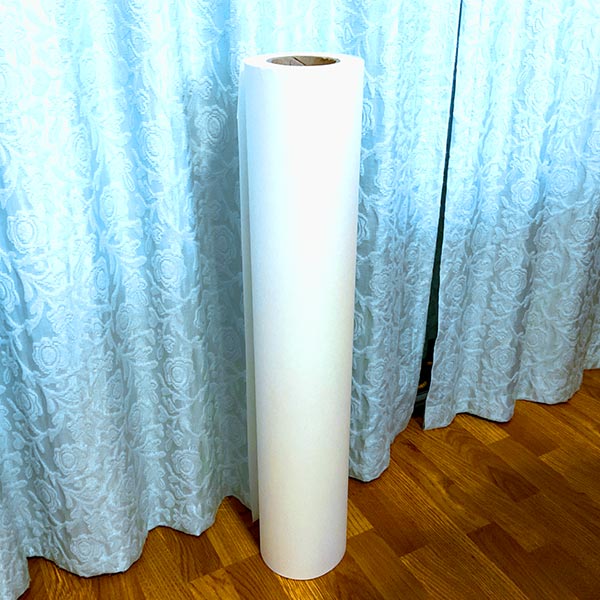
In order to make a pattern for the wrap dress, it’s better to use a large sheet of paper.
What paper do people use for drafting patterns? Well, I like to buy vellum paper from Amazon, but I know some people use medical paper which to me is not wide enough.
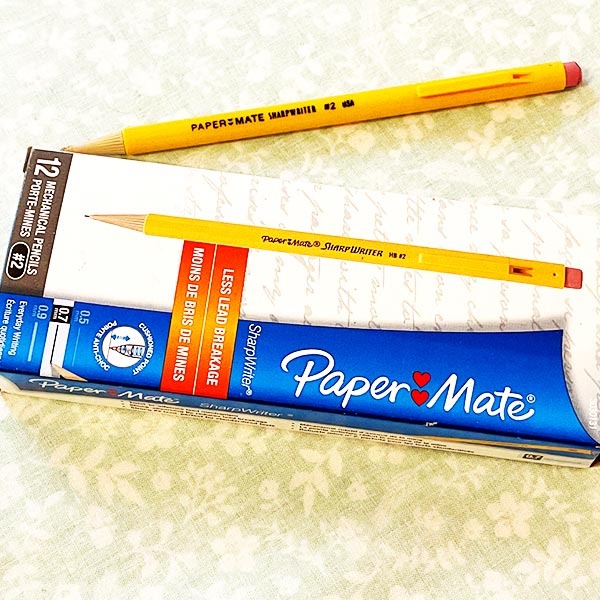
I like to draw patterns using these pencils: PaperMate SharpWriter. They have an extra-fine point that never breaks and the eraser is very good too – doesn’t leave gray marks on my paper. PaperMate SharpWriter pencils are popular with sewists who make their own patterns because they don’t require sharpening. Want to give this awesome pencil a try? Click on the image for more info.
I also like to use a French Curve Ruler for drafting patterns. We have so many pieces that require curves! This is a really handy tool that will make drawing curves much easier for you.

This pattern is specifically made for KNIT FABRIC.
The seam allowances are included and they are ¼ inch for all seams. But for the hem the allowance is a bit bigger (1 inch).
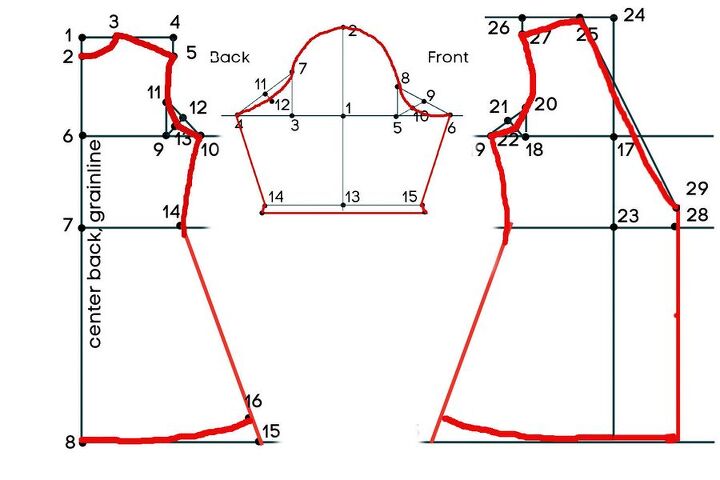
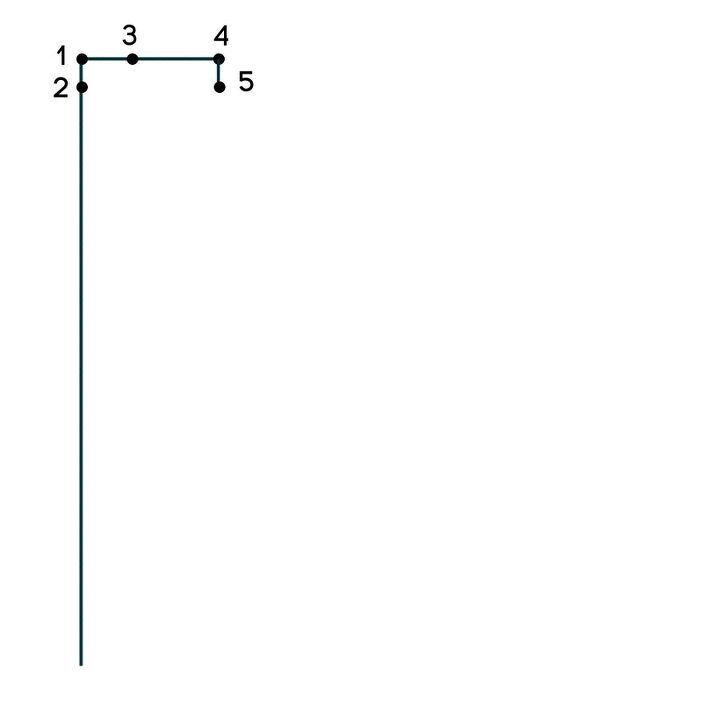
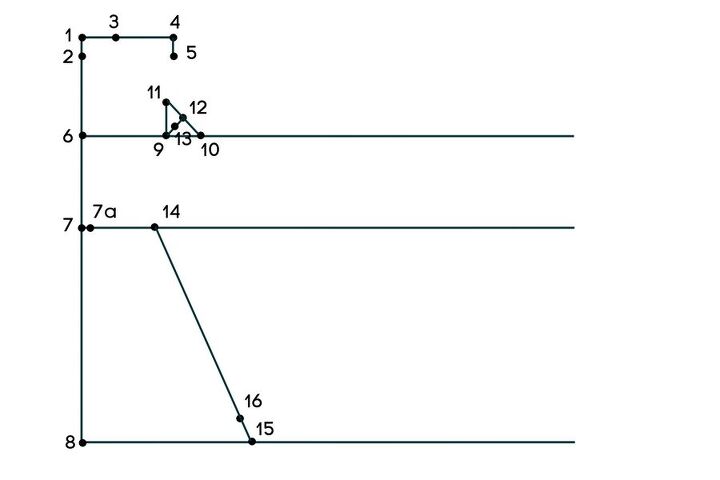
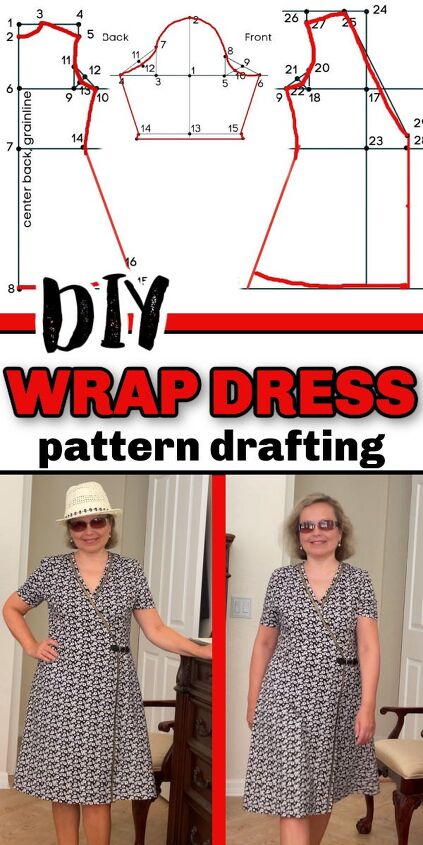
Draw a vertical line on your paper. It will be the center back line. Mark point 1 on this line. Measure 1 inch down on this line and mark point 2. Make a line perpendicular to that vertical line in point 1 and mark point 3. The distance between points 1 and 3 is 3 inches.
From point 3 on this horizontal line mark point 4. The distance between point 3 and point 4 is equal to your shoulder measurement. Draw a perpendicular line in point 4. Measure 1 inch down on this line and mark point 5.
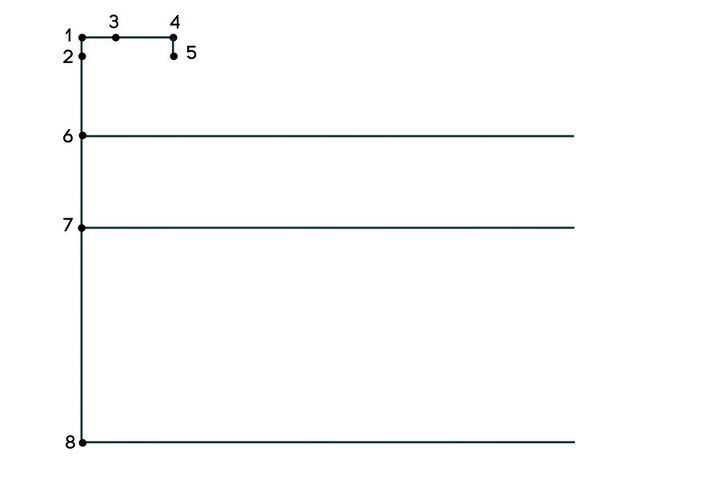
From point 2 go down on the vertical line and mark point 6. The distance between point 2 and point 6 is found using this formula: bust/6 plus 1 inch. For example, my bust measurement is 39 inches, so 39/6 + 1 is equal to 7.5 inches. Draw a perpendicular line in point 6. This is a bust line. Make it long enough for drafting the front of the dress.
From point 1 go down on the vertical line and mark point 7. The distance between point 1 and point 7 is equal to your shoulder to waist (back) measurement. Draw a perpendicular line in point 7. This is the waistline. Make it long enough for drafting the front of the dress.
From point 7 go down and put point 8, the distance between 7 and 8 is about 18-25 inches. It depends on how long you want your wrap dress to be. I put 18 inches. Draw a perpendicular line in point 8. This is the hem line.
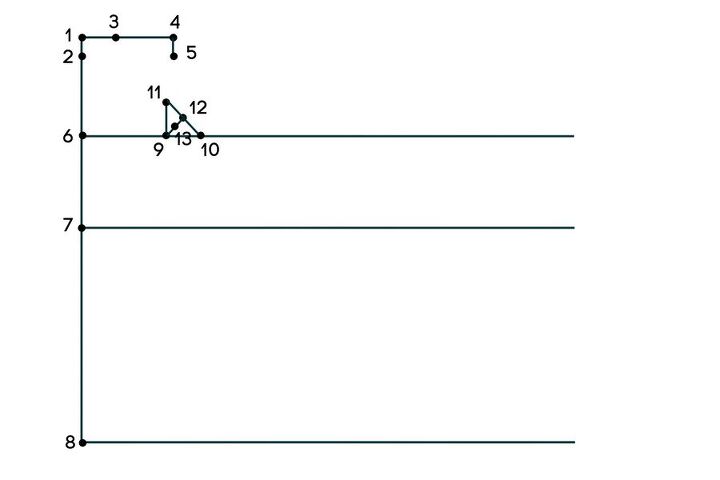
On the bust line mark point 9, the distance between points 6 and 9 is half of your back width measurement. For example, my back width is 15 inches so I mark the point 9 at 7.5 inches from point 6.
On the same line (the bust line) mark point 10, the distance between points 6 and 10 is equal to your bust measurement divided by 4. For example, my bust is 39; 39/4 is 9 ¾ inch. So I mark the point 10 at 9 ¾ inch from point 6.
Draw a line perpendicular to the bust line in point 9. Mark point 11 on this line. The distance between 9 and 11 is 2 ¾ inch for all sizes.
Next, connect points 10 and 11 and divide this distance in half. Mark point 12. Connect points 12 and 9 and again divide this distance in half. Mark point 13.
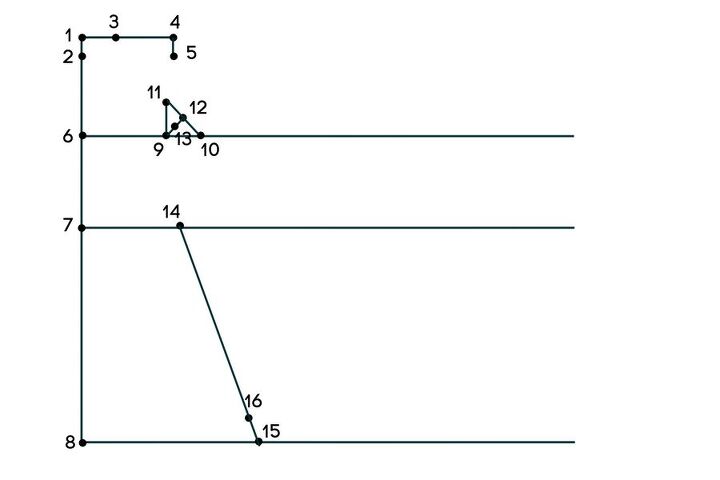
On the waist line mark point 14 at the distance equal ¼ of your waist measurement.
On the hem line mark point 15 at the distance 15 – 17 inches from point 8. I put 17 inches.
Connect points 14 and 15 and mark point 16 on this line. The distance 14 – 16 is equal to the distance 7 – 8.
The next point is optional though. If you have a straight back you don’t need to adjust the center back line. But if you have an enlarged lumbar curve you might need to consider this.
So, on the waistline, mark point 7a at ½ inch from point 7. Connect points 2 – 7a – 8 with a curved line. But you can also do it later after you sew side and shoulder seams – you try the dress on and see how it looks in the back. If necessary, make a center back seam adjusting for your back.
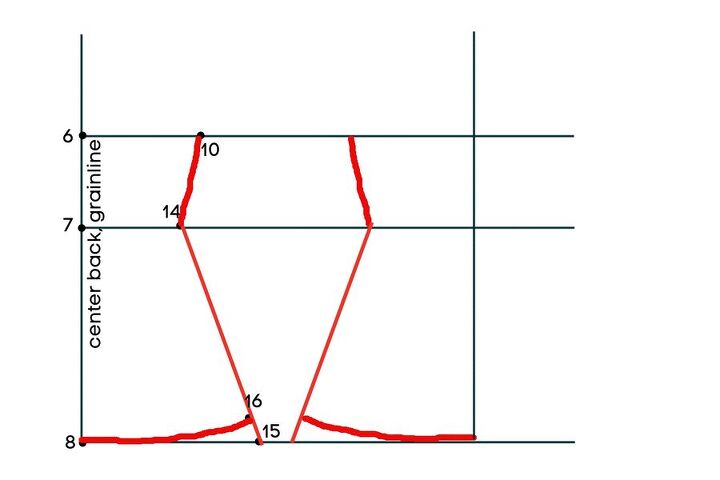
Now connect points 2 and 3 with a curved line (this is the neck line), 3 and 5. 5, 11, 13 and 10 (armhole); 14 and 16; 8 and 16. Make sure the line 10 – 14 – 16 doesn’t have any sharp corners and has a very smooth curved line at the waist.
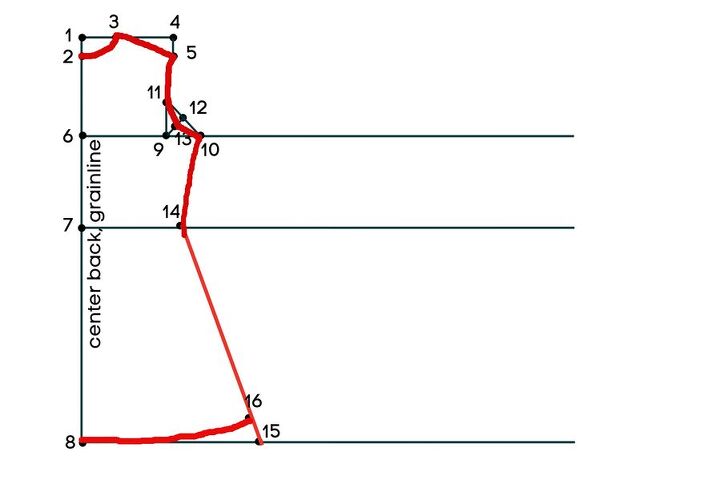
And this is the pattern if you decided to mark point 7a.
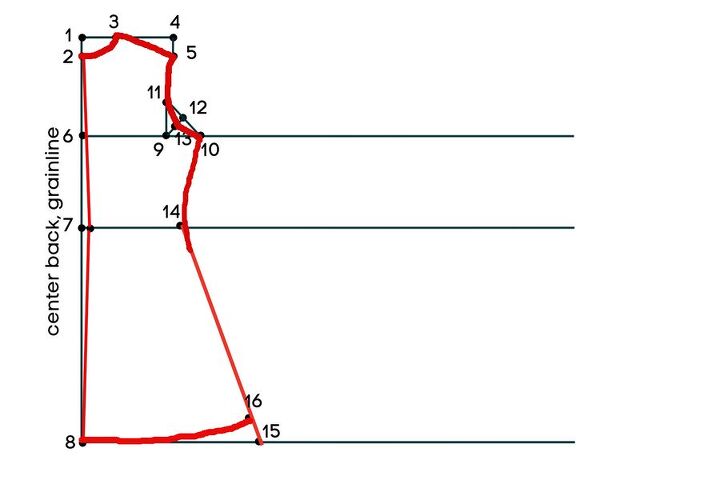
The pattern for the back of the wrap dress is done.
Now make a mirror copy of some part of the wrap dress as you see in the image below.
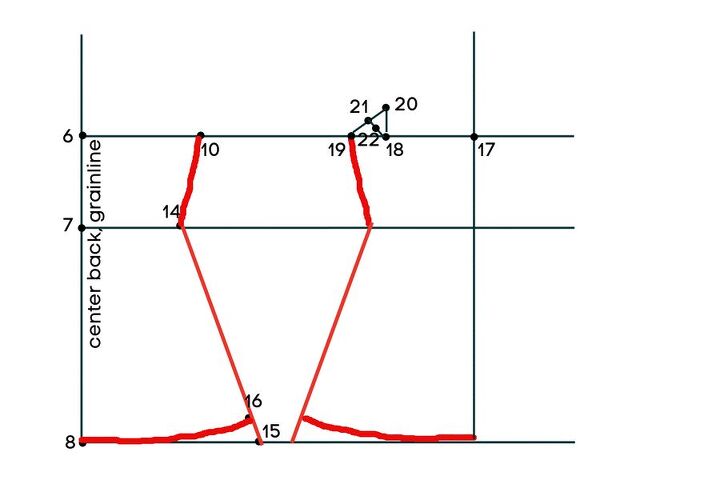
On the bust line mark point 17 (where the bust line intersects with the center front line).
Mark point 18 on this line. The distance between points 17 and 18 is equal to the HIGH BUST MEASUREMENT divided by 2. For example, my measurement is 13.5 inches, so I measure 6 ¾ inch to point 18.
Mark point 19 on this line. The distance between points 17 and 19 is equal to ¼ of your bust measurement (you made the mirror copy, remember?)
Make a perpendicular line in point 18 and mark point 20 at 2 inches from point 18.
Next, connect points 19 and 20 and divide this distance in half. Mark point 21. Connect points 21 and 18 and again divide this distance in half. Mark point 22.
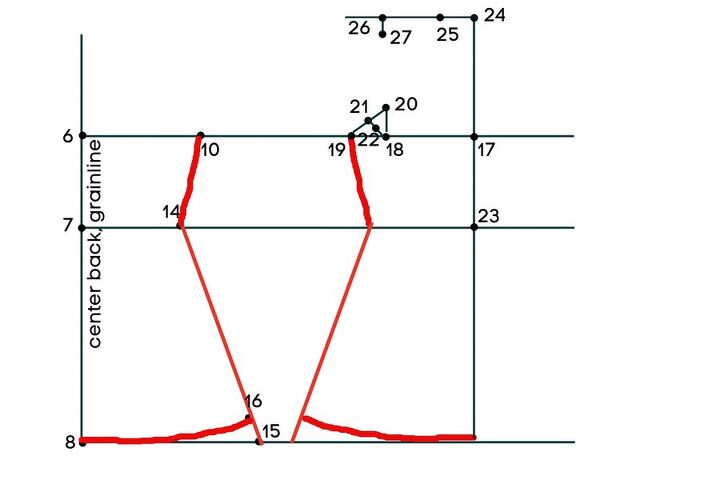
Mark point 23 on the waist line. From this point go up and mark point 24 at the distance equal to your shoulder to waist measurement (front). My number was 17 inches.
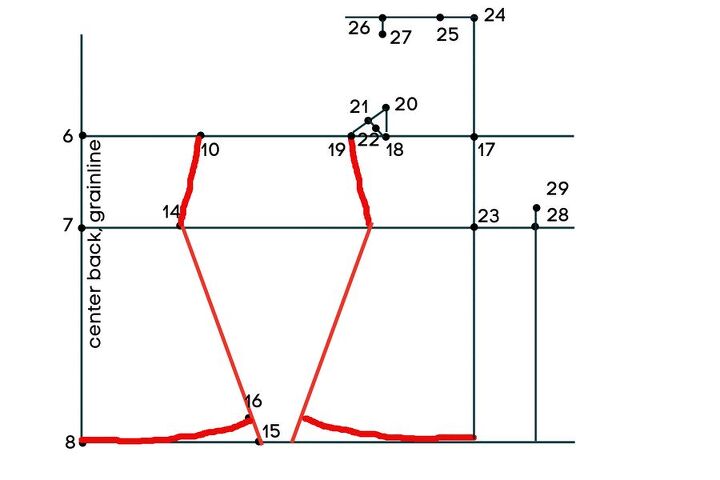
Make a perpendicular line in point 24 and mark 3 inches to the left. Mark point 25.
From point 25 go to the left and mark point 26 at the distance equal to your shoulder length.
From point 26 go down and mark point 27 at the distance 1 ⅜ inch.
Next, on the waist line mark point 28 at 7 inches to the right from point 23. Draw a line parallel to the center front line. On this line go up from point 28 and mark point 29 at 2 inches from point 28.
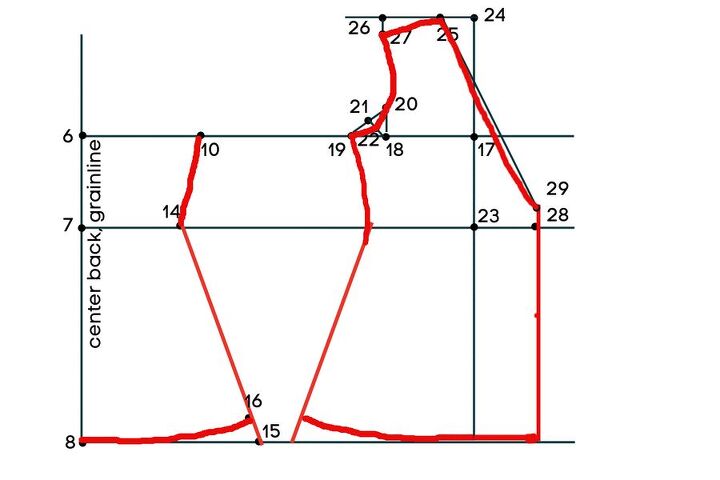
Now all points for the front of the wrap dress are ready. Connect points 25 and 27; 27, 20, 22, 19 (armhole); 25 and 29 (a little bit curved line).
Make sure the side seam line is a very smooth curved line at the waist (no sharp corners).
When drafting a pattern for the wrap dress, you can freely draw necklines in as many different shapes as you like.
For this wrap dress, I prefer a decent neckline – the one whose depth doesn’t show a lot of cleavage. The lowest point of the neckline in a wrap dress is usually located where the wrap line crosses the center front line, because this is where the two wrap lines overlap.
The higher this point, the more modest the neckline will be. The lower this point, the deeper it will be.
And, of course, you need to take into account the peculiarities of the bra with which you plan to wear this dress – draw a neckline that will not open the straps or cups of your bra (unless, of course, you set yourself the goal of accidentally demonstrating expensive new lingerie :-)).
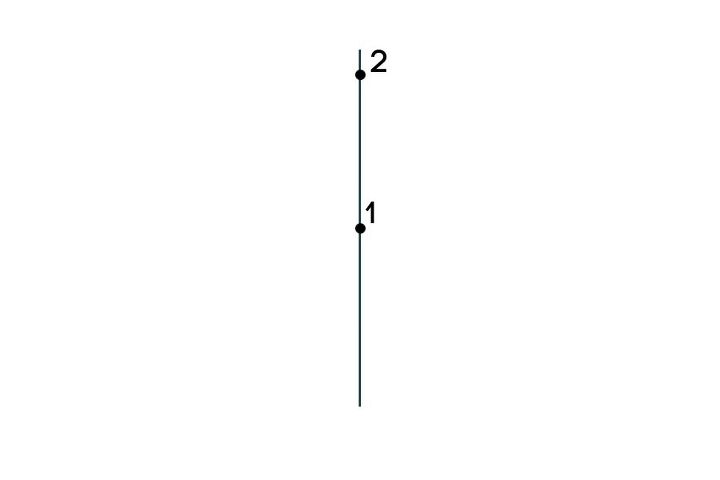
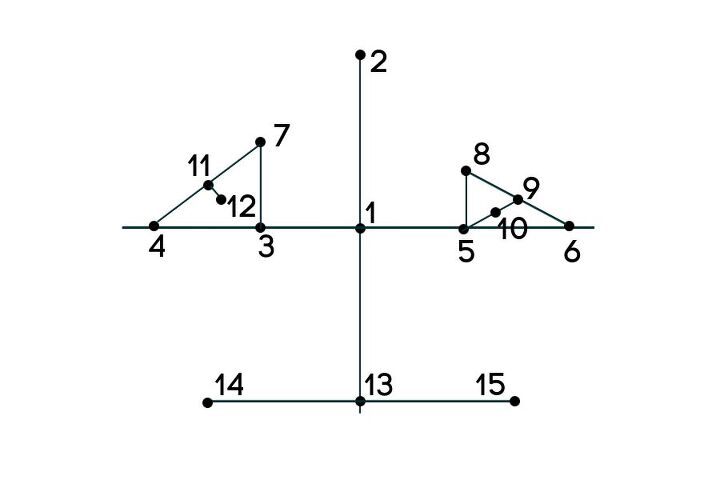
Draw a vertical line somewhere in the middle of your paper. It will be the center line and mark point 1 on this line. From point 1 go up and mark point 2. Use this formula for the distance between points 1 and 2: your bust measurement divided by 6 minus ⅝ inch. For example, my bust is 39 inches. 39/6 – ⅝ is equal to 5 ⅞ inch.
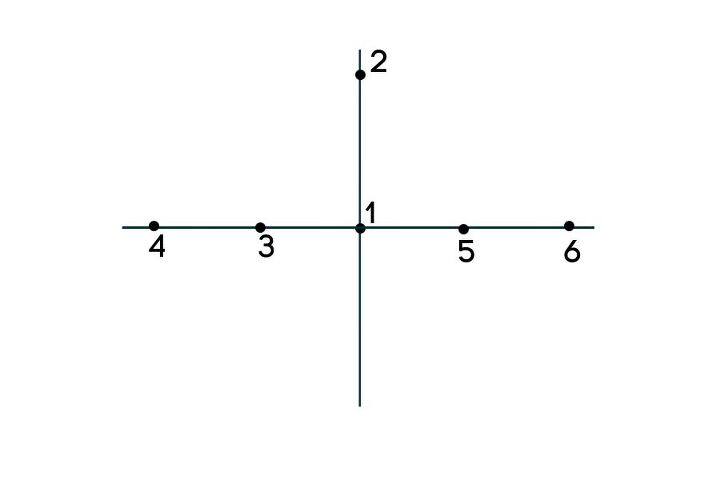
In point 1, draw a line perpendicular to the first vertical line. You will have to mark 4 points on this line.
The distance between all these points is the same and is equal to the width of the arm divided by 4 plus ⅜ inch. My number for the width of the arm is 12 inches, so for my pattern the distance was 3 ⅜ inches.
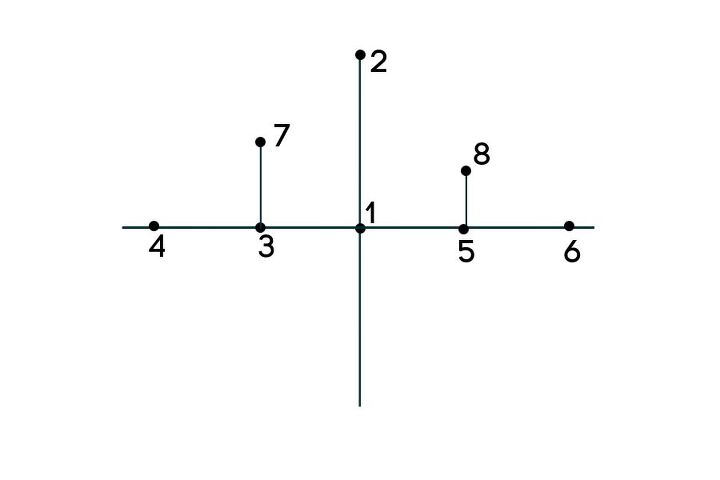
Draw perpendicular lines in points 3 and 5 and mark point 7 at 3 inches from point 3 and mark point 8 at 2 inches from point 5.
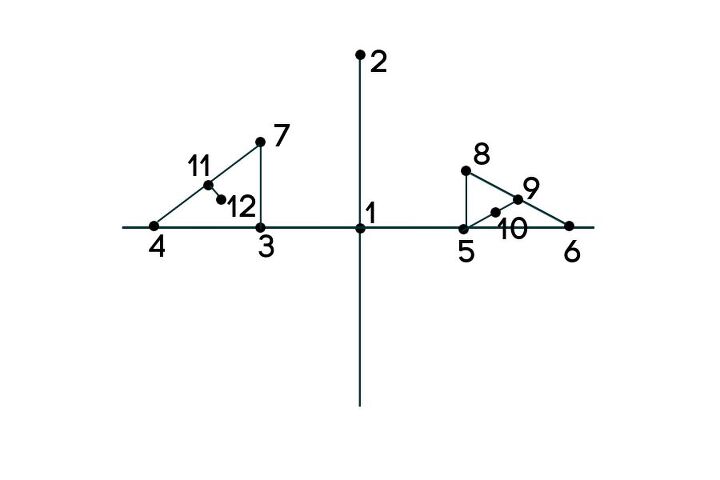
Next, connect points 8 and 6 and divide this distance in half. Mark point 9. Connect points 9 and 5 and again divide this distance in half. Mark point 10.
Next, connect points 4 and 7 and divide this distance in half. Mark point 11. Draw a perpendicular line at point 11 and mark point 12 on this line at ⅜ inch from point 11.
Measure the length of the sleeve from point 1 down. I wanted short sleeves so I measured 3 inches down from point 1. Mark point 13. Draw a perpendicular line in point 13. Mark points 14 and 15 on this line. The distances 13 – 14 and 13 – 15 are equal and it’s your width of the arm 2 divided in half.
For the sleeve, we need to add seam allowances for the hem of the sleeve. So add 1 inch for the hem.
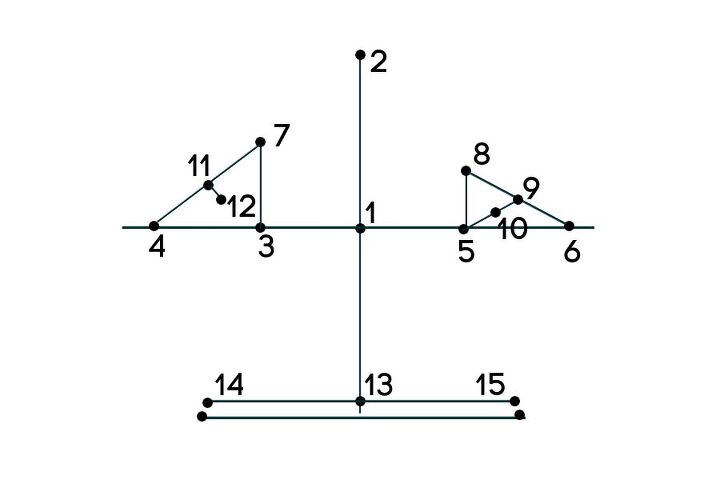
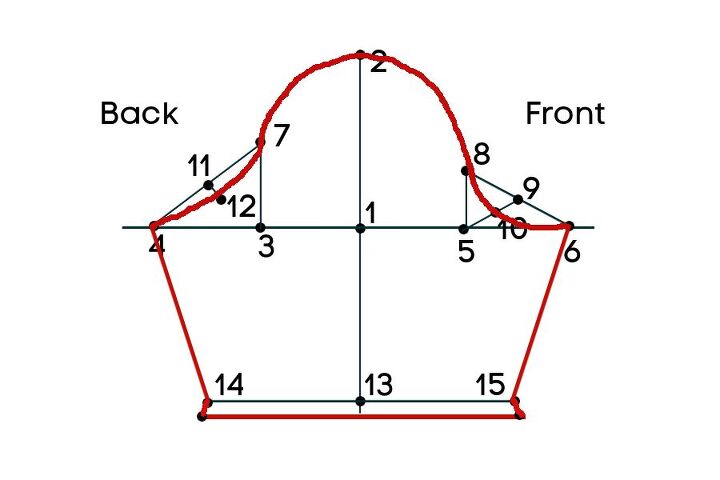
Connect all points with smooth curved lines.
For the back facing piece, draw a line 1 ½ ″ from the neckline, I think for the knit wrap dress a narrow facing piece is better.
And for the front facing, measure 3 inches from the straight edge of the front pattern and draw a straight line. Measure 1 ½ inches from the shoulder seam. Draw a smooth long curved line to connect your two lines.
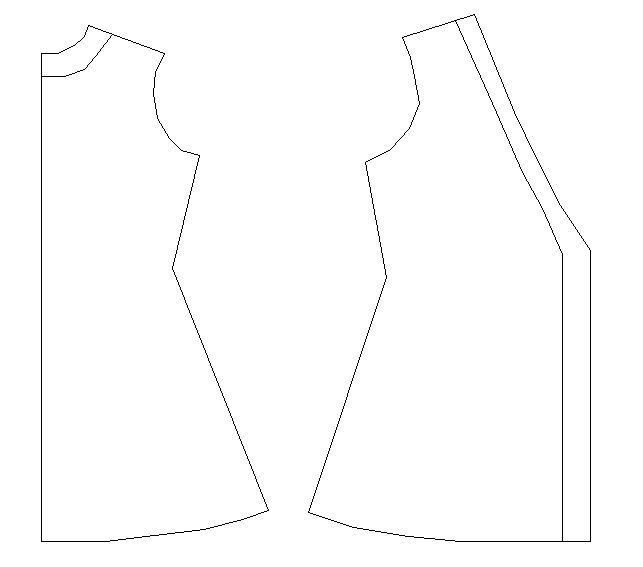
The sewing pattern for the wrap dress is ready and you can go to my tutorial DIY Wrap Dress if you want to continue with sewing the wrap dress.
Did you find this tutorial helpful? If so, save this pin (see below) on your sewing board so you can come to this tutorial later when you are ready to make a wrap dress sewing pattern, and follow me on Pinterest for more tips, tutorials, and inspiration!
The author may collect a small share of sales from the links on this page.


Comments
Join the conversation