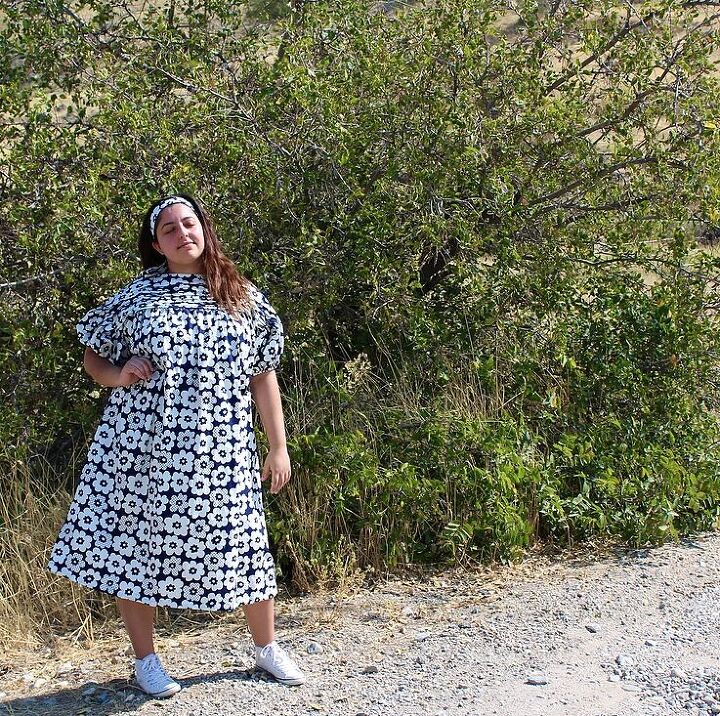
Marimekko Dress Dupe
Today I'll be showing you how I took the only Marimekko dress I own and drafted my own pattern to create a replica with my gorgeous Minerva fabric.
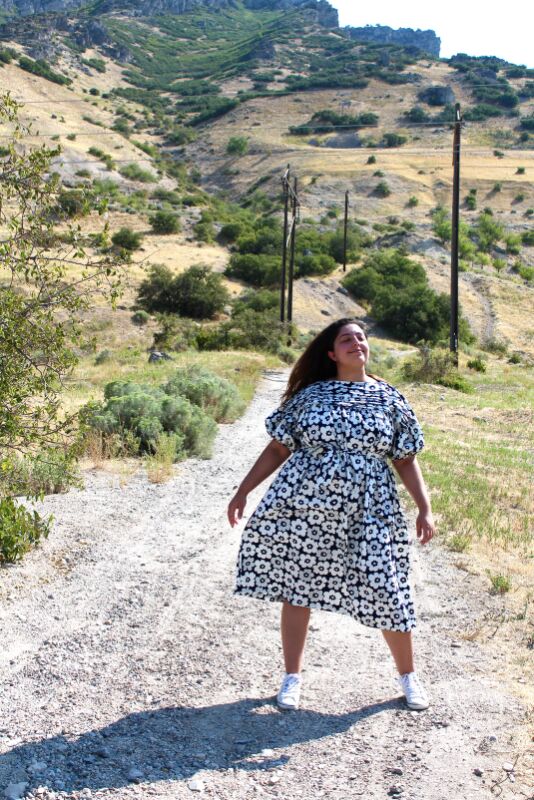
Every now and then I get an idea to replicate something I own. Historically it's been something simple, but quarantine has me bored so I decided to replicate the Maininki Pioni dress (pictured below) I own from Marimekko. Fun fact: This is the only dress I own from Marimekkko and that's because I got it on a super sale. So it only seemed right to try and draft this pattern so I could make myself more pretty versions.
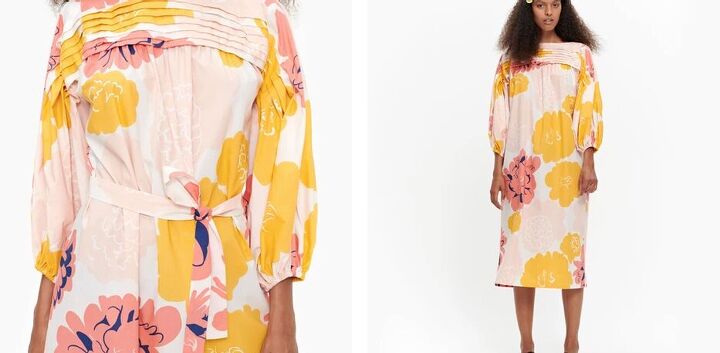
Now I was gifted this incredible fabric from Minerva so all the details of what I did will be up on their site shortly, but in this post I'll give a short break down. In the meantime, let's talk about this stunning fabric. It's so crisp yet falls so nicely. It feels exactly like my Marimekko dress so the quality is exceptional. You can find it here. I got it in the Navy and Cream colourway but honestly all the colourways are gorgeous.
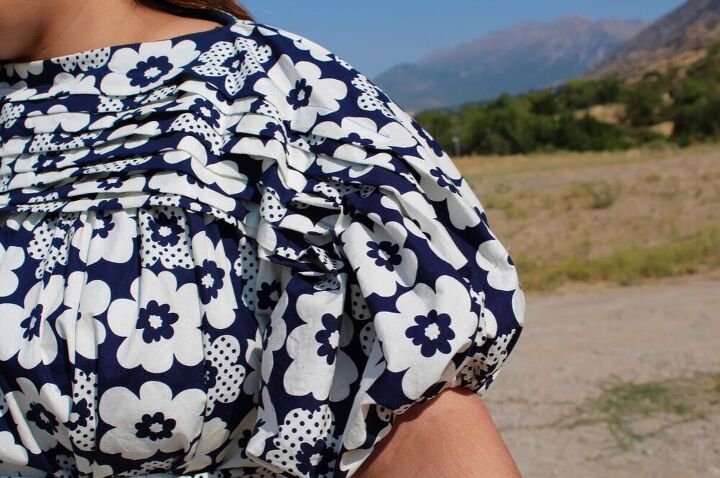
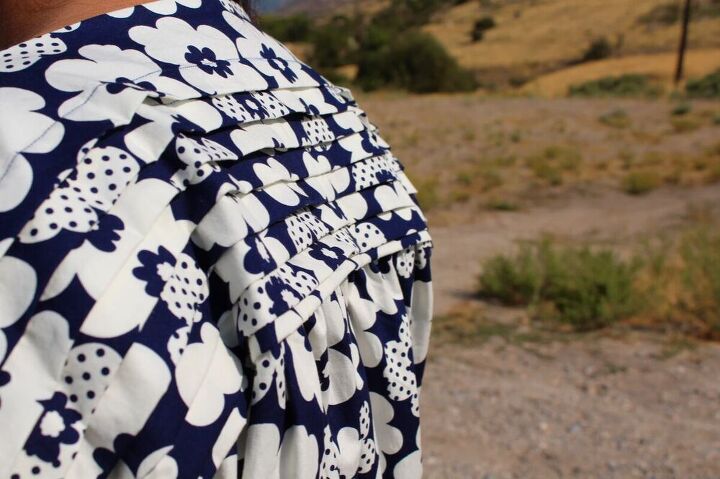
The dress pattern I created was pretty simple to sew up, but it was getting the pattern pieces together that was the hard part. The dress details are boat neckline, horizontal pleats across the top and back of the bodice, voluminous sleeves and a gathered portion under the pleats that extends to the dress. I've included a simple break down on the instructions but the more detailed process will be up on the Minerva site soon.
The bodice and sleeve are actually one pattern piece. The width is the width of the fabric you are using (mine was 44"). For the bodice length I used this formula:
(Number of pleats x Pleat size) + (Space between pleats x Number of pleats) + Seam Allowance for neckline and bodice hem.
So mine looked like this: (7x1.5) + (5/8x7) + (5/8x3*)
*NOTE: Multiplied it by 3 to account for the 5/8 gap between the neckline and first pleat.
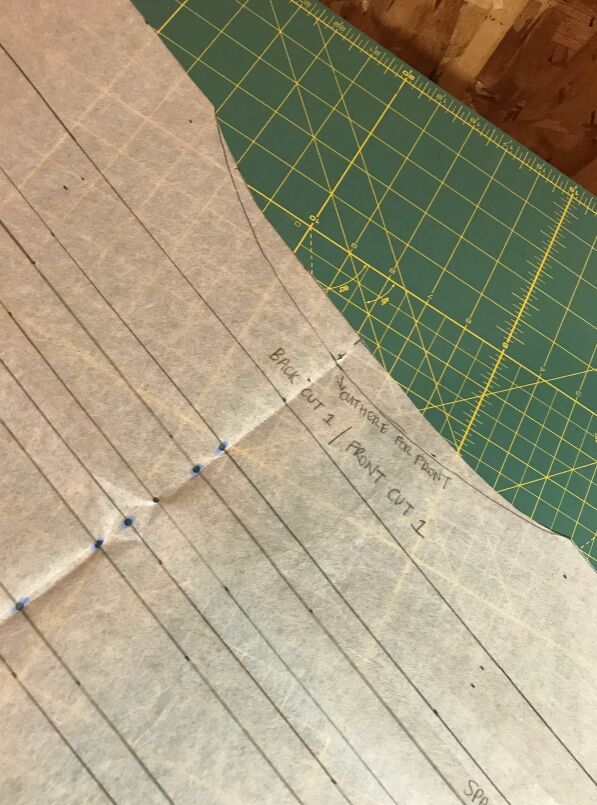
2. Draw in the neckline using an existing garment/pattern piece or freehand. I used a boat neckline for mine. I also traced the back on the same piece to save tracing paper. If you don't want to do this you will need to create two versions of step one!
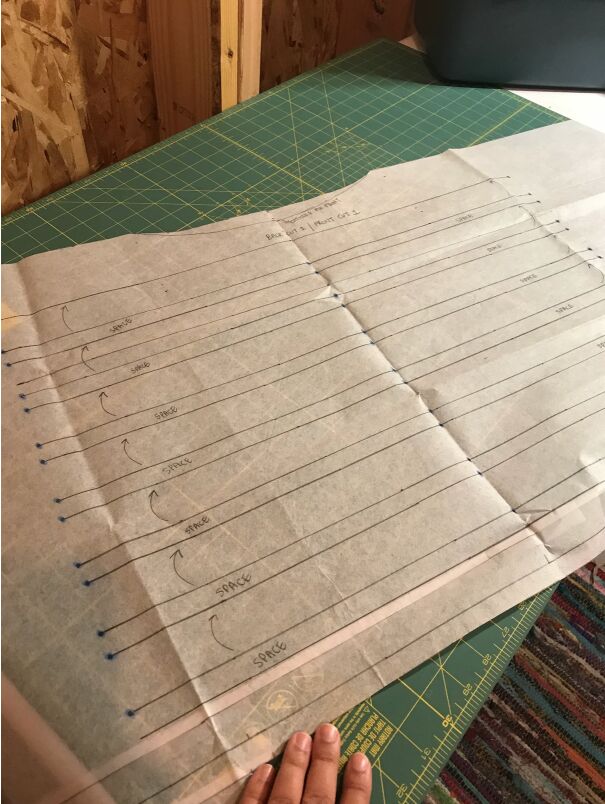
a. Fold the bodice/sleeve pattern piece in half to find the centre.
b. Measure 12" out on each side from the centre. This is the spot where your pleat will stop on each side.
c. Measure 1.25” down from the neckline. This is where the first pleat will start.
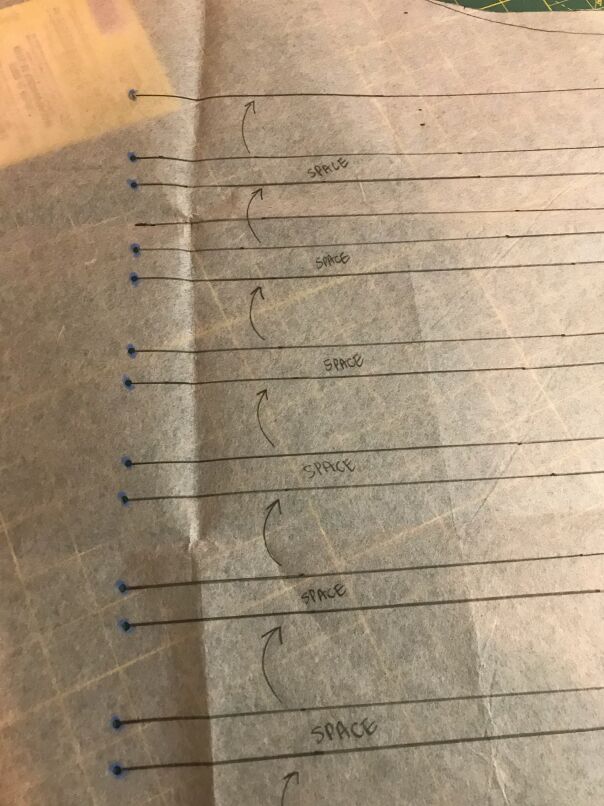
d. Measure 1.5" and add another horizontal line (first pleat marked).
e. Measure down ⅝” down and drew that line in (that’s my first space between pleats 1 and 2).
f. Repeat until all 7 pleats are drawn in.
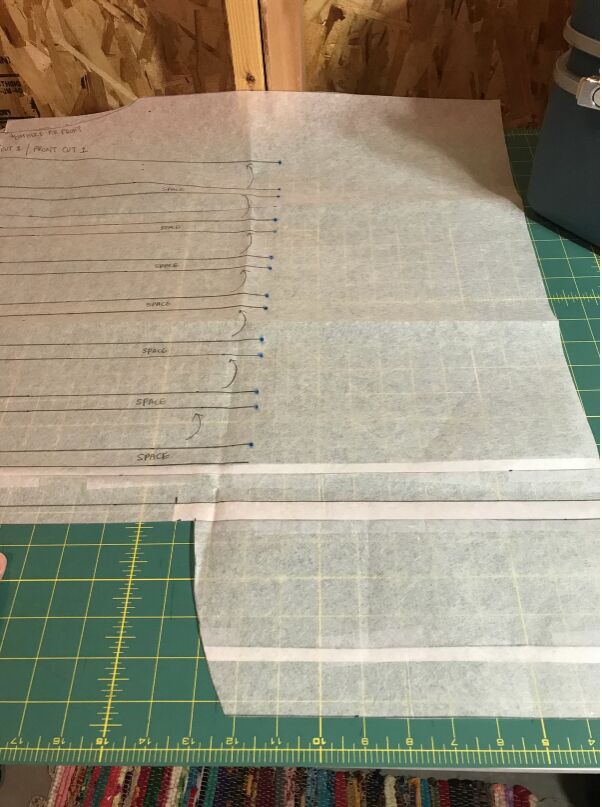
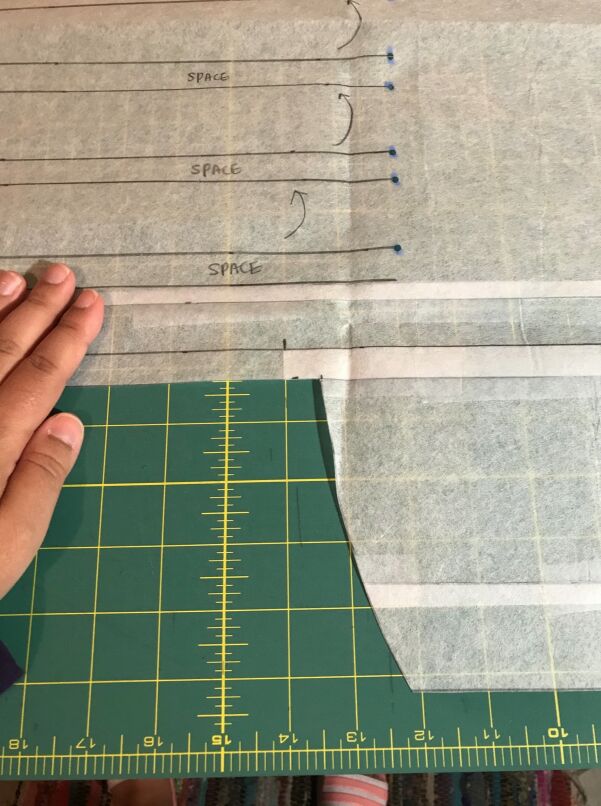
Mark points 9" out on each side. I added 5.5” in length and then free-handed a slight curve between those points. This pattern piece is now done and should resemble something like the picture below.
- Trace the sleeve curve from the bodice/sleeve pattern piece.
- Draw a line across from the top of that curve. The length of this line will be gathered and attached to the top piece we just made. I determined the length as follows:
(Final Measurement on garment) x 1.75 / 2 (as this piece is designed to be cut on the fold).
Mine looked like this: 18" x 1.75 / 2 = 15.75" ( I rounded it up to 16").
3. Determine length and add in seam allowance. Mine ended up being 44” down and I’m 5’4” for reference. The seam allowance I used throughout is ⅝”. This pattern piece should look like this picture below.

- Cut one bodice/sleeve piece for the front. If you have one piece for the back and front like I did then make sure you cut out the front neckline as marked.
- Cut one bodice/sleeve piece for the back.
- Transfer pleat markings to both the back and front bodice/sleeve pattern piece.
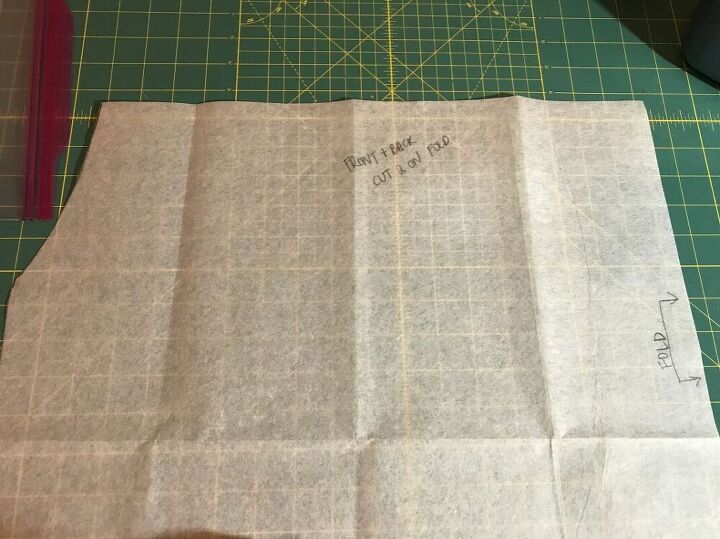
- Cut two of the skirt piece on the fold.
Basic Construction Instructions:
1. Sew the pleats first.
2. Gather and attach the skirt.
3. Attach the front and back at shoulder seams, finish seams.
4. Finish neckline with a facing or bias tape.
5. Attach the sides and finish seams.
6. Hem dress and insert elastic at sleeve hems. Done.
Just a reminder, I'm completely self taught and this is my hobby so I've tried to explain this as best as I can. If you need any further help and would like to try this out please don't hesitate to reach out and I will do my best to help.
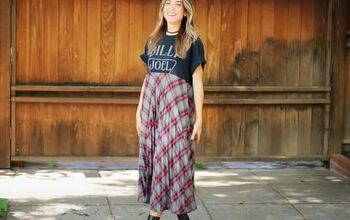
I hope you enjoyed this post. This was really out of my comfort zone, but so worth the effort. So what do you think? Do you think this was a successful copy?


The author may collect a small share of sales from the links on this page.


Comments
Join the conversation