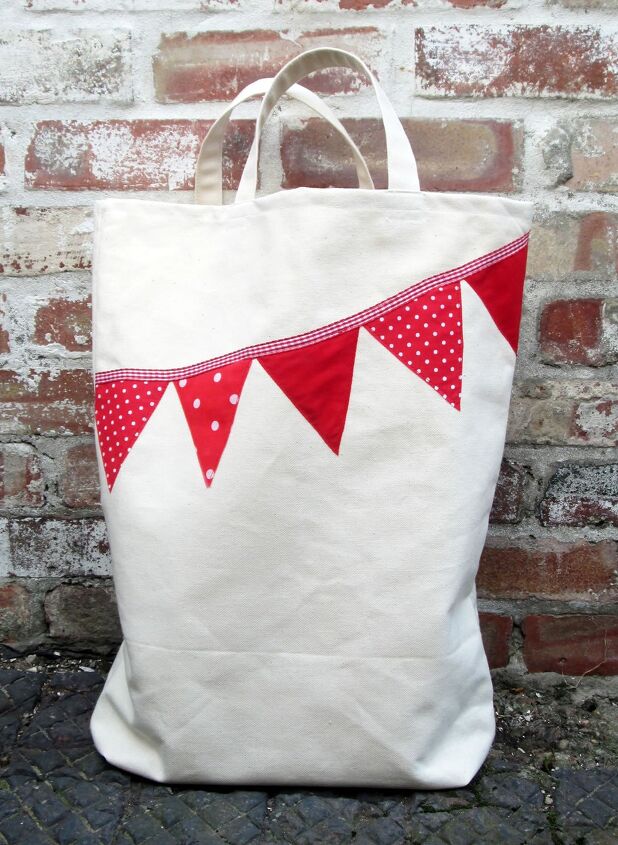
Bunting Tote Bag Tutorial
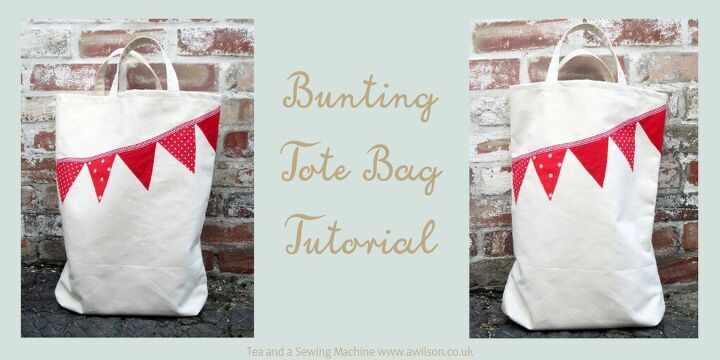
Bunting Tote Bag Tutorial
This is a post I actually wrote 3 years ago when a new law was introduced in the UK that required shops to charge for plastic bags.
I’m recycling it because it fits in nicely with the Year of Bunting!
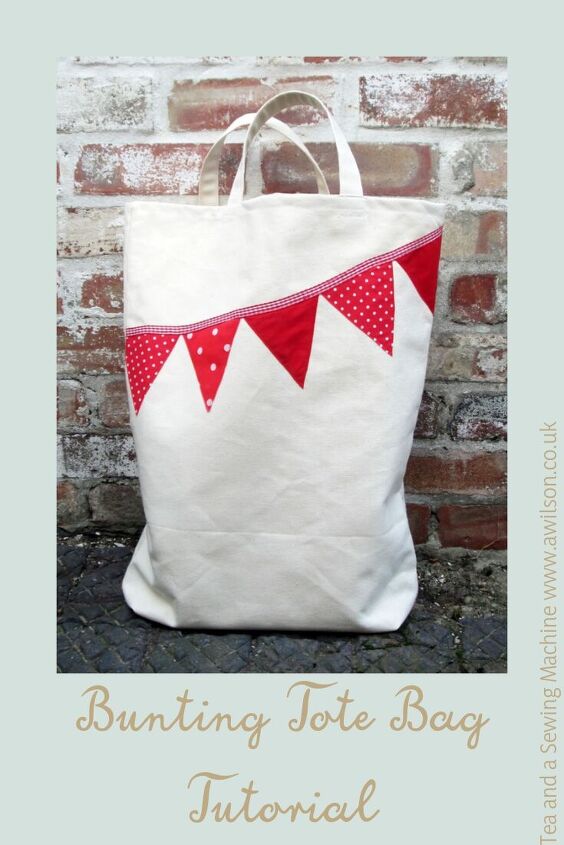
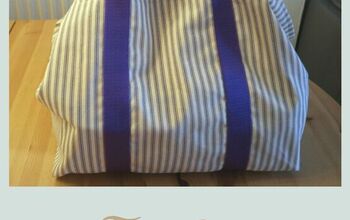
For making the bunting tote bag, I’d recommend using a strong fabric, like a heavy weight cotton. The canvas I used was left over from some curtains I’d made, and the appliqued bunting from scraps of cotton from dresses and other things.
If you don’t have any canvas, you might have an old tablecloth or some curtains you could use.
If you’d rather use a lighter cotton or polycotton fabric, you could line it to make it stronger, or just decide to use it to carry bread and flowers instead of potatoes and gallons of milk!
The bunting tote bag has boxed corners, which means that depending on what you put it, it should stand up.
How to Make a Bunting Tote Bag
1. Cut a rectangle of fabric. Good dimensions would be the same width as a Lidl bag (or other bag for life) and twice as long, plus seam allowance. Mine measured at 48 cm x 120 cm.
If you are using fabric with a directional print, cut 2 rectangles and sew them together.
2. If you do not have an overwhelming urge to cover everything in bunting, you can skip this bit and go straight to Step 3.
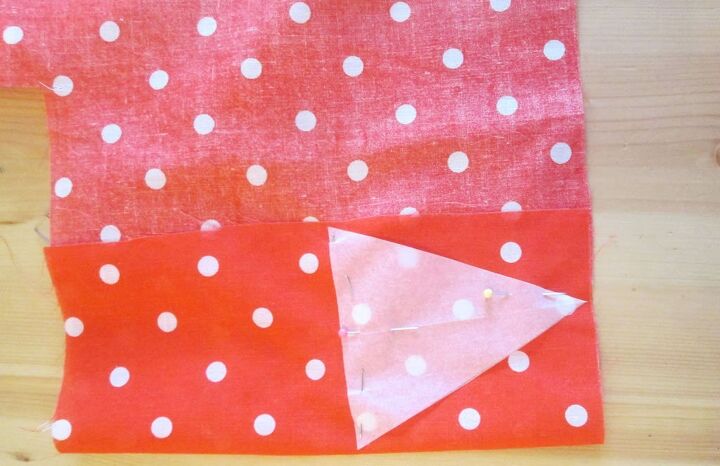
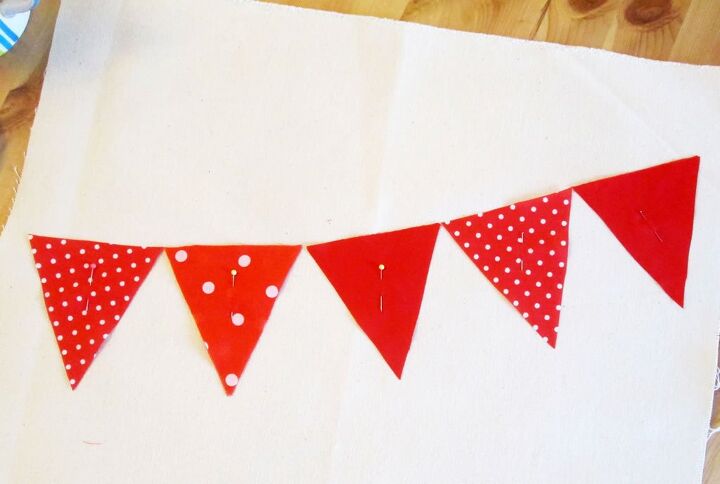
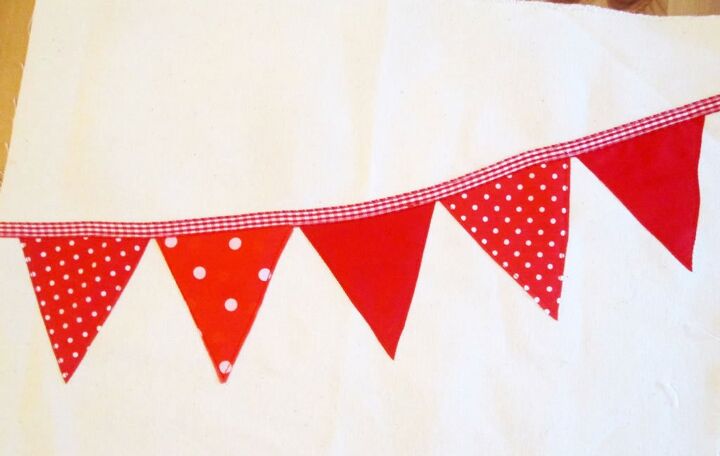
To make the bunting, cut a rectangle 9 cm x 10 cm. Fold in half lengthways. Cut diagonally from the folded corner to the corner opposite. Use this triangle to cut 5 triangles. Position them onto the fabric, allowing for seams. Pin in place, then applique them to the fabric. Sew a piece on of ribbon so that it covers the tops of the triangles.
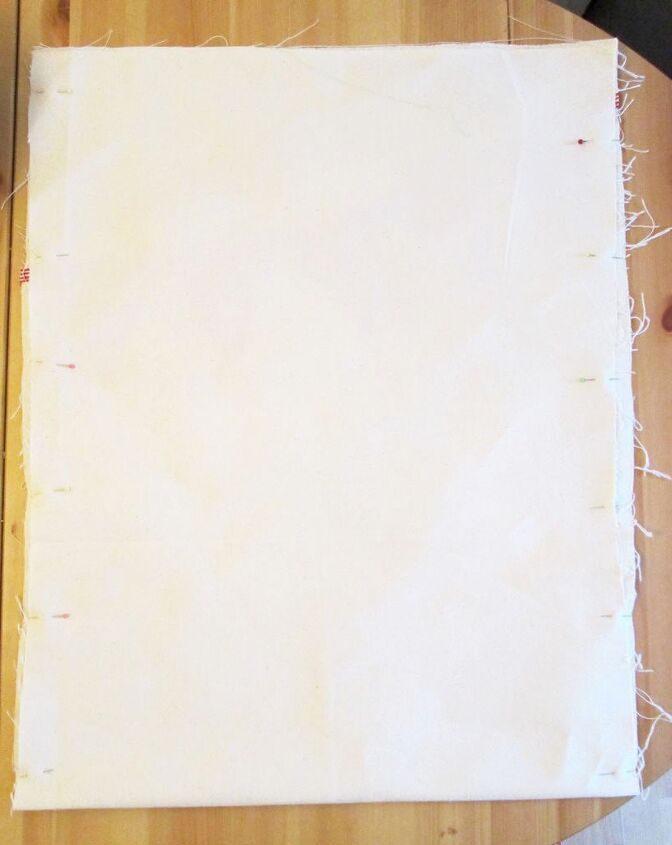
3. With the right sides together, pin the side seams then sew them up. Trim the seams. Finish the seams with zigzags, or an overcasting stitch if you don’t have an overlocker. This could be the difference between getting all of your shopping home and the bag breaking and veg and milk and stuff ending up all over the road!
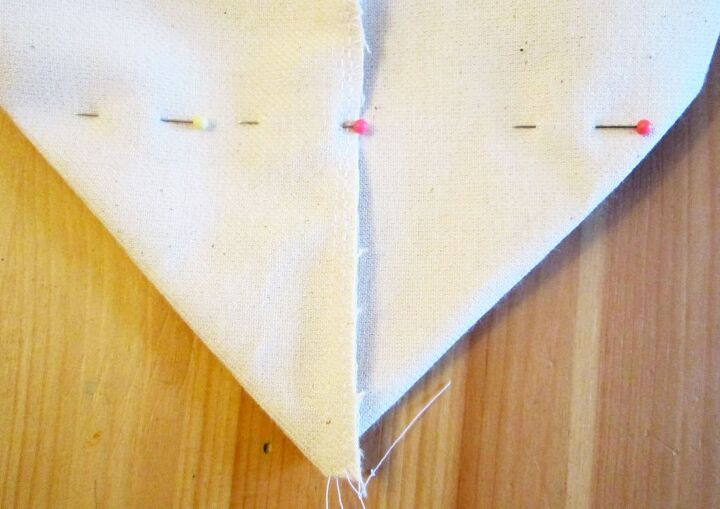
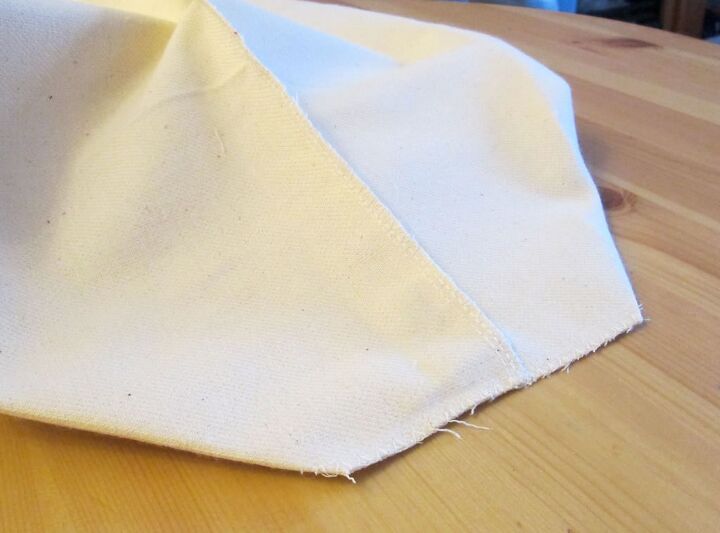
4. To make the boxed corners, press firmly on the fold at the bottom. Squash one of the corners flat so that the seam is aligned with the fold at the bottom. Measure up 6 cm from the corner. Pin. Sew across the corner. Cut the corner off. For more detailed instructions for making boxed corners, visit this tutorial here.
5. Hem the top of the bag.
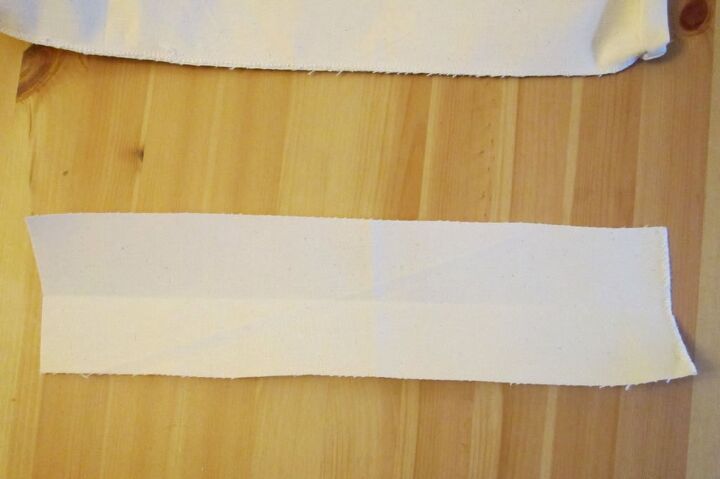
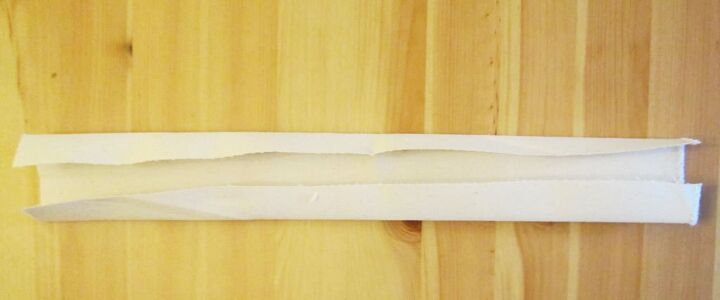
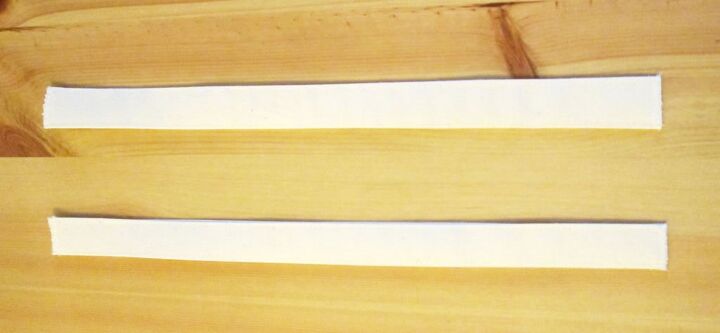
6. To make the handles, cut 2 pieces of fabric 40 cm long and 10 cm wide. Fold in half lengthways. Then fold the outer edges into the middle. Fold in half and pin. Sew. I like to sew along both edges so that it looks symmetrical. Repeat for the other handle.
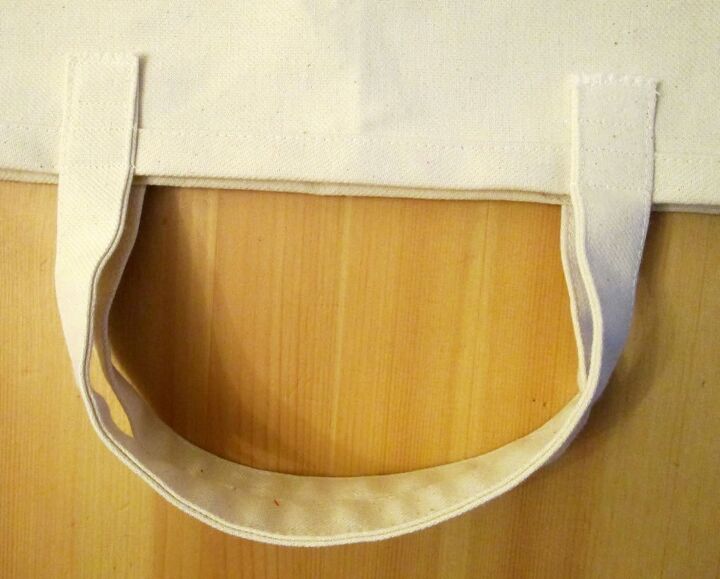
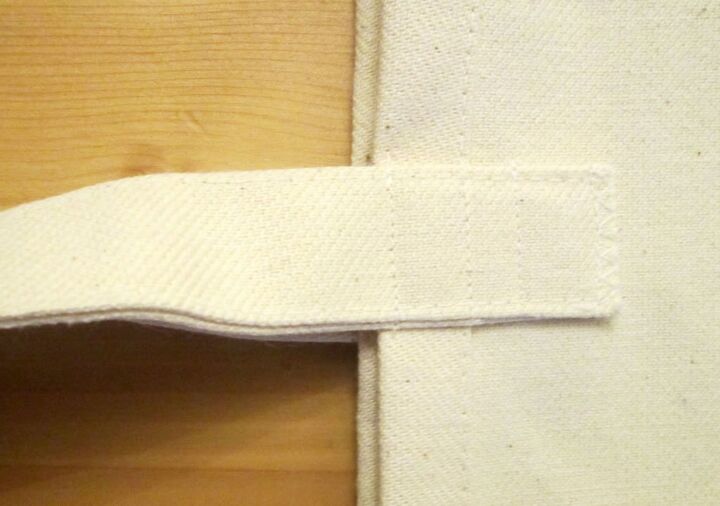
7. Sew the handles to the bag. You will need to sew them on in a few places to ensure that they stay on when the bag is full of shopping.

Now all you have to do is remember to take it with you when you go shopping!
Tips
Heavy weight fabric will be strongest, but other fabrics can be made stronger by adding a lining.
Ripstop will make good bags that are both strong and waterproof.
You could make bunting tote bags in different sizes.
Decorate them as you like to jazz them up.
If you will be carrying your shopping a long way, add some wadding to the handles and quilt them to make them more comfortable.
They make great last minute Christmas gifts and are a good way of using up fabric that you don’t know what to do with!
The author may collect a small share of sales from the links on this page.


Comments
Join the conversation