Easy Knot Tutorial: How to Tie a Square Knot for a Bracelet

Today, I’m going to introduce you to a simple knotting technique called the square knot. This is one of the most basic and versatile macrame knots. It is an easy technique to master and creates an interesting pattern.
If you’re planning on making some bracelets, this mini tutorial will show you how to tie a square knot for friendship bracelets.
The only material needed for this project is cord. A thicker cord results in a thicker bracelet with a more prominent knotting pattern, so keep that in mind when choosing your cord.
You'll also need something to hold the knot while you're tying it. I used a clipboard for this bracelet.
Before we begin learning how to tie a square knot for a bracelet, I want to share two tips:
Firstly, as you knot you may forget the side of the square knot you were working with, if this happens, look for the side that has the loop and begin the next knot there.
Secondly, your patterns will look more consistent if you tighten your cords evenly when you make each square knot.
A couple of important macrame terms you'll need to know are:
Working Cord: The cord that is used to make the actual knots. In my example, the working cords are the blue and pink cords.
Filler Cord: The cord that your knots wrap around. In my example, this is the orange cord.
Great, let’s begin our step-by-step guide on how to make a square knot bracelet!
Tools and materials:
- Cord
- Clipboard (or something similar)
1. Cut cord
Cut three pieces of cord that are long enough to work with. You can use whatever color cord you want. I am using three different colors to make visualizing each step easier.
2. Secure cord
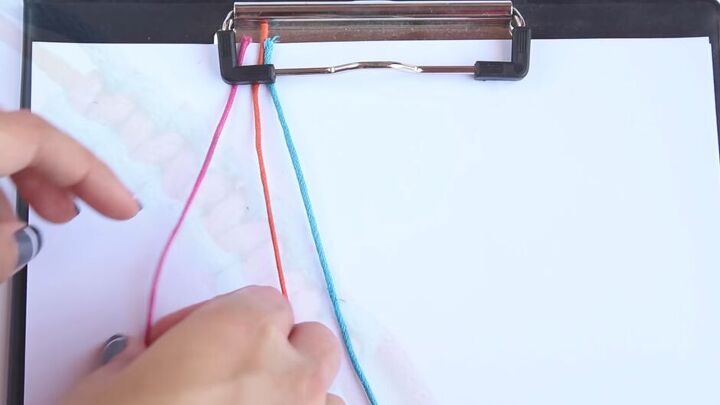
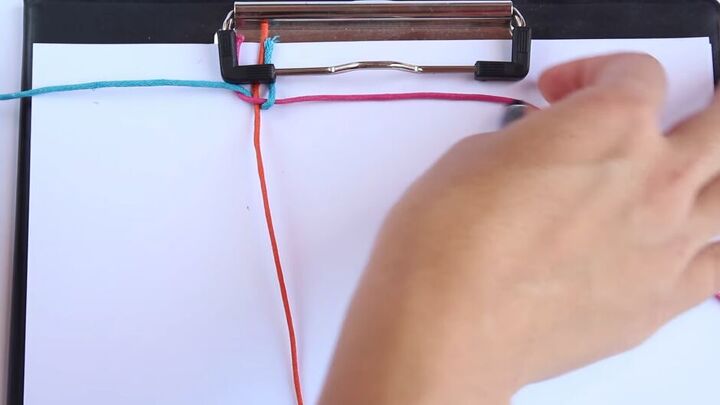
Secure the tops of the three cords under the clip at the top of your board.
You want to make sure the orange filler strand is in the middle and the two working strands are on the outside.
Secure the other end of your filler strand to the bottom of your clipboard with another clip or tape.
3. Start knotting
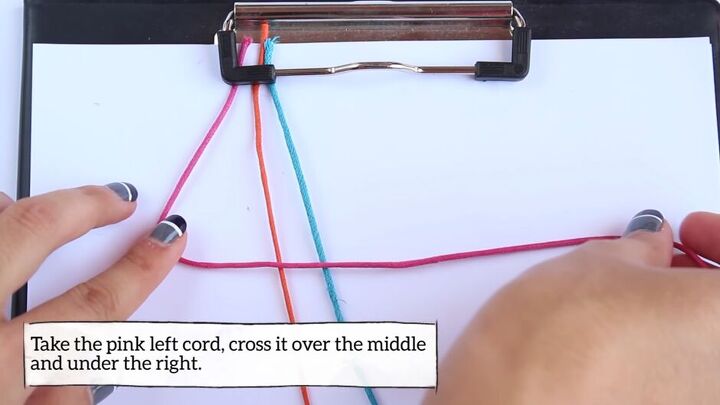
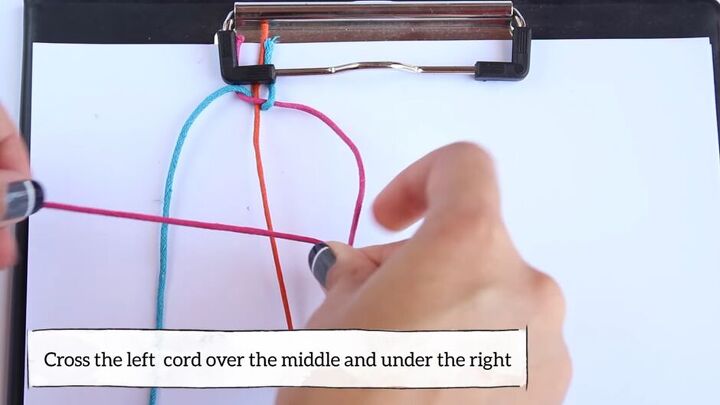
Take the pink working cord and cross it over the orange filler cord.
Then take it under the blue cord on the right.

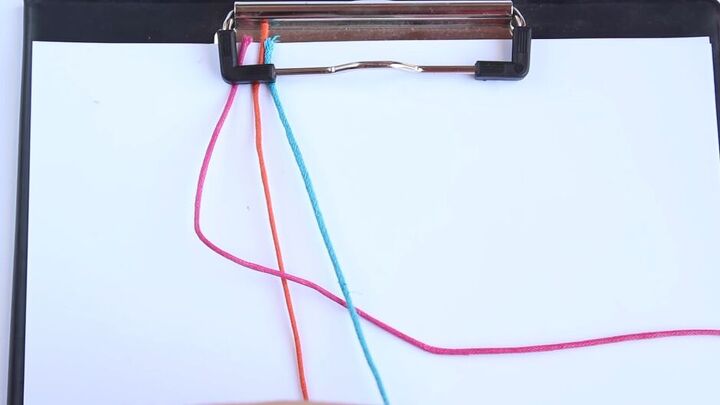
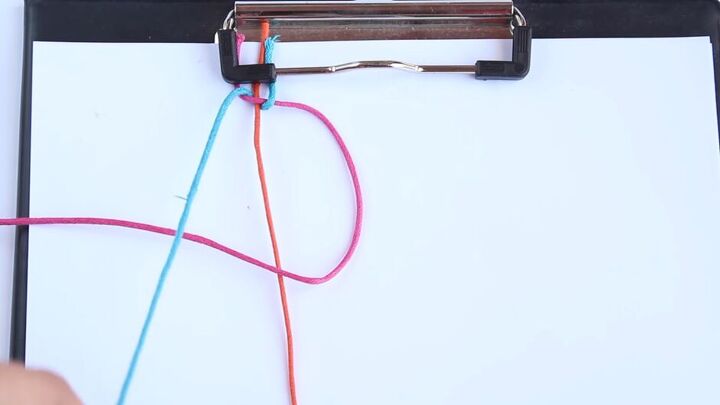
Now take your blue working cord, slide it under the orange cord and up through the loop.
Pull the two working cords slowly, making sure you are tightening each side equally.
Continue tightening the knot until you reach the top.
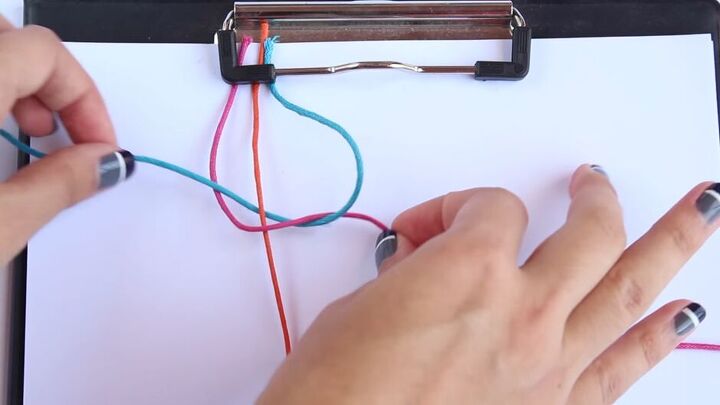
Now for the second half of the knot: cross the right pink cord over the orange filler cord.
Bring it under the blue cord on the left.
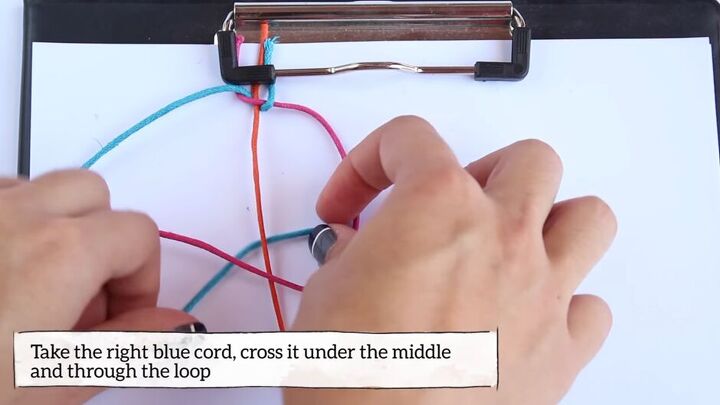
Take the blue cord, slide it under the middle and up through the loop.
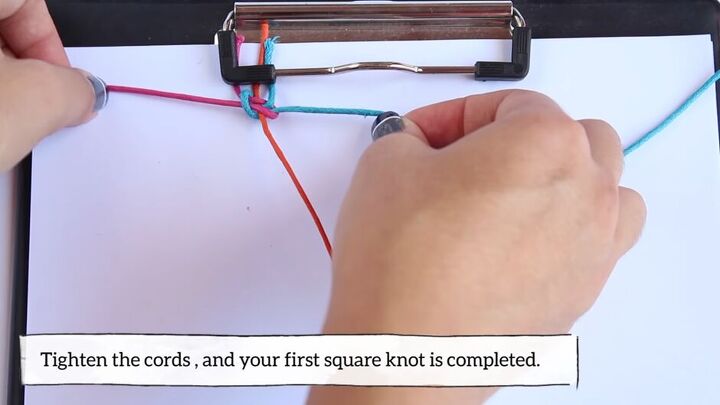
Tighten the cords, and your first square knot is completed. So simple!
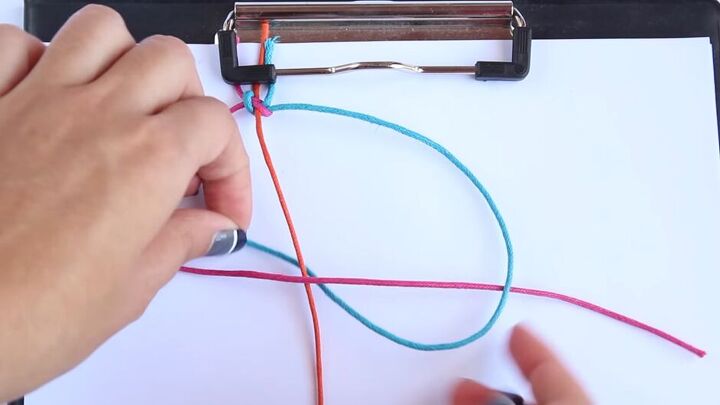
Continue the steps above, knotting and tying.
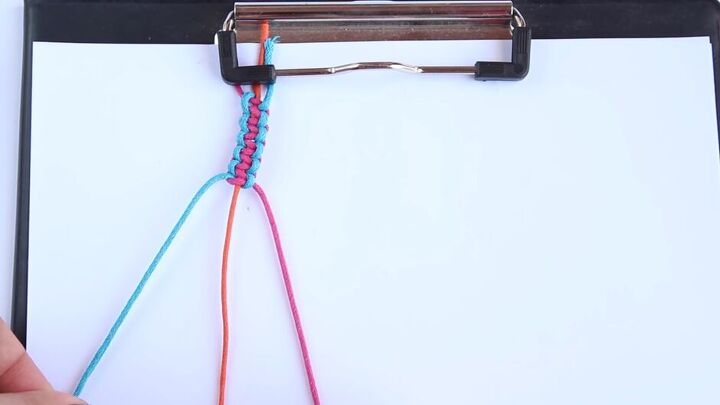
You will end up with a long strand made up of square knots.
How to tie a square knot for a bracelet
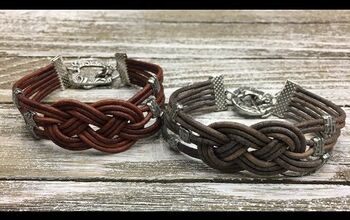
With these instructions you can master the technique so you can make square knot friendship bracelets. You can use the same technique to create chokers, necklaces, and anklets.
Have you made any projects using the square knot before? Leave a comment down below.
If you enjoyed this tutorial, check out my post on How to Make 3 Cute Macrame Friendship Bracelets!
The author may collect a small share of sales from the links on this page.


Comments
Join the conversation