How to Make Honeycomb Earrings From Polymer Clay

Show off your crafting skills and your love of bees with these sweet and simple honeycomb earrings made from polymer clay. They’re unique and colorful, and a perfect, quirky spring accessory.
Tools and materials:
- Polymer clay: White, black, yellow, green, honey
- Acrylic roller
- Hex key
- Large sewing needle
- Knife
- Small, circular cookie cutter
Soften
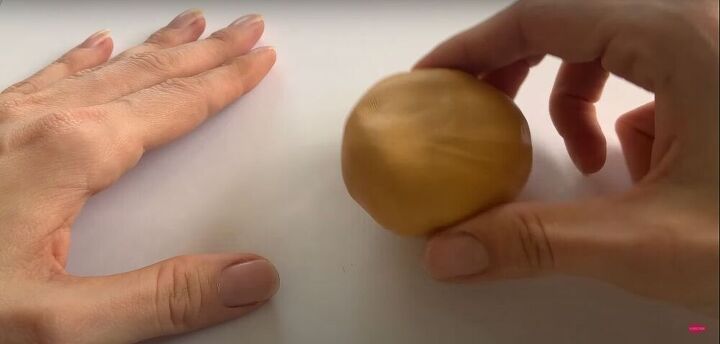
Work each brick of clay in your hand until it is soft and malleable, and able to be rolled into a ball.
Roll
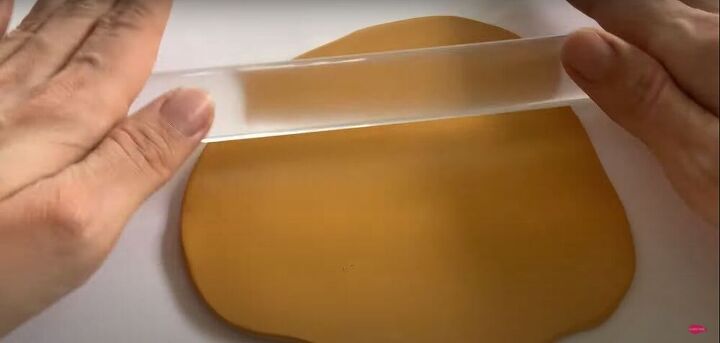
Use an acrylic roller to roll the honey-colored clay into a wide, flat slab, about ¼ inch in thickness.

Mark
Use a hex key to press a honeycomb pattern into the slab of clay.
Create flower centers
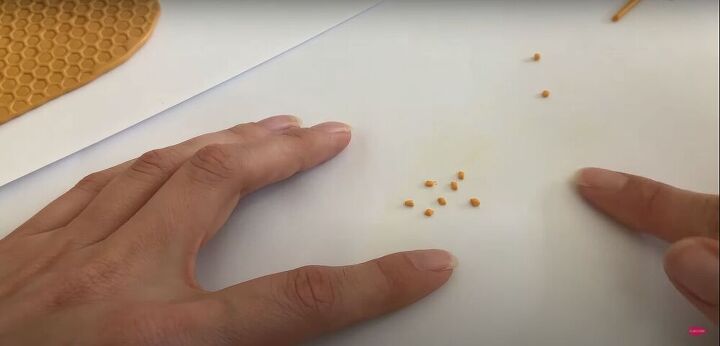
Cut ten small pieces of yellow clay, and roll them under your index finger until they are spherical.
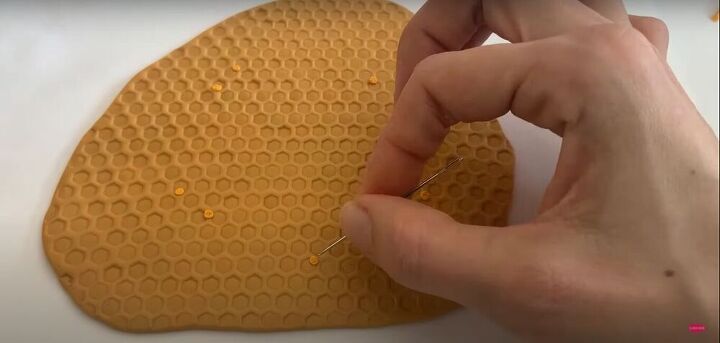
Use the point of a large sewing needle to transfer the yellow spheres onto the honeycomb, placing them at random. Use the point of the needle to poke a few small holes to give the flower centers some texture.
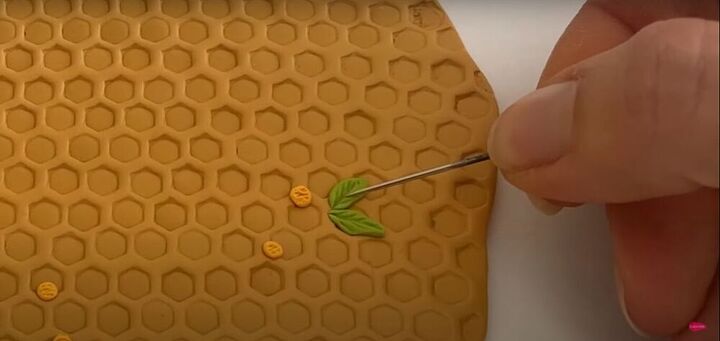
Create leaves
Cut pieces of green clay, slightly larger than the pieces used for the flower centers. Use your fingers to pinch the ends of each green piece to create a leaf shape. Use the needle to transfer the leaves onto the honeycomb, placing the leaves near the flower centers, leaving enough space for the petals to be placed later. Carve the veins of the leaf into the clay with the point of the needle.
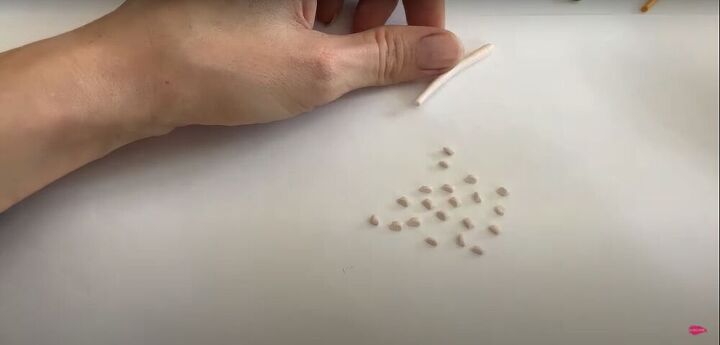
Create petals
Cut white pieces of clay, smaller than the leaves, and slightly larger than the pieces used for the centers of the flowers.
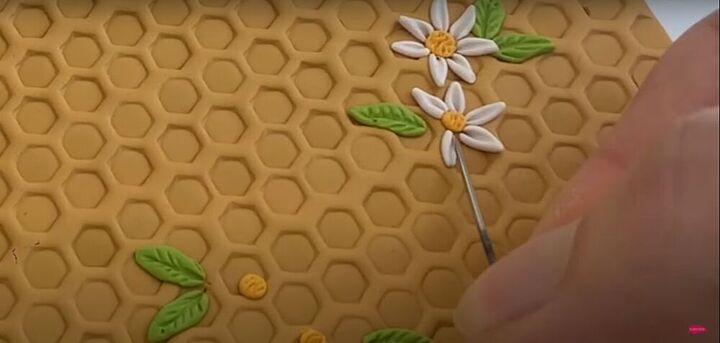
Roll each white piece into a cylindrical shape, and use the needle to apply them to the clay slab, arranging them around the yellow flower centers. Use the tip of the needle to push the ends of the petals slightly under the center of the flower, and to press a fold into the center of each petal.
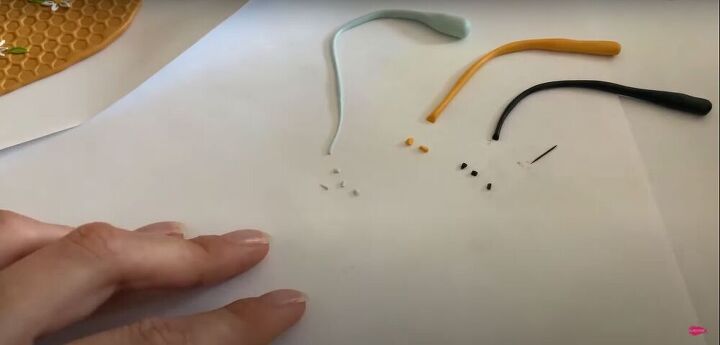
Make bees
For each bee, cut four black pieces of clay, two yellow, and four white. Roll one of the black pieces into a very thin strand.
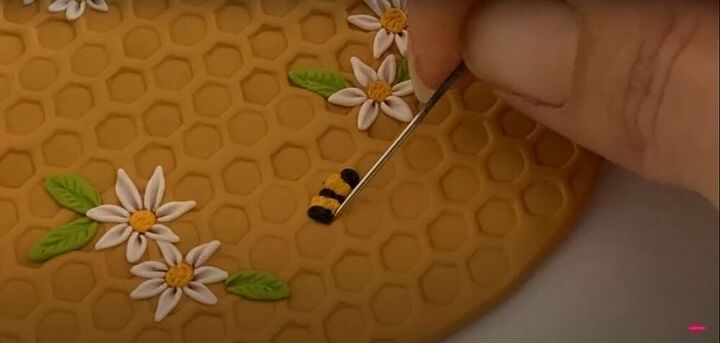
Arrange two yellow pieces and three black pieces in an alternating pattern to create the body of the bee. Use the point of the needle to create texture on the bee’s body.
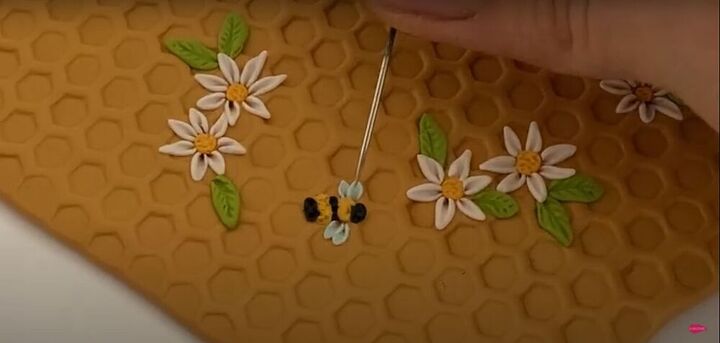
Place two white pieces of clay on either side of the bee’s body, and use the tip of the needle to push them slightly under the bee, and to create a central fold on each wing, as you did previously with the flower petals.
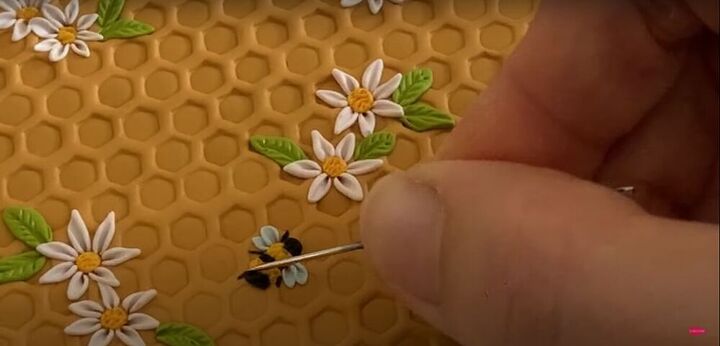
Cut the black strand into six smaller strands, and carefully place three along each side of the bee’s body, to make its legs.
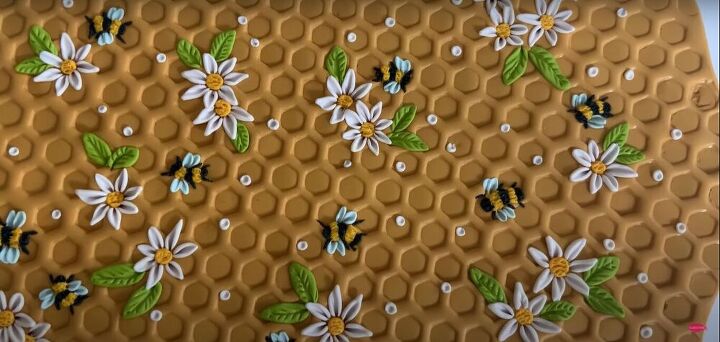
Add white dots
Cut tiny white pieces, roll them into spheres, and place them at random all over the honeycomb.
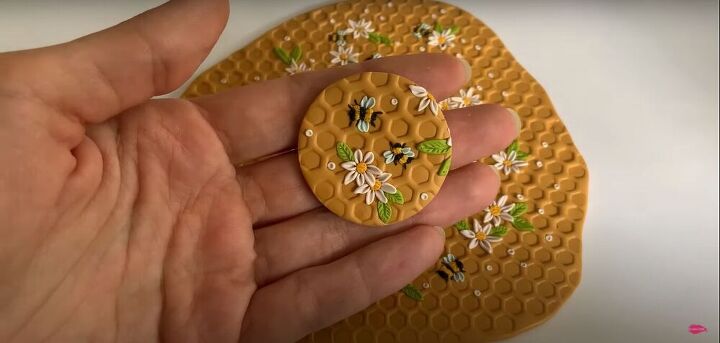
Cut
Use a small, circular cookie cutter to cut medallions out of the slab to be used as pendants for earrings, necklaces, or keychains.

Once the clay is dry, you can attach jump rings and hooks to create earrings.
Working with all the very small pieces in this project can take time and patience, but as you can see, the results are worth the effort. If you use this tutorial to make polymer clay honeycomb earrings of your own, we’d love to see how they turned out!
The author may collect a small share of sales from the links on this page.


Comments
Join the conversation
Seriously sweet ( no pun intended). I love it.
♥️