Multi-Color Polymer Clay Earrings
Create a stunning pair of multi-color earrings using Liquid Sculpey polymer clay!
Have you tried using Liquid Sculpey yet? It's such a fun medium for any crafting level to use to create all kinds of things, including jewelry. Sculpey just released some new colors of Liquid Sculpey, so I decided to put them to the test using one of my new molds. I ended up making a few sets of Multi-Color Earrings, and I absolutely LOVE how they turned out! If you're nervous to jump into resin or sculpting with polymer clay, Liquid Sculpey is the perfect in-between. I like that it has the freedom of pouring like resin, but is quick and easy to use like clay!
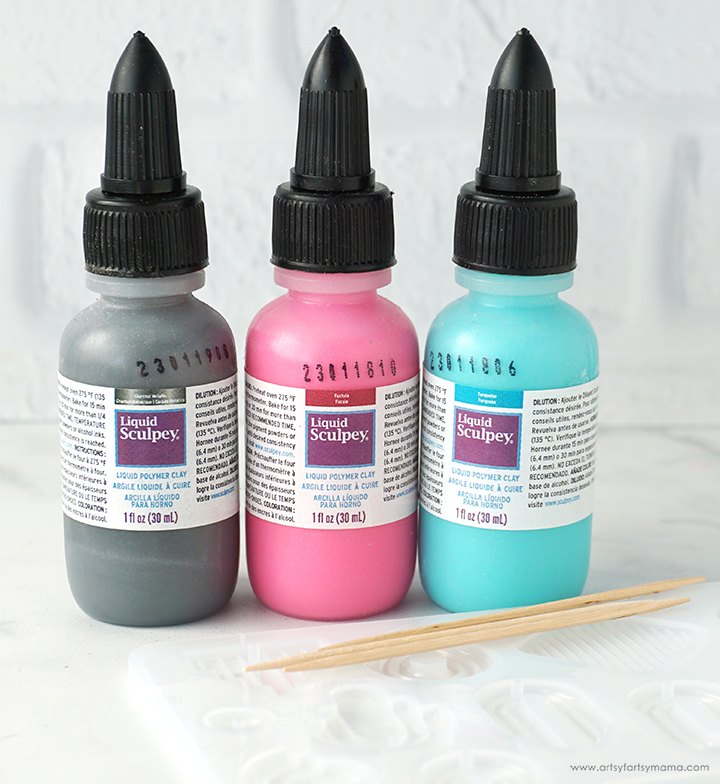
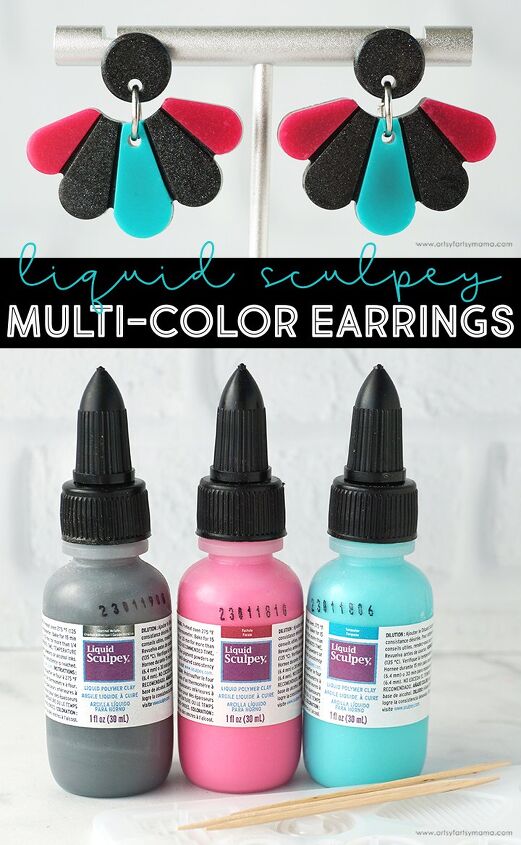
To make your own Multi-Color Liquid Sculpey Earrings, you will need these supplies:
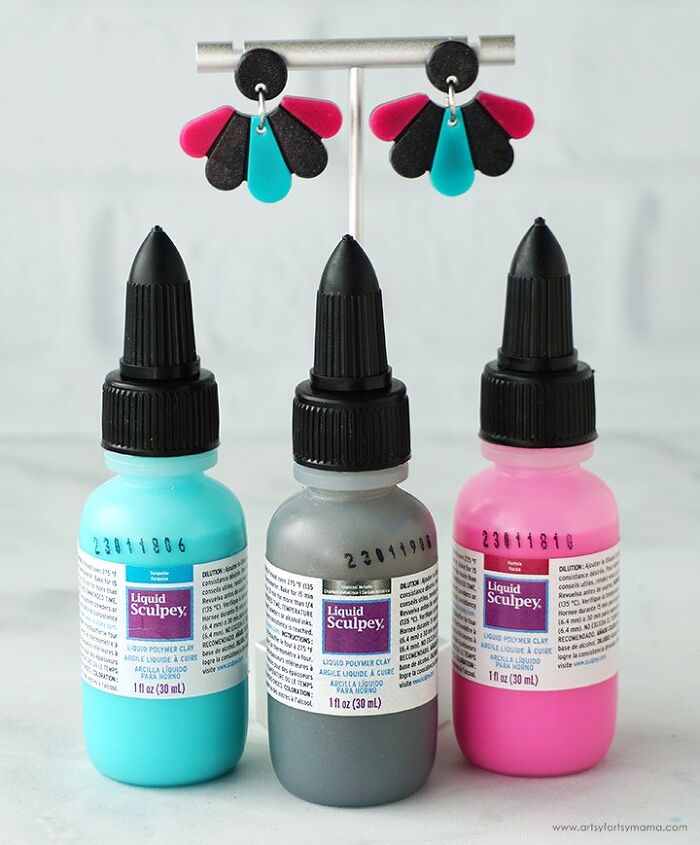
- Liquid Sculpey - Fuchsia, Turquoise, Charcoal Metallic
- Earring Silicone Mold
- Toothpicks
- Jewelry Pliers
- Jump Rings
- Earring Posts
- Strong Adhesive
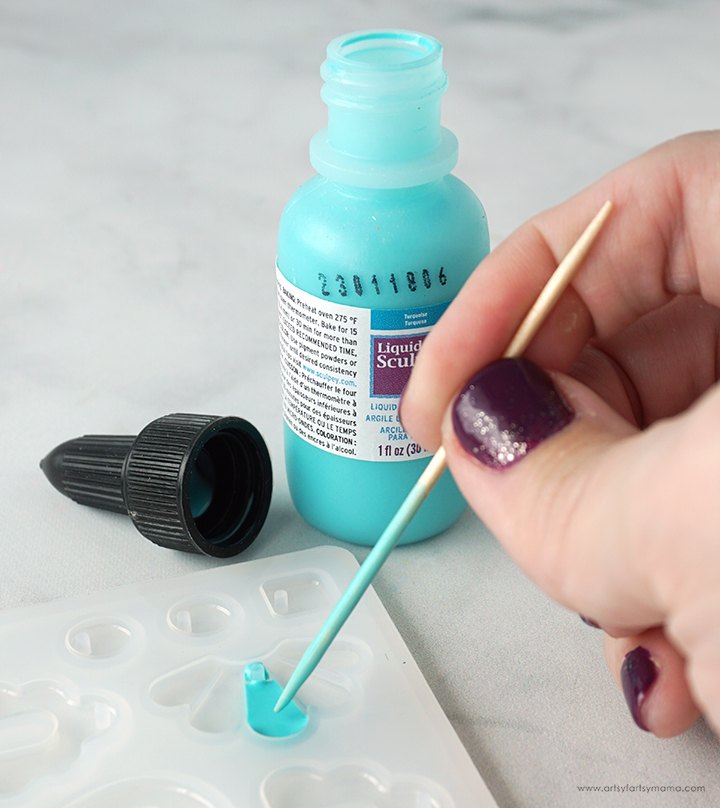
The hardest part of this project is deciding which design in the earring silicone mold to use! I was drawn to the semi-circle of teardrops, so I decided to fill the mold using multiple colors of Liquid Sculpey in one design to see how it would work out.
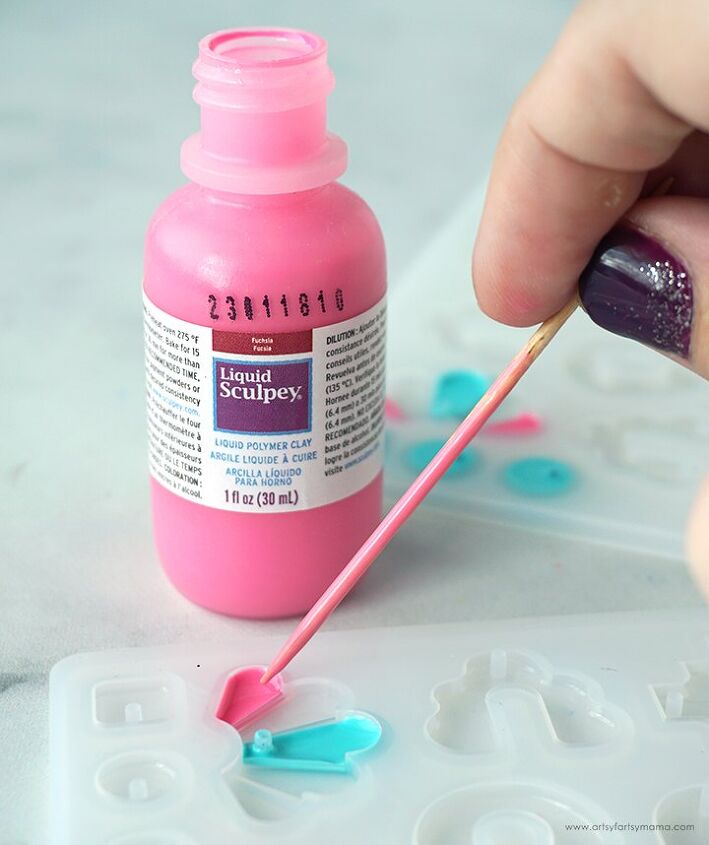
Next, use a clean toothpick to fill the other parts of the mold with the fuchsia Liquid Sculpey. For this earring design, I filled both end teardrops with this color. Again, fill other parts of the mold with this color while it's open.

Lastly, fill the last two open spaces with charcoal metallic Liquid Sculpey with a clean toothpick. If you overfill the mold, the clay will start to bleed into the other colors. See how the charcoal is getting into the fuchsia there on the end? As long as it's just a little bit, it shouldn't be a problem. If it is more than this, you may have to scoop some of the clay out and refill. Once full, gently tap the mold on your workspace to bring any trapped air bubbles to the top and pop them.
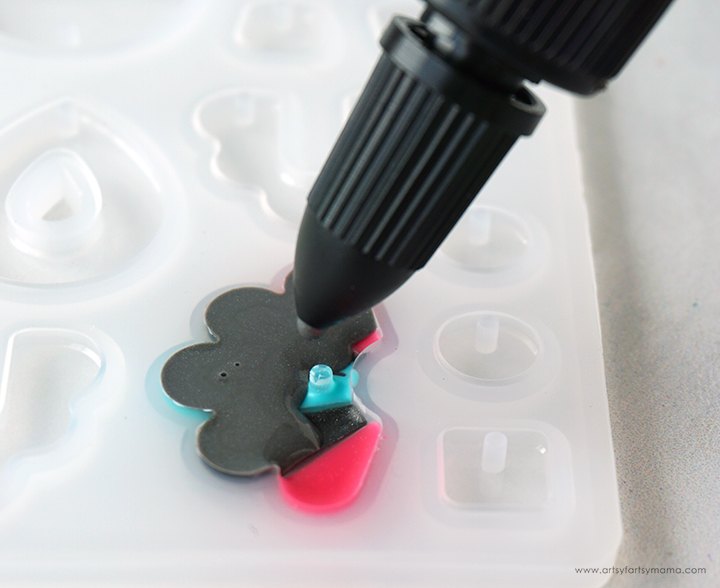
Let the clay cool completely, but DO NOT REMOVE IT FROM THE MOLD. Choose one of the three colors of Liquid Sculpey and fill the mold up the rest of the way. No need to use a toothpick, just open the bottle and pour it in! Gently tap the mold on your workspace again to bring any air bubbles to the top.

Once the baking is done, let the pieces cool completely before removing from the molds. Once cooled, carefully remove the pieces. The baked project is going to be a little flexible, so don't think you messed anything up! Don't you think these are so fun? I am beyond thrilled that I was able to use the three different colors in one mold!
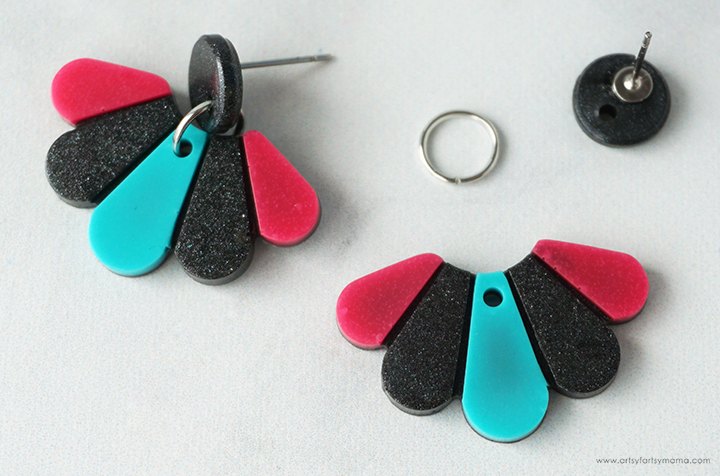
To assemble the earrings, you will need two jump rings and two earring posts - one for each earring. First, use some strong adhesive or even some matching Liquid Sculpey* to attach the earring posts to the back of the small earring pieces.
I just can't get enough of these earrings! I absolutely love that with the right molds, I can combine different colors of Liquid Sculpey to make multi-colored jewelry. The fuchsia and turquoise add a gorgeous pop of color, and the charcoal metallic adds the perfect amount of sparkle.

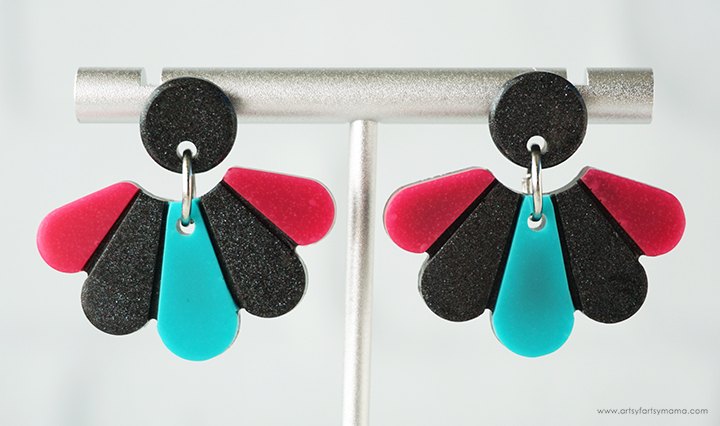
I couldn't resist trying a similar technique to fill this art deco style style part of the mold. I think these are also a fantastic set of earrings, and think they are so fun paired with a fuchsia top instead of the charcoal.
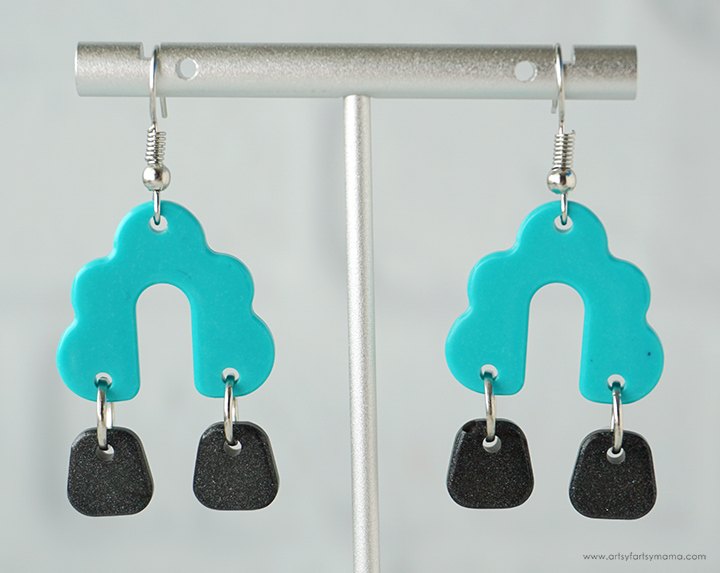
Of course, I also love a modern arched earring that is all the rage right now! This set of earrings was just made by simply filling the mold all the way with one color, straight from the bottles. Easy and quick! I love the way the smaller parts on the bottom of the earrings dangle with movement.
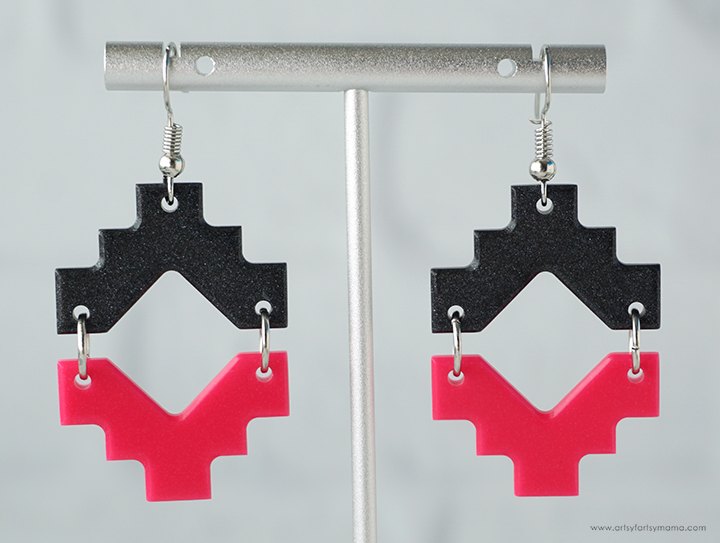
The last set of earrings are simple and chic with an Aztec flair! I love the way the charcoal and fuchsia look together, and think these will be such a fun set to wear this summer to add a pop of color to any outfit.
Isn't it amazing that in just a small amount of time, you can create multiple sets of unique earrings out of Liquid Sculpey?! I am so excited to wear these earrings everywhere I go and to make more pairs to share with friends as gifts. As always, I would love to see what you're making! Share your creations on Instagram, Facebook, or leave a comment/photo on the project pin on Pinterest!
The author may collect a small share of sales from the links on this page.


Comments
Join the conversation