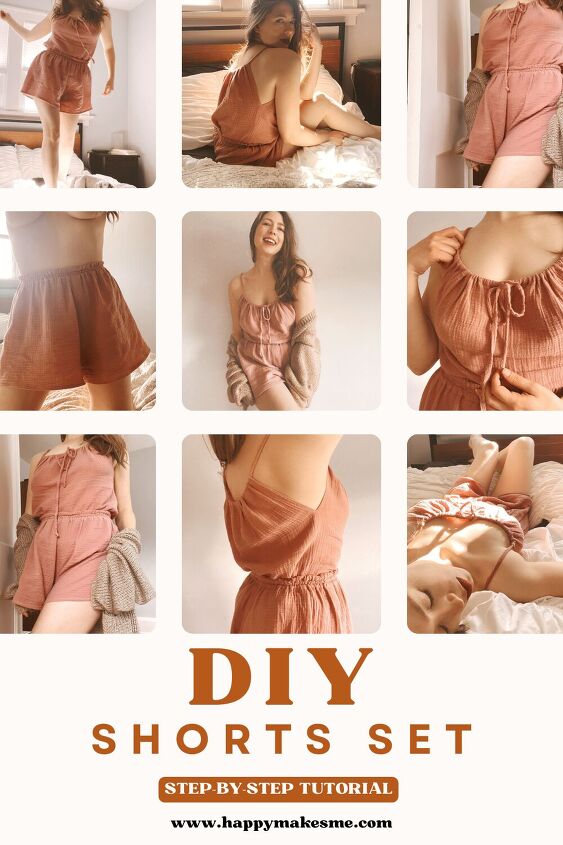
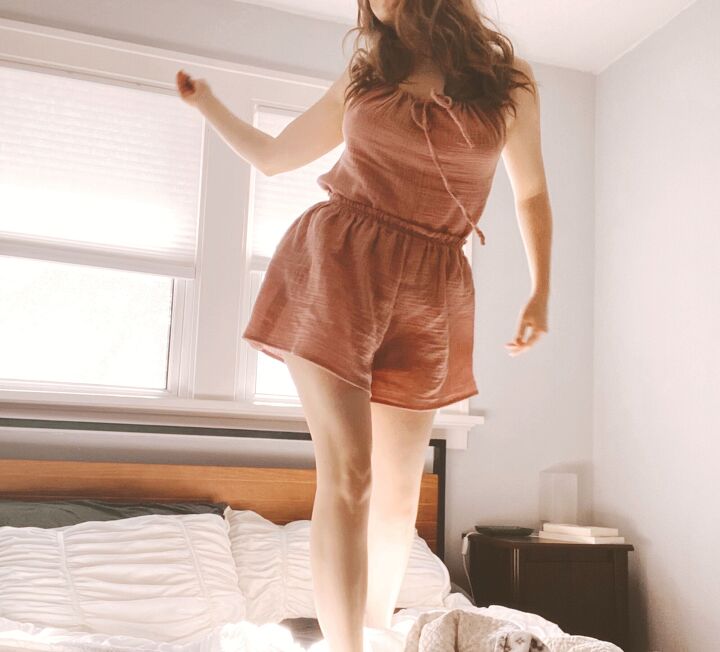
DIY 2 Piece Lounge Set

Hey there! Despite the new Spring season, the weather has still been pretty chilly near me. So, I thought I'd create this cute and comfy sleep set perfect for sleeping in and lounging around indoors during the last of these cold days, while still being light and airy enough to take me well into the summer months.
The result was this ultra-dreamy 2 piece matching set that you can wear for sleeping or for taking things easy at-home on your day off.
The top is self-drafted based on your own body measurements. Trust me, this process is actually pretty simple and is made from only 4 rectangles! I was genuinely shocked by how simple and totally beginner-friendly creating the pattern and sewing together this top was!
That said, this post will mainly focus on the actual sewing process and construction of this set. This is to prevent this post from getting too long (and therefor, confusing!), but don't worry- I'll link to a video that will go over how to draft the top in detail, and I'll also be creating a separate post on how to draft the top.
The shorts are adapted from a FREE sewing pattern from Mood. Alternatively, you could always opt to trace off a pair of shorts you love to wear already.
This set comes together in just a few hours, making it an excellent afternoon or weekend project! My advice? Throw it together on a Saturday so you'll have it ready just in time to enjoy a lazy Sunday.
To make your own, just watch this full, step-by-step tutorial, or follow the instructions below:
To make your own version of this matching lounge set, here's what you'll need:
MATERIALS REQUIRED:
- 1.5 yds of lightweight woven fabric (such as cotton, linen, or gauze) **Note, you may need more or less depending on your personal measurements
- 1/4" in. elastic cut into 3 pieces, all measuring 1 in shorter than your waist measurement
- Bodkin or safety pin
- Scissors
- Fabric marking tool (such as tailor's chalk or water erasable pen)
- Pins
- Sewing machine
- Measuring Tape
- Serger / overlocker (optional)
- Ribbon, or cording to use as the tie straps. (Optional- the video will also walk you through how to make your own ties using your fabric for a matching look)
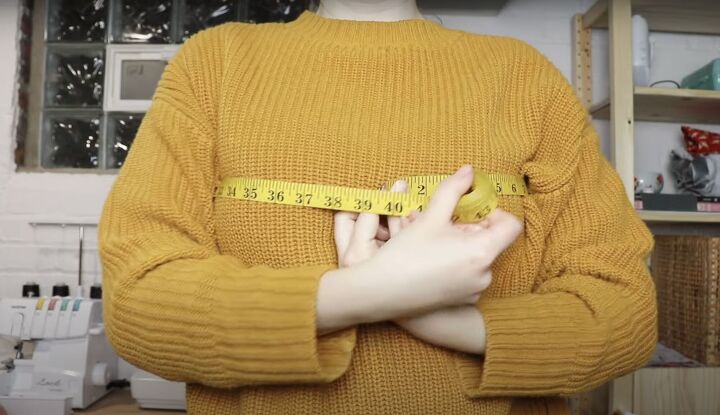
Step 1: Using your body measurements, draft the pattern for the top. (As stated before, the video linked will walk you through how to do this in detail, step-by-step)
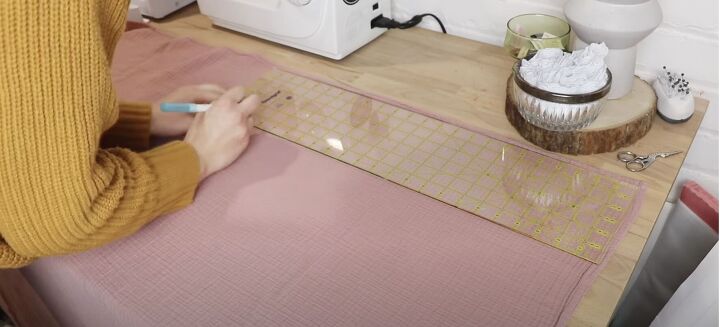
Step 2: Cut out the fabric pieces for the top
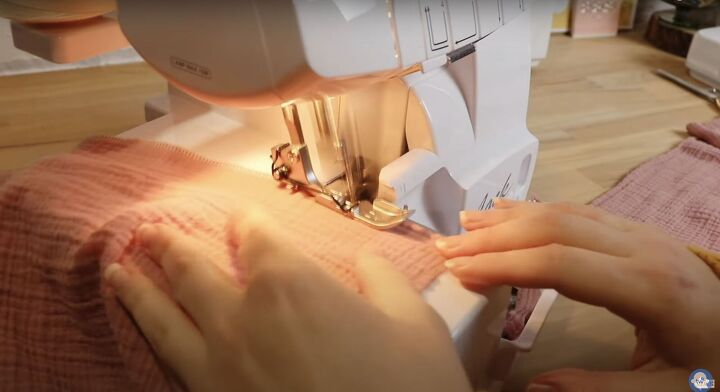
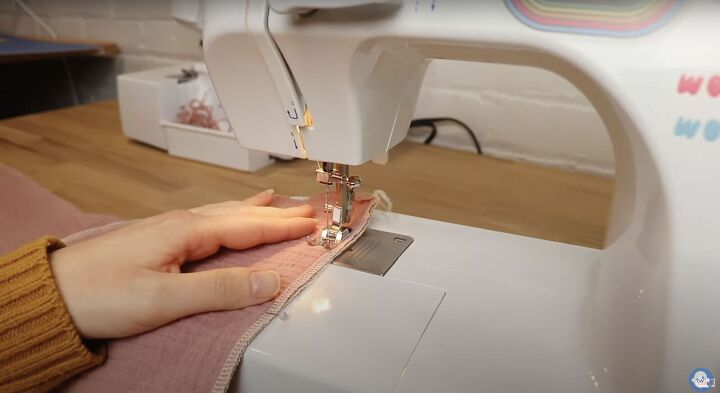
Step 3: Using either a serger/overlocker or the zig-zag stitch on a standard sewing machine, finish off the raw edges of your fabric pieces.

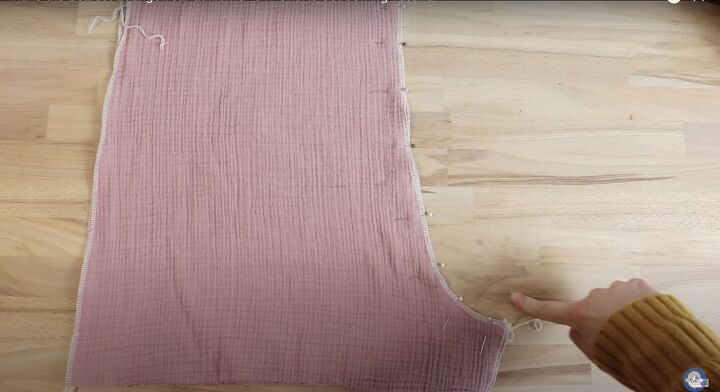
Step 4: Lay your two front panels on top of each other, right sides facing, and pin along one side. (This will become the center front seam.)
Be sure to leave a 3 inch gap from the top edge of your fabric.
Step 5: Sew using a 3/8" seam allowance, making sure to backstitch at the beginning and end.
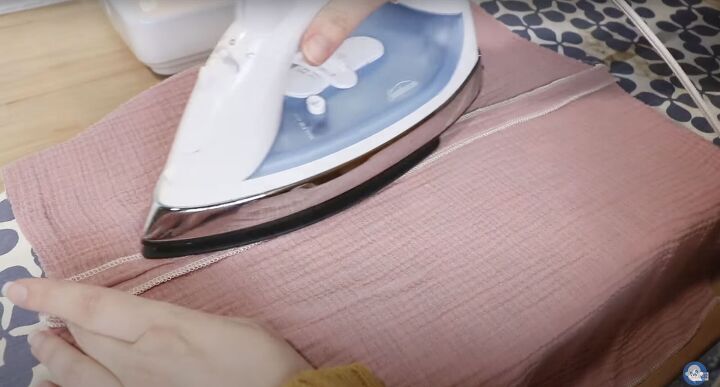
Step 6: Press the seam open.
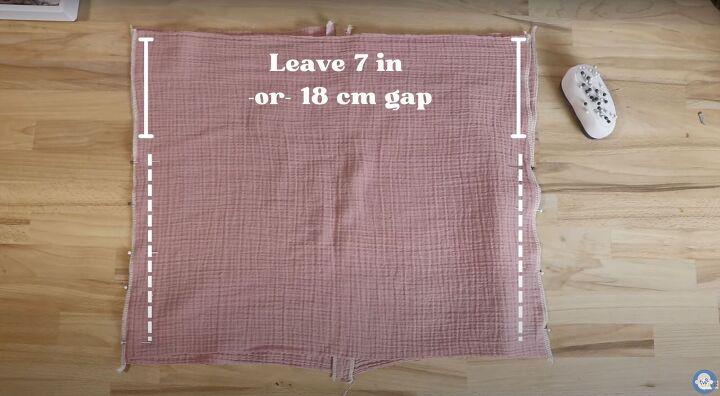
Step 7: Lay the front panel on top of the back panel, right sides facing. Pin along the sides, leaving a 7 inch gap from the top edge of the fabric. This will create the room for your arms to move freely.
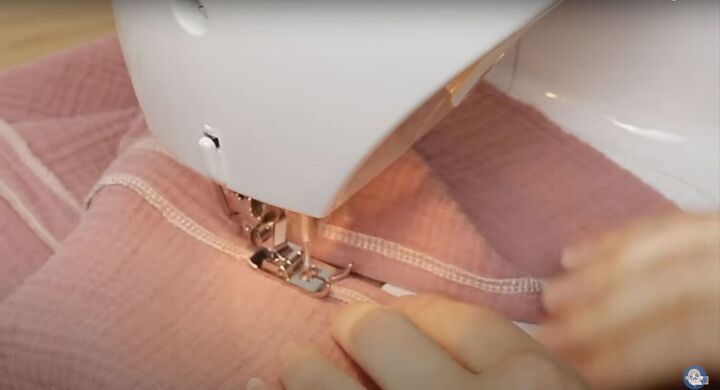
Step 8: Sew along the sides. Press the seams open or to one side.
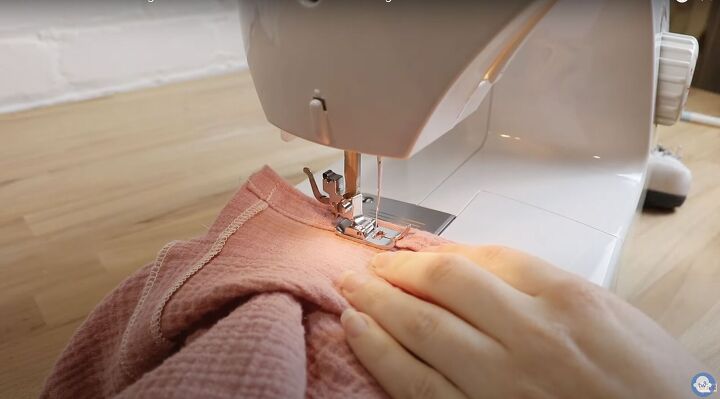
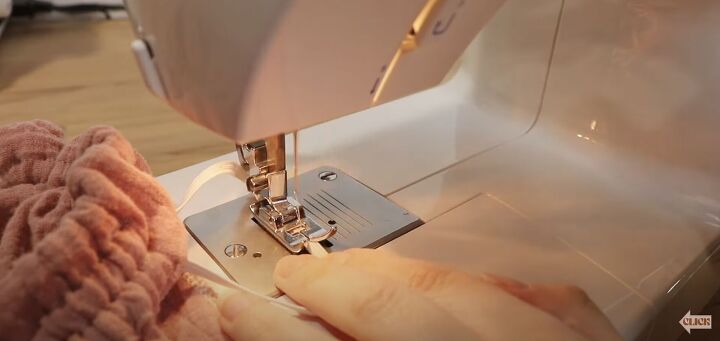
Step 9: Now it's time to sew the openings we created. They should look like little "V"s coming from the top edge of the fabric. Sew them down starting at one side, close to the opened edge. When you reach the bottom of the "V" insert your needle, insert your presser foot, rotate the top, set the presser foot down, then sew down the other side of the opening. (The video linked shows exactly how to do this)
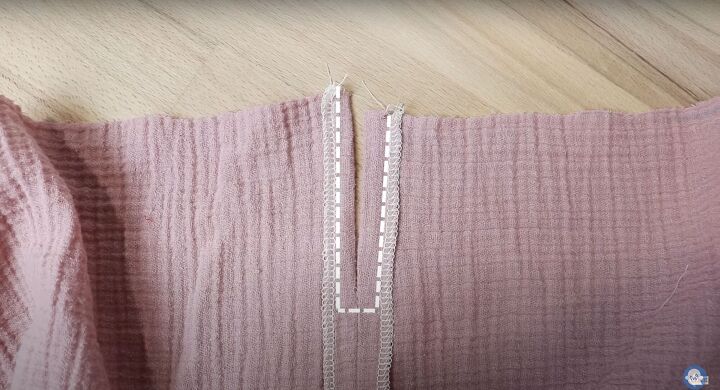
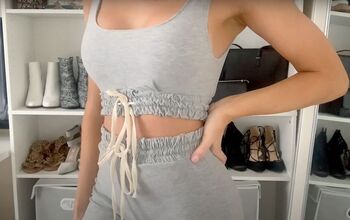
It should look something like this.

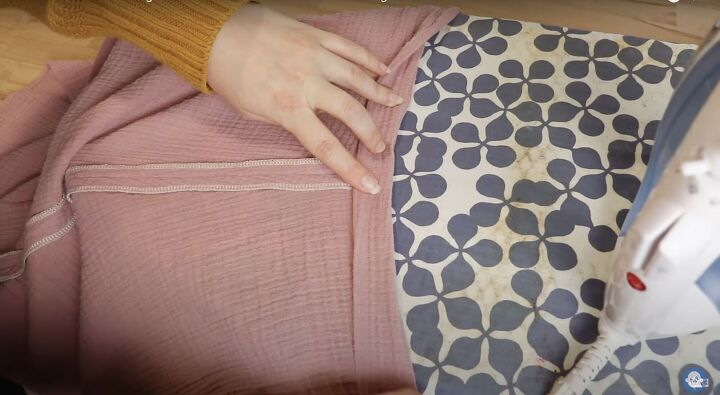
Step 10: Now we'll create the channels for your straps to fit through. To do this, fold over the top edge of your fabric 1/4" and press. Fold it down another 1/2" press, and pin in place.
Step 11: Sew along the fold, close to the opened edge.
Step 12: Hem the top by folding up the bottom edge of the fabric 1/4" twice. Press and pin in place. Then sew along the hem, close to the opened edge.
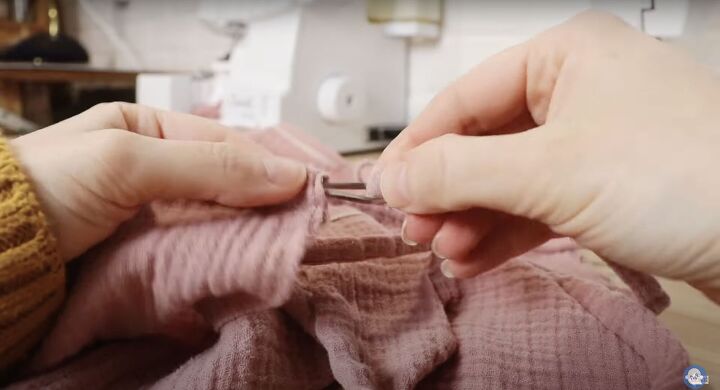
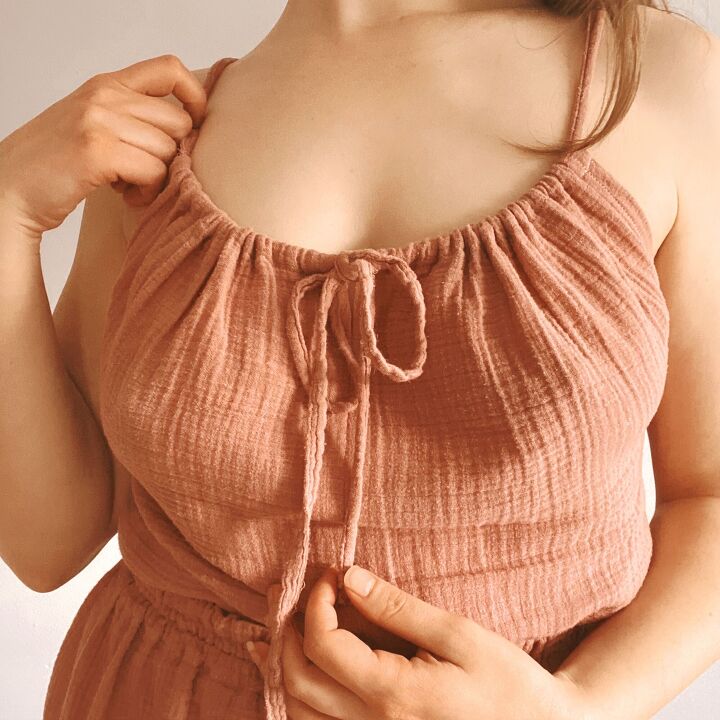
Step 13: Now it's time to insert your ties. Using a bodkin or safety pin attached to one end of your ties (either made from fabric or ribbon, cording, etc) insert your tie starting at the center front of the top.
Work your way through each opening, making sure not to get your straps twisted inside as you do so.
Bring the ties through the other side of the center front opening.
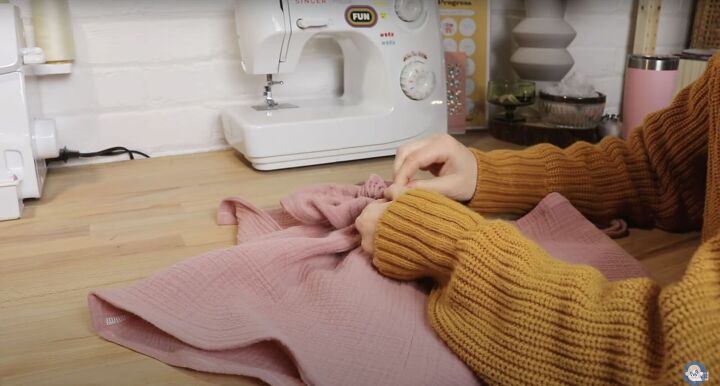
Final Step: Adjust the gathers at the top to achieve your preferred fit. Your top should look something like this:

Now it's time to sew the shorts:
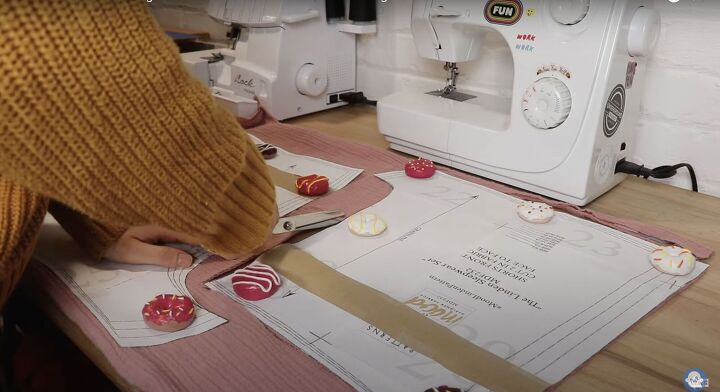
Step 1: Using the Linden Shorts template from Mood, cut out your pattern pieces. I added an extra 2 inches to the rise of my shorts for a higher-waist and thicker waistband, but that's completely optional.
Step 2: Finish off your raw edges using a serger or the zig-zag stitch on a standard sewing machine.
Step 3: Lay your two front pieces together, right sides facing, and sew along the curved edge. Press the seams open.
REPEAT THE SAME STEPS FOR THE BACK PIECES
Step 4: Open the front and back pieces. Lay them on top of each other, right sides facing. Pin along both side seams, and sew together. Press the seams open.
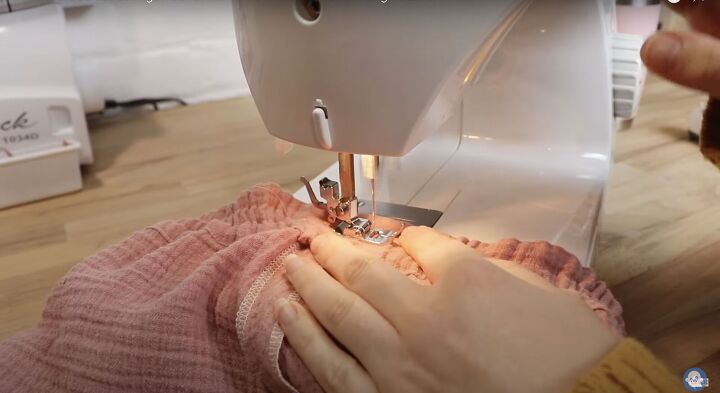
Step 5: To make the waistband, fold the top edge down 1/4" and press. Fold it down another 1 1/2" and press. Pin in place.
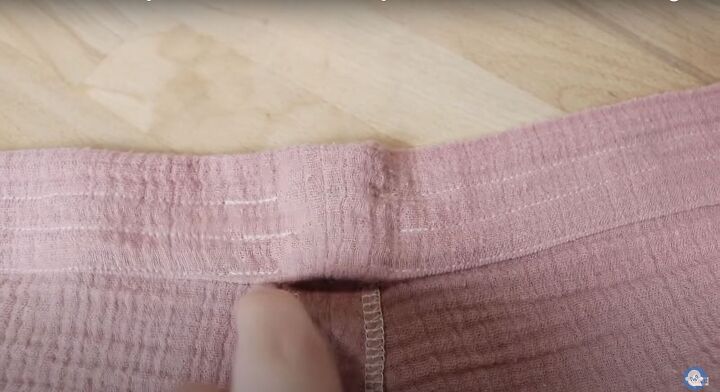
Step 6: Sew along the opened edge of the fold, making sure to leave a 1 inch gap in the back of the shorts. This will create the opening for your elastic to fit through. Using the side of your presser foot as a guide, sew 2 more rows of stitching across the waistband this same way. It should look something like the picture above.
Step 7: Using a bodkin or safety pin, thread your elastic pieces through each channel, making sure not to twist the elastic as you do so.
PRO TIP: I like to pin one end of the elastic to the outside of my projects so that they don't get lost in the channel!
Step 8: Using a narrow zig-zag stitch on your sewing machine, sew each of the elastic ends together one at a time.
Step 9: Sew each of the channel gaps closed.
Step 10: Hem each leg of the shorts by folding the bottom edge of the fabric up 1/4" twice. Press and pin in place, then sew close to the opened edge.
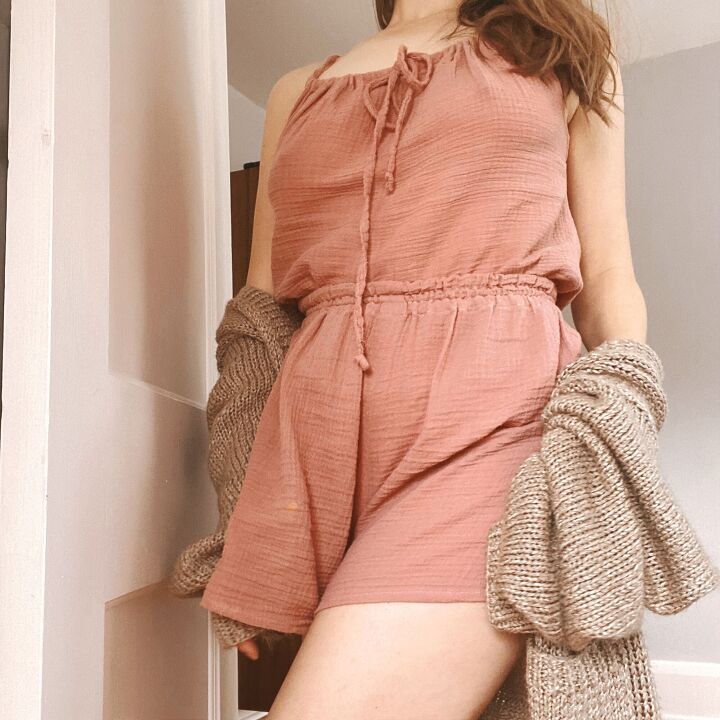

And there you have it! The ultimate cozy, at-home set!
I have so many plans to make more because I fully intend to exclusively live in these once the weather finally thaws out a bit more!
If you end up making this set for yourself, please feel free to tag me, @happymakes_me on IG because I LOVE getting to see all your beautiful looks for myself!
Happy making!
-Caley
The author may collect a small share of sales from the links on this page.


Comments
Join the conversation