How to Make Dhoti Salwar - Chic Draped Pants Tutorial

In this tutorial, you will learn how to make dhoti salwar - a type of ethnic clothing common to the Indian subcontinent, which resembles loose, draped pants.
Keep reading for step-by-step instructions on how to measure, cut, and assemble this beautiful piece that will be a unique addition to your wardrobe.
All-in-one video creator I use: Click for an editor, converter, screen recorder and more.
Tools and materials:
- 2.5 meters (2.75 yards) satin fabric
- Fabric chalk
- Scissors
- Pins
- Safety pin
- Wide elastic band
- Serger
- Sewing machine
- Fork
1. Cut the fabric
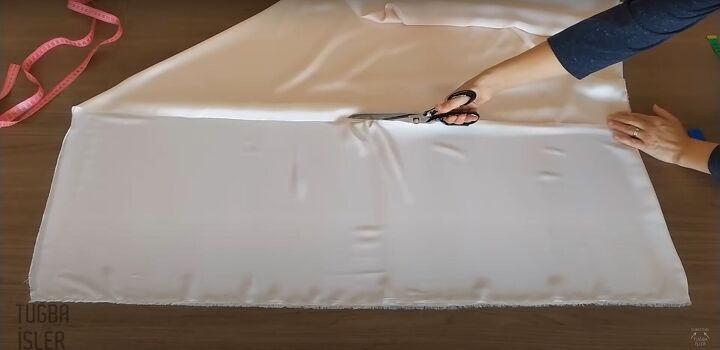
Begin by cutting a piece of fabric that measures 220 x 110 centimeters (86.6 x 43.3 inches).
2. Fold and pin the fabric
Fold the fabric in half to create a square, and then fold the square diagonally to create a triangle. Pin down the open edges of the triangle.
3. Measure, mark, and cut the fabric
See the video from 2:16-4:25 for instructions on how to draw the pattern and cut the fabric.
4. Pin the edges
Lay one pattern piece flat, and locate the corner with the small rectangular notch. Align the edges of the notch, and pin them together. Repeat for the second pattern piece.
5. Create pleats
On the edges to the left and right of the notch, begin making pleats and pinning them in place along the entire edge, leaving about 2 inches of flat fabric on either end.
Make sure the fold of each pleat is facing towards the notch in the center. Do this for both pattern pieces.
6. Sew the pleats
Sew down the pleats using a straight stitch. To help create even pleats, you can use a fork to hold and fold the fabric, as shown in the video from 5:51-6:50.
7. Pin and sew the curved side edges
Once the top edges of both pattern pieces are pleated, lay the two pieces together, right sides facing, pin the curved side edges together, and serge.
8. Pin and sew the inseams
Next, turn the fabric so the two curved side seams are in the center front and center back, and there is a large split in the center, which will be the inseams of your pants. Pin the inseams together, and serge.
9. Hem the dhoti salwar
To hem the dhoti salwar, serge the bottom edges. Then fold the hems up once, and sew them down using a straight stitch.
10. Measure, cut, and sew the waistband
Measure the circumference of the top edge of the pants. Cut a piece of fabric equal to the circumference and about 8 inches wide, and sew the ends of the strip together to create a loop. This will become the waistband.
11. Attach the waistband
Fold the waistband in half lengthwise. With the pants inside out, pull the top edge of the pants through the center of the waistband, and pin it in place, aligning the raw edges of the pants with the raw edges of the waistband.
Then sew the waistband in place with a serger, leaving a 2-3 inch gap in the stitching.
12. Insert elastic and sew
Cut a piece of elastic band that fits snugly but comfortably around your waist. Attach a safety pin to one end of the elastic band, and insert it into the gap in the stitching. Use the safety pin to guide the elastic through the waistband and back out through the gap.
Once the elastic has been pulled all the way around the waistband, sew the ends of the elastic together. Adjust the elastic so it is entirely hidden inside the waistband, and then sew the gap closed with a serger.
How to make dhoti salwar tutorial
Your dhoti salwar is complete! Aren’t they gorgeous? I hope you found this tutorial helpful and will use it to make your own beautiful dhoti salwar. How would you style this special piece?
To see more of my DIY sewing tutorials, follow me on TikTok @tugbaisler.
Enjoyed the project?
Suggested materials:
- 2.5 meters (2.75 yards) satin fabric
- Fabric chalk
- Scissors
- Pins
- Safety pin
- Wide elastic band
- Serger
- Sewing machine
- Fork
The author may collect a small share of sales from the links on this page.


Comments
Join the conversation