How to DIY a Fuzzy Circle Skirt

Today, I’m going to show you how to make a DIY circle skirt without any seams and with an elastic waistband.
This is a very easy project so if you’re new to the world of sewing, this is a great project for you to try. Let's get started.
Tools and materials:
- Fabric
- Scissors
- Tape measure
- Tailor’s chalk
- Sewing machine
- Elastic
- Pins
- Clips
- Safety pin
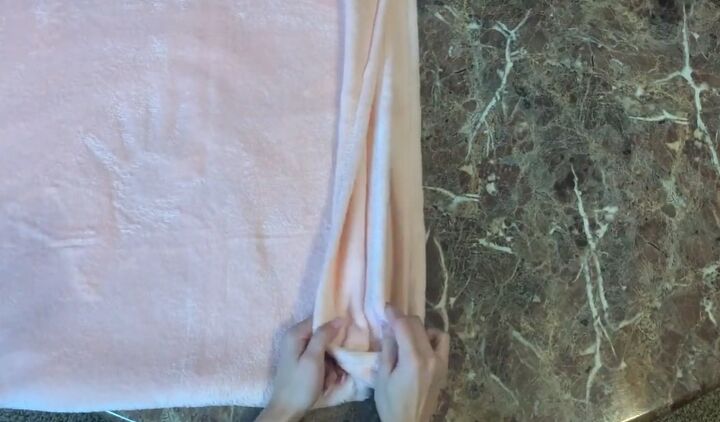
1. Fold the fabric
First, fold the fabric in half and then in half again.
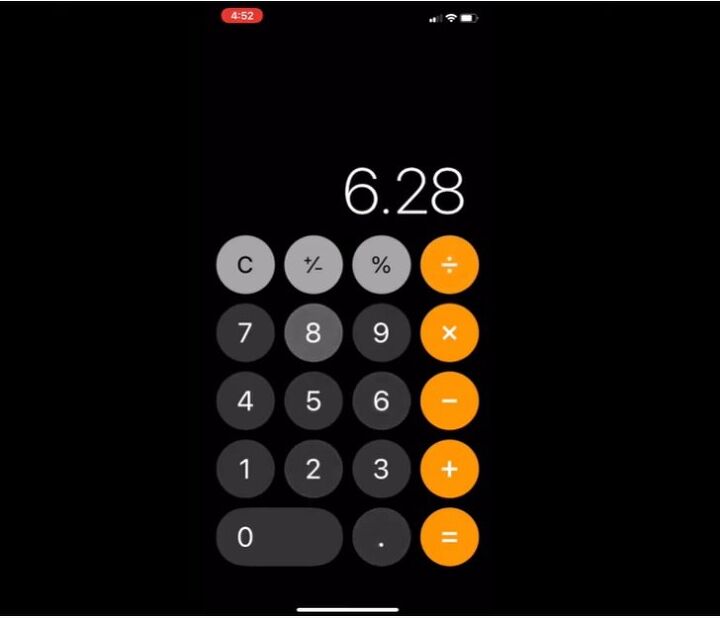
2. Calculate the radius
Because this is a circle skirt, we do have to find our radius, which is really simple.
Just take your waist measurement (mine is 28 inches - 71cm) and divide that by 6.28 to get your radius (mine is 4.45 inches - 11cm).
It doesn't matter what your waist measurement is, you're always going to divide it by that 6.28.
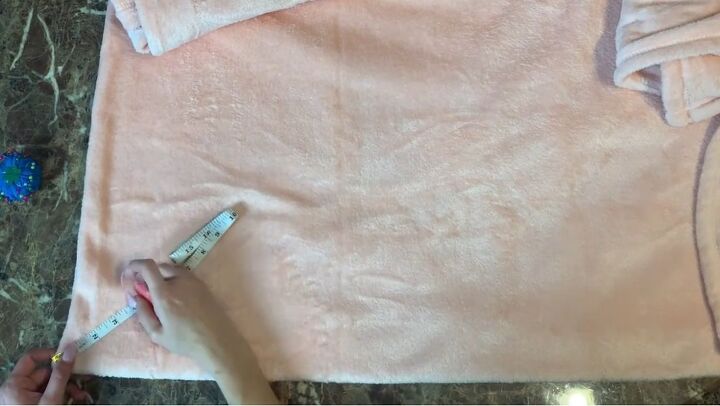
3. Mark out the waist
Pin your measuring tape to the edge of your fabric. Then measure out the radius length (and a little bit extra for seam allowance) and mark that on the fabric.
Reposition the measuring tape and keep marking the radius point on your fabric to create a quarter-circle shape which will be the waist.

4. Mark out the length
For the length, I wanted my skirt to be about 15 inches (38cm) long. So, from the radius mark, measure down 15 inches (or whatever length you want your skirt to be) and then add a half inch of seam allowance.
Then, draw your mark (for me, this was at the 20-inch [60cm] point).
Do the same thing that you did for the waist, move your tape measure around to make the marking, and then join them all up.
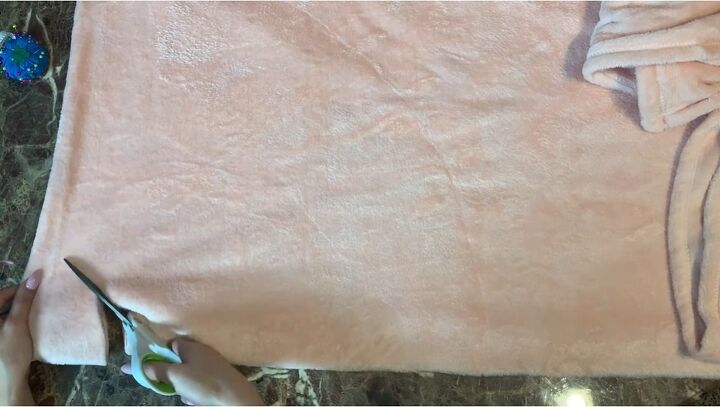
5. Cut the fabric
Cut out the lines that you traced.
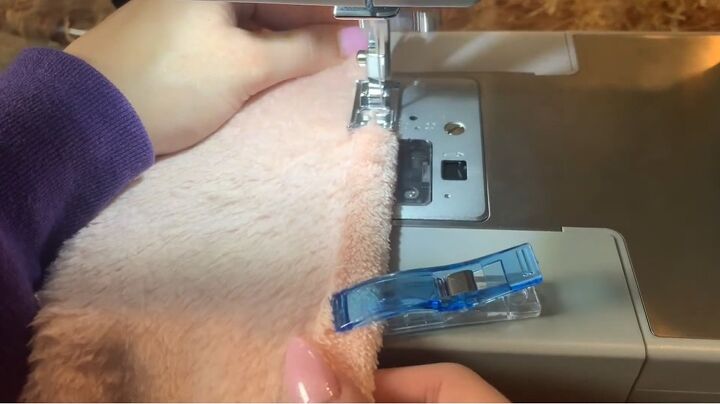
6. Hem the skirt
Once it is all cut, open the fabric out and flip it inside out.
Then, hem it by taking the raw edge, folding it over, pinning it down, and then sewing it all the way around using a double overlock stitch.
This type of stitch sews the fabric and also acts as a serger for the raw edge, ensuring that the material doesn’t fray.
If you don't have that stitch on your machine, you can just do a zigzag stitch over the edges.
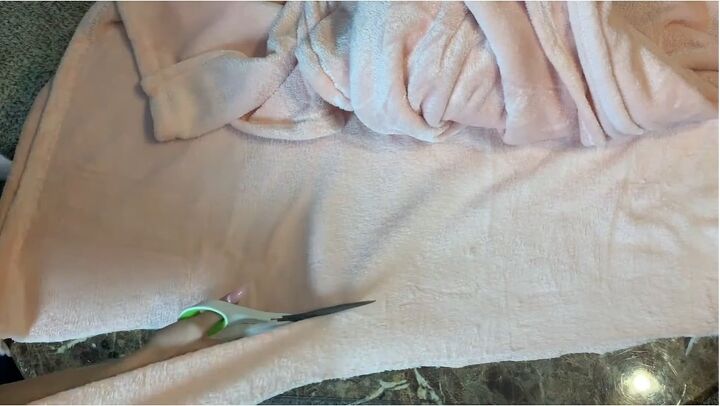
7. Cut the waistband
The waistband needs to be cut longer than the actual waist measurement.
Add a few more inches onto your waist measurement and mark this on the fabric. I made the width 3 inches (7.6cm).
Once this is all marked, cut out the fabric.
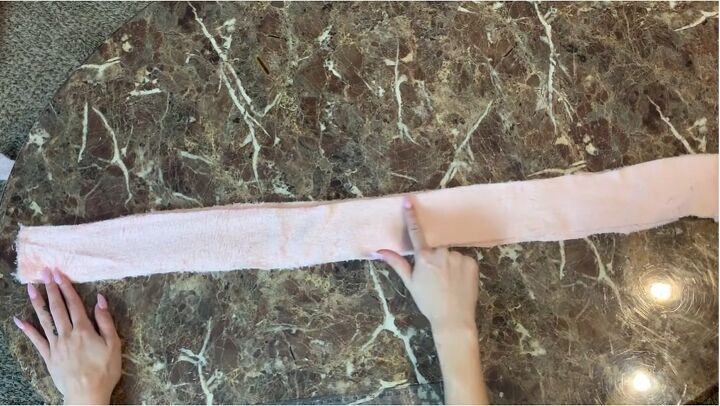
8. Sew the waistband
Sew a straight stitch along the top and the bottom. Then flip that inside out.
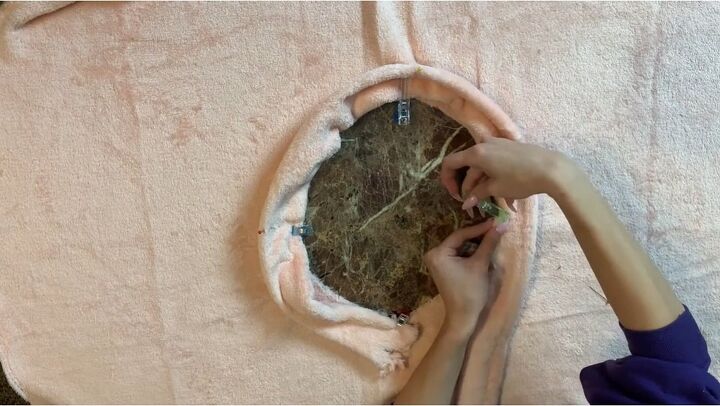
9. Attach the waistband to the skirt
Flip the skirt in half and pin it at either edge. Then grab the skirt in the middle and flip the middle pieces to now be the two sides and pin those sides.
Now you have four reference points, equally spaced apart. Then do the same thing to the waistband - fold it in half and then pin the sides, grab it in the middle again and then pin those two sides so that you have your four reference points again.
Open up the skirt on the inside, and line up the pins from the waistband to the ones on the skirt.
Clip those together and sew all the way around. Don’t close up the waistband, as you still need to insert the elastic.
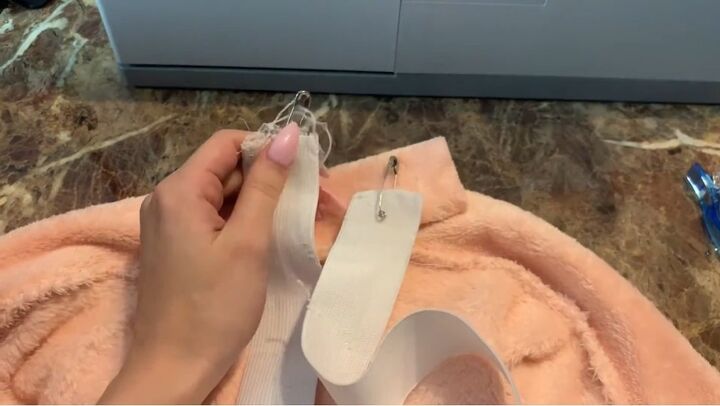
10. Insert the elastic
Cut your elastic a little bit shorter than the length of the waistband and attach a safety pin to one end.
Use the safety pin to pull the elastic through the waistband.
Sew the two ends of the elastic together and then sew up the waistband.
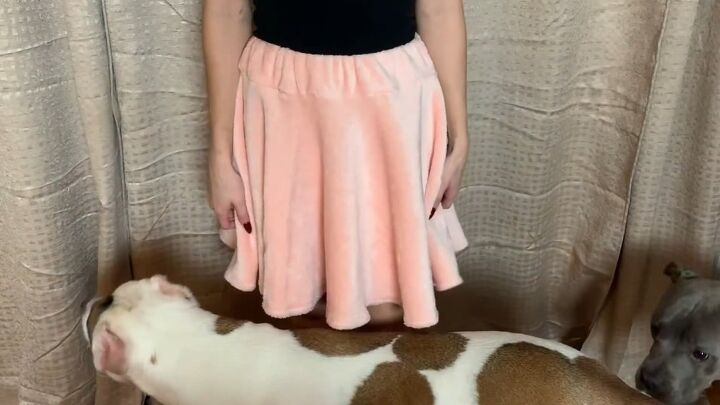
DIY circle skirt
Boom! Our 360° circle skirt without any seams and with an elastic waistband is all finished.
This is a really cute skirt and a great beginner's sewing project. I hope you’ll give it a try!
If you enjoyed this tutorial, check out my post on how to DIY a Cozy Half Zip Sherpa Pullover.
The author may collect a small share of sales from the links on this page.


Comments
Join the conversation