How to DIY Cute Gap UV Resin Earrings

Today, we're going to be making UV resin earrings that have a gap in them at the top.
Whether you’ve worked with resin before or not, this is a nice and easy tutorial that is very straightforward and will leave you with a gorgeous pair of earrings at the end. Let’s jump on in!
Tools and materials:
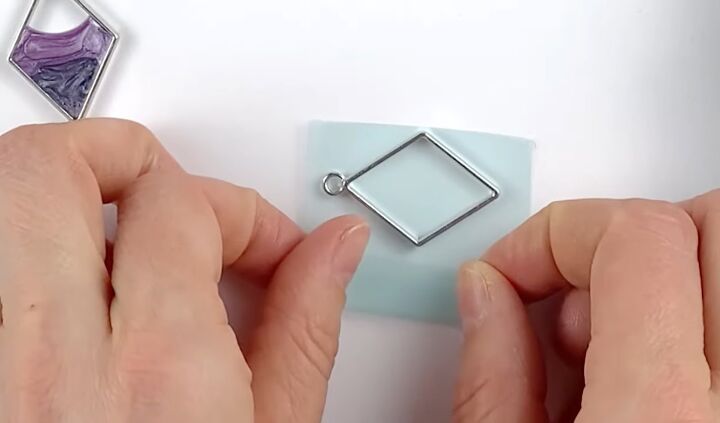
1. Place bezel on tape
Put the bezel on the tape and press it down to make sure that it is sticking to all the sides because you don't want any of the resin to get underneath.
Fold the side of the tape over, so you have a place to put your finger.
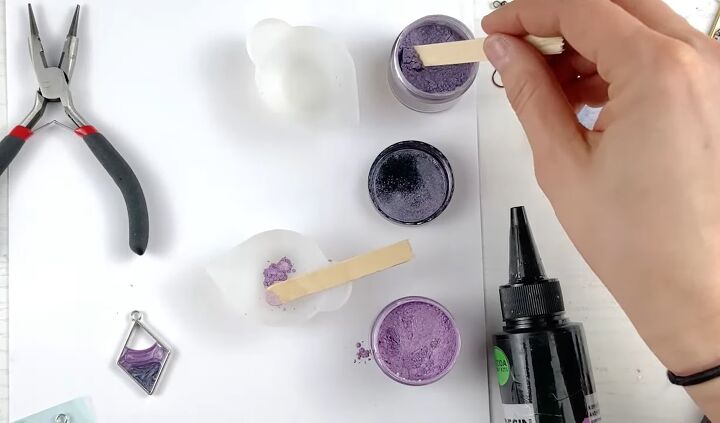
2. Place powder in bowls
Put on a protective mask and gloves before this next step!
Pick up the two colors of mica powder that you’ll be using for this project with popsicle sticks and place them in two separate bowls.
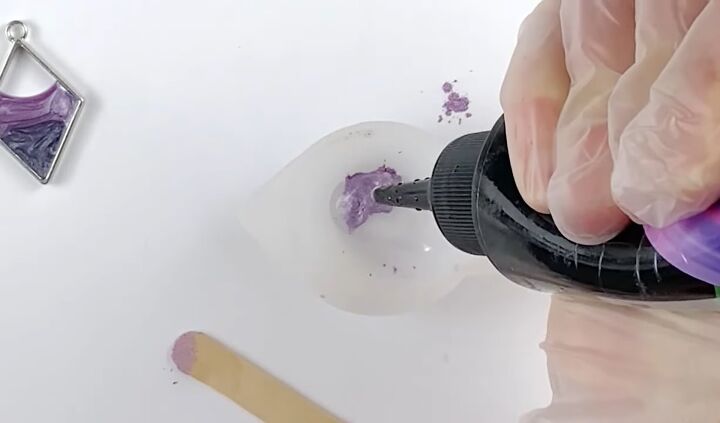
3. Add resin
Then add in resin to both of the powders.
I recommend not squeezing the resin into the powder directly because air will come out first, and then the mica powder will go everywhere.
Instead, squeeze it into the side, and once the air is out, you can put it directly on it. You only need to add a little bit of resin.
Mix the colors until they are thoroughly mixed all the way through.
Then check to see if you like the color. If it's too light for you, add more mica powder, and if it's too dark, you can add more resin.
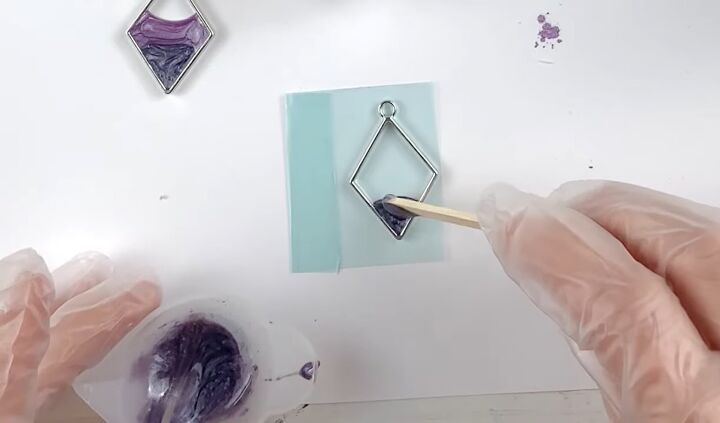
4. Place resin mixture in bezel
Take one of the colors and place it in the bezel.
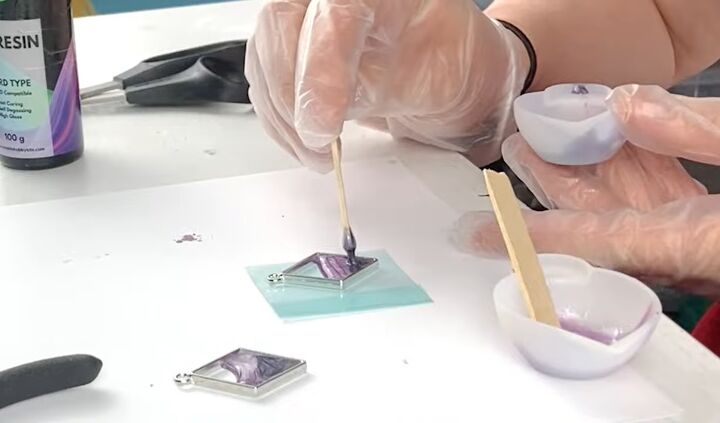
Then before it starts to spread out, add in the other shade.
Make sure your resin is touching the sides of the bezel. After that, you can go back in with the first shade of purple if you want and add a bit more.
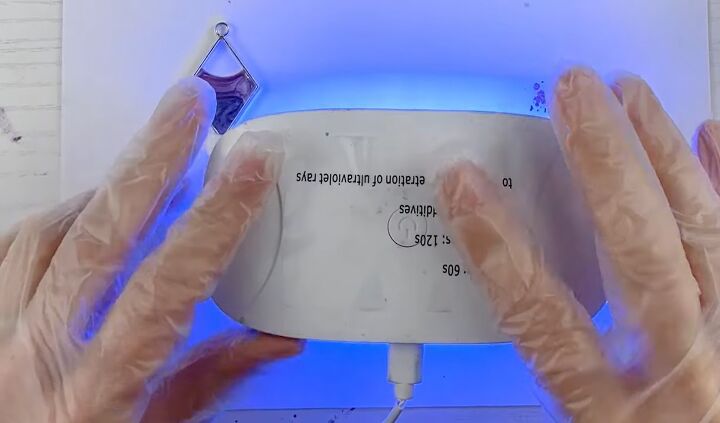
5. Place under light
Next, put it under the resin light before the liquid spreads. You want to do a minute on one side and a minute on the other.
Check to make sure that it’s dried all the way through. If it is squishy at all, then put it under the light for longer.
When you push it, and it feels solid, then it’s done, and you can remove the tape.
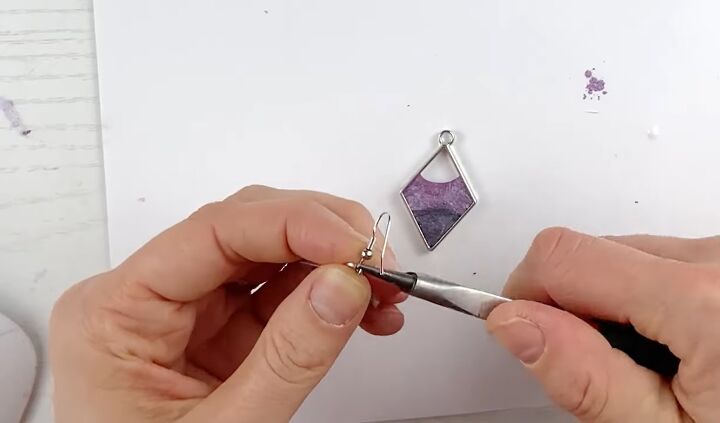
6. Attach earring hooks
Open up the earring hooks with the round nose pliers. Then insert the hooks in the holes on the bezel.
Make sure they’re facing away from the side of the earrings that you want to be the front.
Close the hooks up with the pliers, and you’re done!
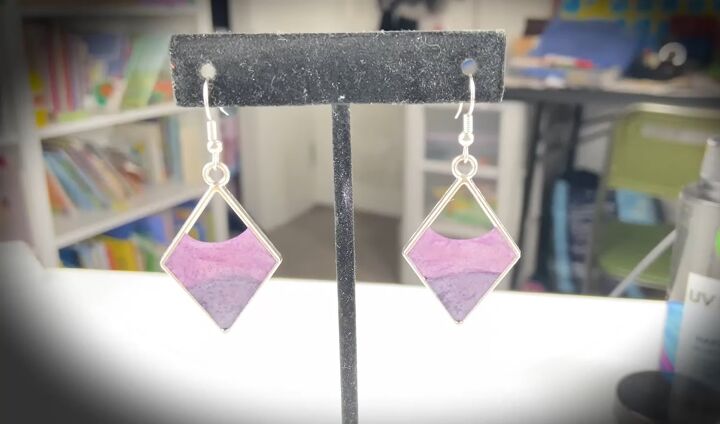
DIY UV resin earrings
And there, my fellow jewelers, you have a gorgeous pair of UV resin earrings with the coolest technique you ever did see!
I love how the two shades of purple almost blend into each other, as well as the empty gap at the top.
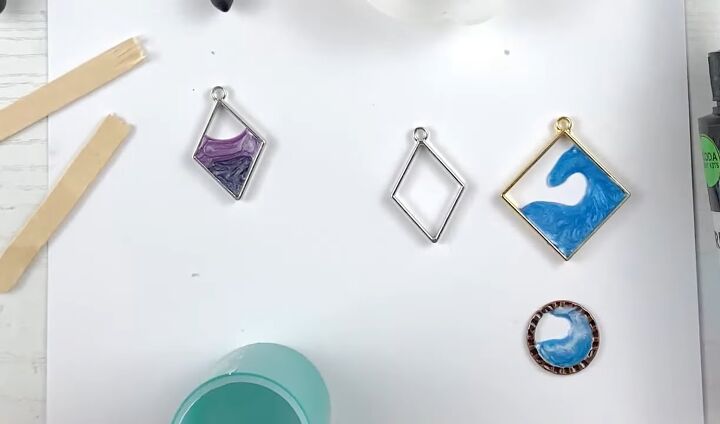
You can, of course, change up the design by varying the colors as well as the shape of the bezel.
Here is an earring I created where I made the blue resin look like a wave. I hope you’ll give this DIY a go!
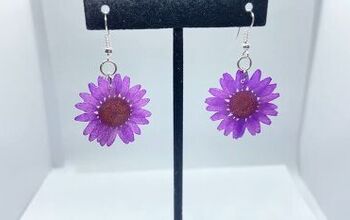
If you enjoyed this tutorial, check out my post on How to DIY Cute Resin Flower Earrings.
The author may collect a small share of sales from the links on this page.


Comments
Join the conversation