Easy Yellow Summer Nail Design Tutorial

In this tutorial, we’re doing yellow summer nail designs with builder gel.
This is a nail art for beginners step-by-step tutorial, so feel free to follow along with your own nails or just stick around for some summer yellow nail ideas.
Before we start, apply full-coverage nail tips and make sure to buff the surface of your nails. Let’s get into it.
Tools and materials:
- Base coat
- Beige builder gel
- Yellow gel polish
- Black gel polish
- Striper brush

1. Apply a base coat
Apply a base coat to your nails to make sure the builder gel has something to stick to. Cure for 60 seconds.

2. Apply three coats of builder’s gel
Apply a light beige builder gel. The traditional way to apply gel polish is to get a big bead of product and then float it down the nail.
Since this builder gel is thicker, paint a few coats on like you would a gel polish. Leave the bulk of the polish around the middle of the nail, then spread it out.
Make sure you coat the entire nail without flooding the cuticles. Cure this coat for sixty seconds, and repeat for three coats total.
If your nails are shorter, you can do two coats. You can also gauge how thick and strong you want the nails to figure out what works best for you.
I had these nails on for about a week and a half and had no issue with lifting or cracking.

3. Draw a thin line to the corner of the nail
File your nails and now it’s time to go in with a neon yellow.
Starting a little before the middle of your nail, use a thin, striper brush to draw a diagonal line to the opposite corner of your nail.

4. Fill it in
Use the regular brush to fill in the triangle you made. Cure for 60 seconds.

You can use a clean brush to fix any mistakes you’ve made. Wipe the brush off on a paper towel that’s moist with alcohol. Make sure you’re working on a smooth surface.
If you’ve buffed the nail and there are scratches, be careful when cleaning up because polish can get trapped in those scratches.
You can either do a matte top coat first or make sure you buff the nail till it's smooth.

5. Mirror the yellow triangle with a black outline
With black nail polish, use the same striper brush to draw a line down the right side of the nail.
Where it ends, draw a diagonal line to the center of the nail, crossing over the yellow triangle you’ve filled in.

Finally, draw a black line across the top of the nail, connecting the two ends of your triangle.
This triangle should mimic the yellow one, but you’re not filling it in. Cure.

6. Apply a top coat
Apply a top coat over the finished design and cure.

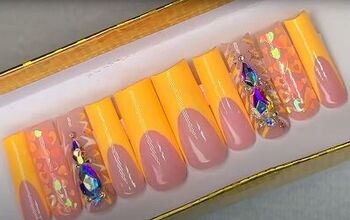
Yellow summer nail design
Here are the finished summer yellow nails! Let me know what you think about this design down below.
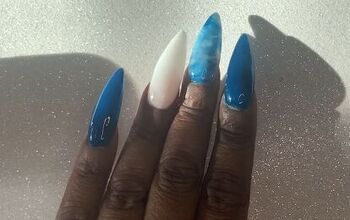
Next, check out my Easy Blue Leopard Nails Tutorial.
Or, you might like this post on How to DIY Cute and Easy Pop Art Nails.
The author may collect a small share of sales from the links on this page.


Comments
Join the conversation