How to Upcycle Old Pants Into a Cute Spring Blouse

I have so many upcycling ideas for clothes, it’s hard to keep up with them!
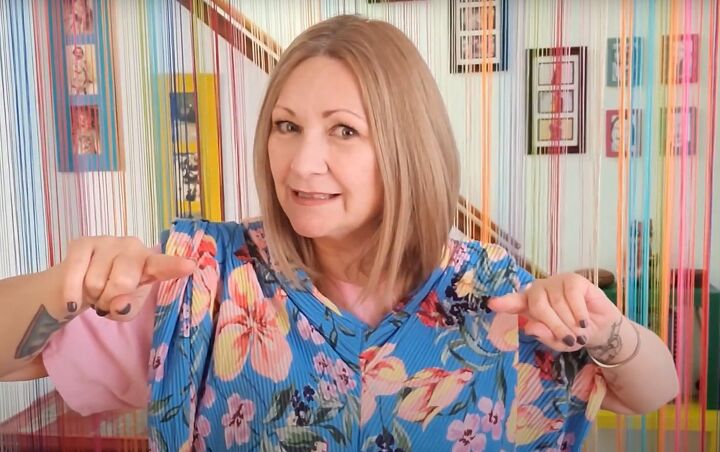
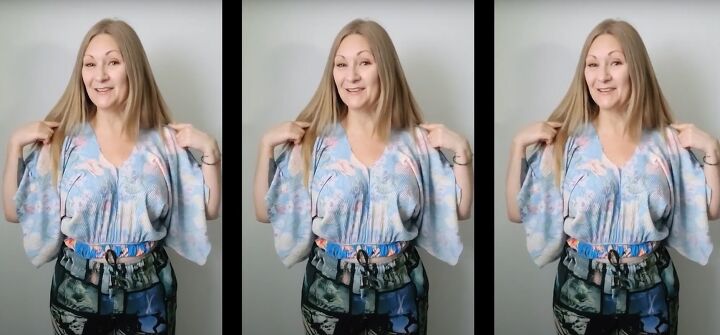
Today’s project is to take a pair of wide-legged culottes and turn them into a spring top.
I thrifted these because I adore the fabric, but the style really doesn’t suit me when worn as pants.
Tools and materials:
- Wide leg lounge pants or culottes with elasticated waistband
- Scissors
- Pins
- Lace or braid trimming (optional)
- Sewing machine
1. Plan the upcycle
I intend to upcycle these pants with as little sewing as possible.
I’ve already decided that the elasticated waist is going to become the lower edge of the top and that the legs will become the sleeves.
I’ve never attempted to do anything like this before, so I’m learning along with you.
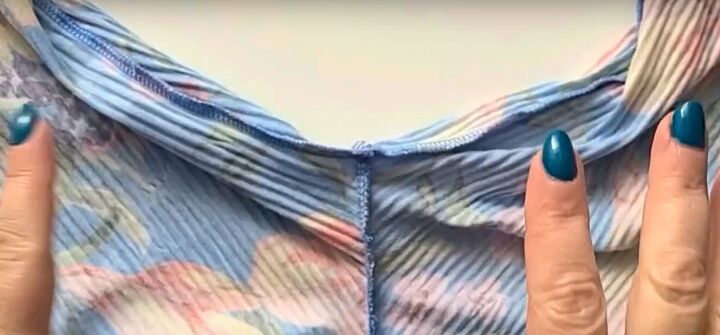
My main issue is how to cut out the neckline.
I know it’s going to come from the crotch area, but I don’t want to spend a lot of time unpicking the inner leg or crotch seams when I’m going to have to cut them anyway.
I ended up folding the pants in half lengthways and lining up all the seams as well as I possibly could.
2. Cut out the neckline
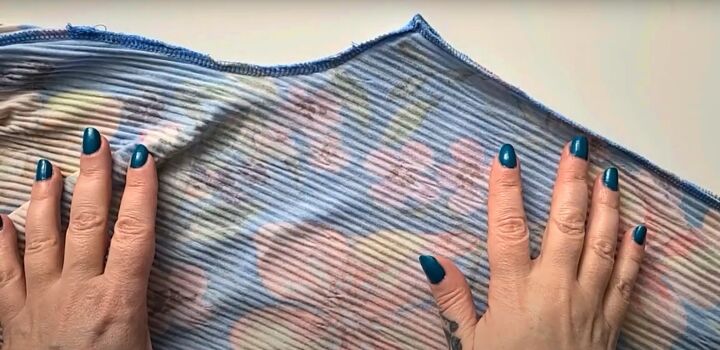
My motto is, you can always cut more but it’s hard to put material back if you cut too much.
So my plan is to try on the pants/top after each cut, and gradually increase the size of the neckline, trying it on each time, until it’s the depth and width I feel comfortable with.
I started by cutting a very small semicircle out of the crotch.
It took me three or four tries to get the style of neckline I wanted.
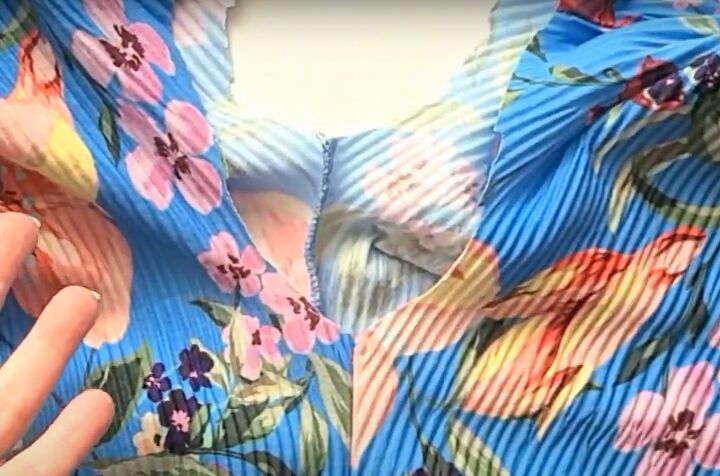
I kept the pants folded for each cut, so the neck was exactly the same on both sides at the front.
I also refolded the pants with the crotch going the other way because I wanted the back neckline to be higher than the front.

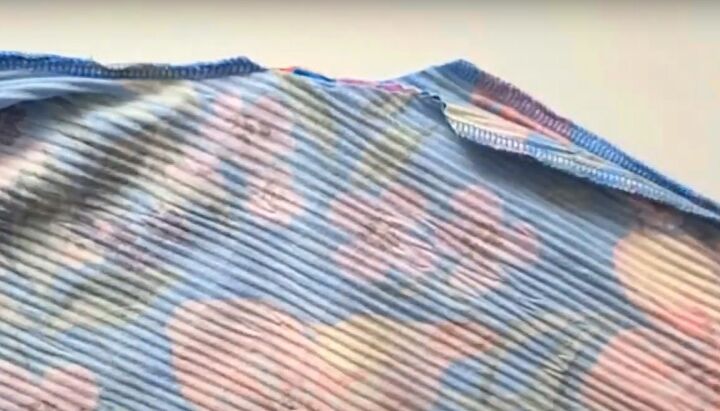
3. Finish the neck edge
You could make a very simple neckline by folding in the neck edge twice to make a narrow hem and sew it in place.
I wanted to try something a bit dressier, so I tried out different vintage trims until I found one I really liked.
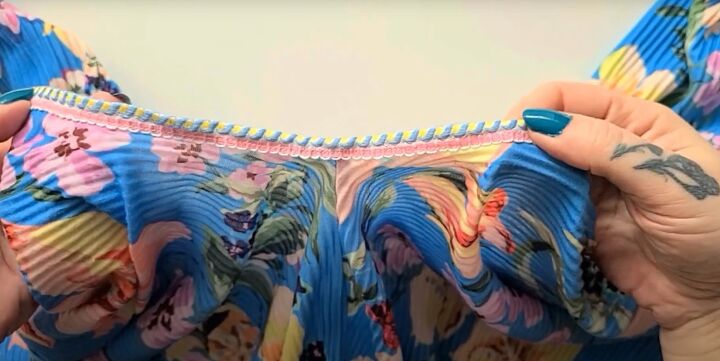
I pinned the trim to the raw edge of the neckline with the right sides together and stitched it down.
Then I turned the trim to the inside to cover the raw edge, and sewed it down on the wrong side so the raw edge was completely covered by the braid.
You could hem this by hand if you don’t want the stitching to show at all.
You could upcycle leggings or jogging pants in the same way and because the fabric wouldn’t fray, you wouldn’t need to finish the neck edge at all and it would be a completely no-sew project.
DIY blouse from upcycled pants
This was such a very easy and quick project and it turned out so well.
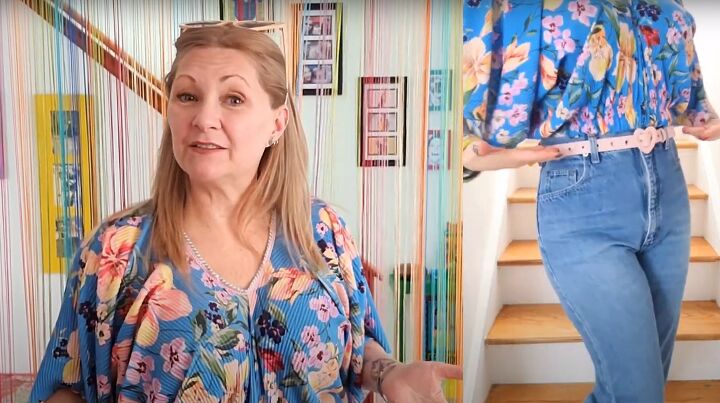
I didn’t adjust the length of the sleeves, but if you do this with full length pants, you could shorten them if you wanted.
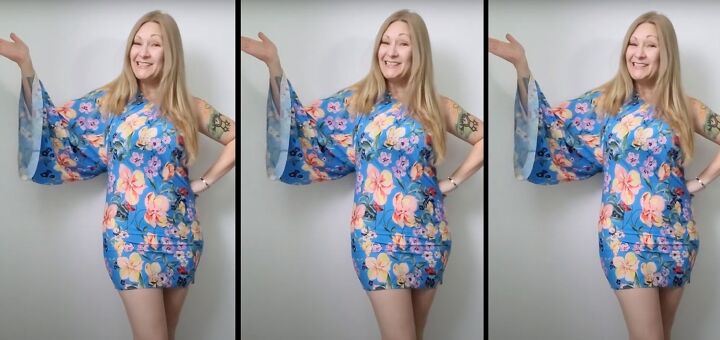
And here’s another off the wall idea, if the pants are wide enough or you’re narrow enough.
Make a one shouldered bodycon dress out of the pants without cutting or sewing anything at all.
Just use one leg of the pants as the dress and the waistband becomes your cross body neckline.
Now I’d love to know what you think of these ideas and which one of them you’ll be using. Please drop me a comment below.
Next, learn How to Make a Cozy Flannel Shirt Dress Out of 2 Old Shirts.
The author may collect a small share of sales from the links on this page.


Comments
Join the conversation