How to Make Embroidered Patches: The Ultimate Guide
Hi Creative Mamas! Super happy to be sharing with you how to make embroidered patches. These DIY patches are great accessories to use as patch pins and brooches but they are also great as patches to sew on clothes.
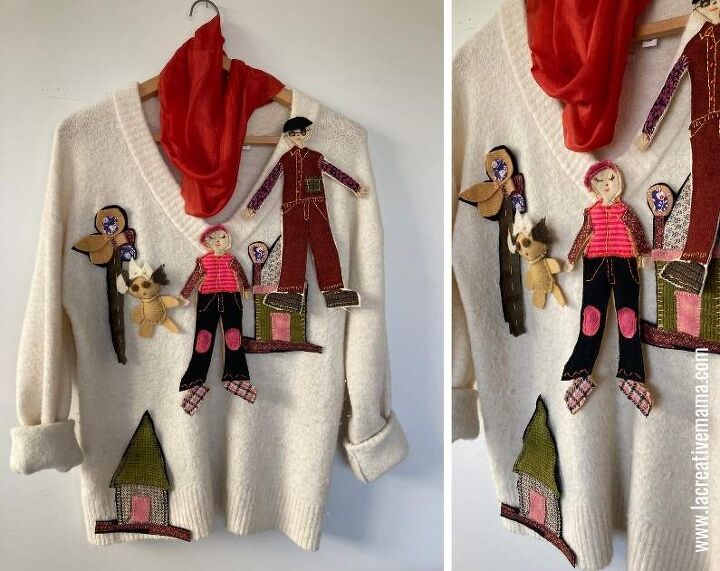
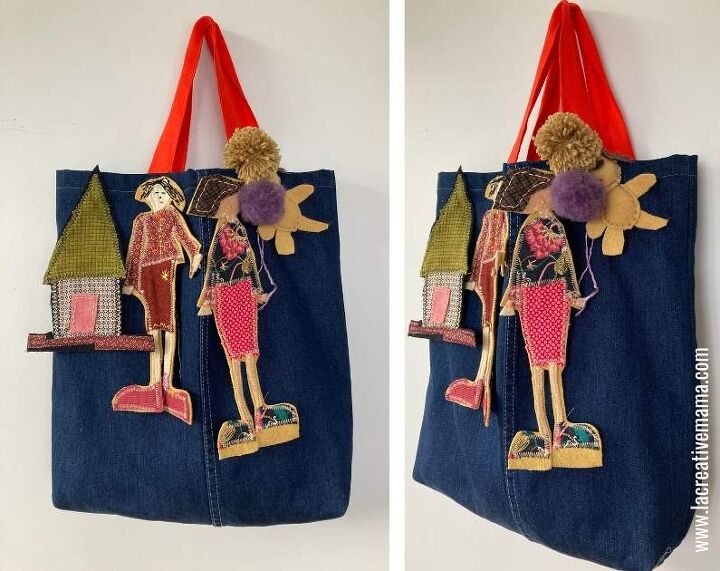
You can use these DIY embroidered patches to cover holes in a garment, to add some glamour into an old pair of jeans or tote bag, or to s ew as applique to your favorite pillow. These patches are a great way to upcycle and re purpose small fabric scraps.
These DIY embroidered patches can be hand embroidered or they can also be a combination of hand and machine sewing. Welcome to the Ultimate Guide to how to make embroidered patches!
There are many different ways to make embroidered patches. I love to make pin patches and applique the patches on my own clothing. I also love to make felt sew on patches.
In this post I will show you how to hand embroider a patch from scratch using La Creative Mama Applique Patterns. It’s a super easy way to make patches and you can adapt it to any drawings or shapes that you may want to use.
It’s also a great way to practice your favorite embroidery stitch. I love using back stitch.
The idea is to have fun and to make creative and unique patches for you and for the whole family. These make great gifts as well.
I will also show you how to make the patches by machine embroidering them. This method is a bit quicker and it looks as nice as the hand sewn ones.
It does give you a very different look to the fully hand embroidered patches. These are great if you are planning to sew them onto a pair of jeans or any other surface that will have to be washed.
I actually like to combine hand embroidery with machine sewing. Let me show you how I do it 🙂 I have also included a section on how to make iron on patches.
This post contains affiliate links, which means I receive a small commission, at no extra cost to you, if you make a purchase using this link. Please see my disclosure for more details.
There is a wide variety of materials to choose from. In this post I focus on using scraps, felt and upcycled wool blankets to create my patches.
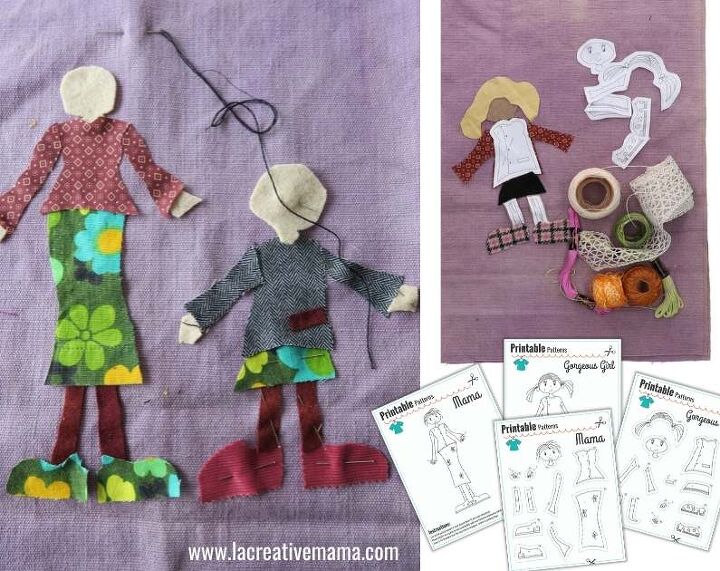
- Patch Printable Applique Pattern (available in my FREE RESOURCE LIBRARY— get the password for free by filling out the form below)
- Fabric scraps
- Wool felt or wool fabric (old blankets are great too)
- Embroidery threads
- Hand sewing needles for embroidery
- Embroidery hoop (optional)
- Fabric scissors
- Wool yarn (optional)
- Iron on adhesive fusing
- Iron
- Anti Fraying liquid
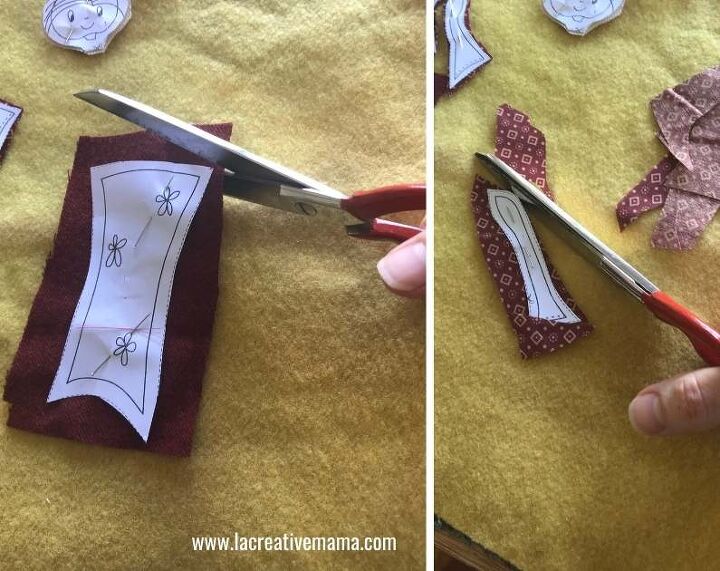
Fill in the form above and download the FREE Applique Template of the mom. Print out the applique pattern. You can print it out to any size you wish. There is a full figure and a pieced one.
For this project we will be using the segmented mom because each little part needs to be cut out in different fabrics.
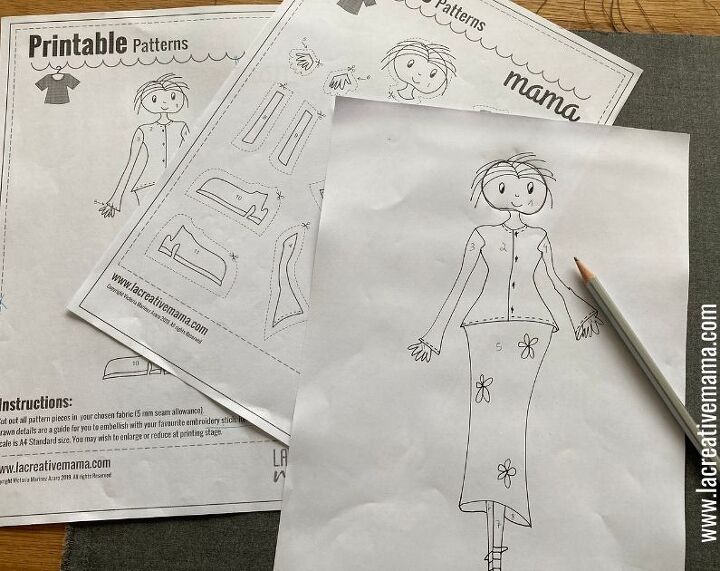
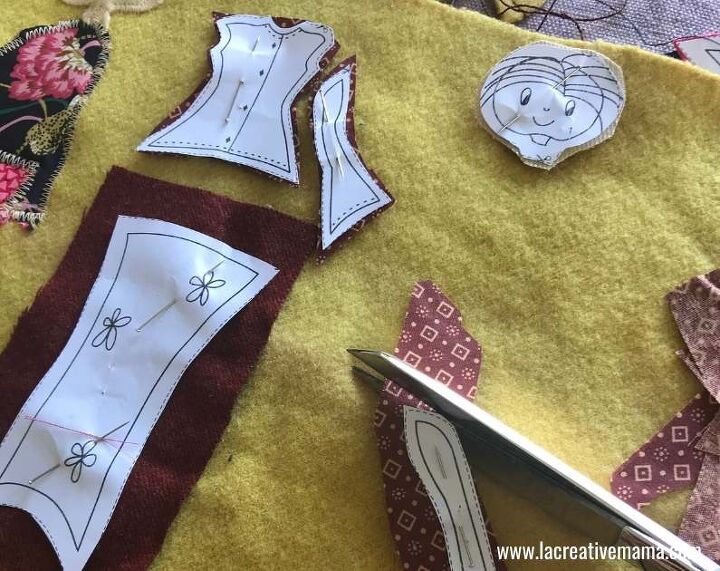
The templates have numbers so that you can keep track of each part of the mom’s body 🙂 Cut out the different segments of mom’s body and pin on your chosen fabric. Cut around the fabric pieces and place them on top of a base fabric.
In this example I am using several different fabrics to create the outfits for mom and for the little girl so I chose to use a thick cotton weave fabric as my base cloth. You can also use wool felt as your base.
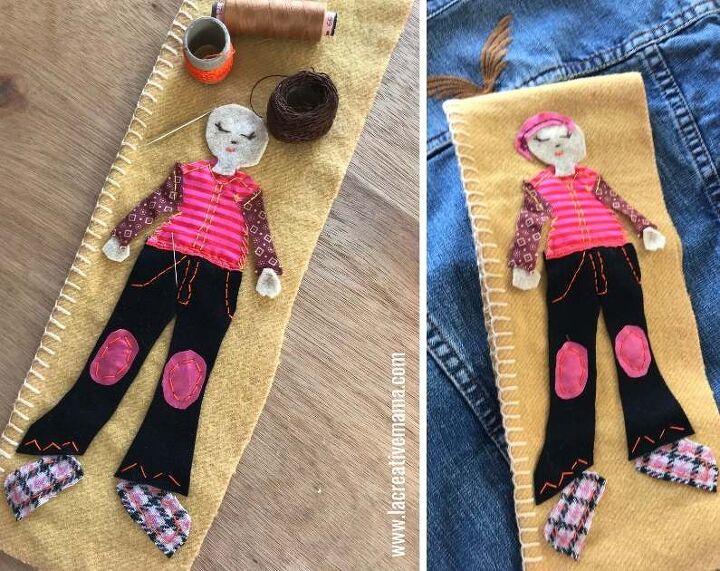
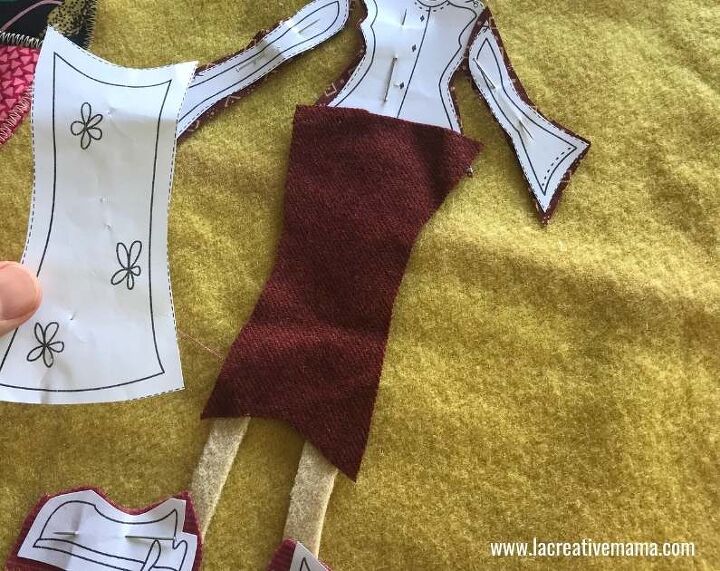
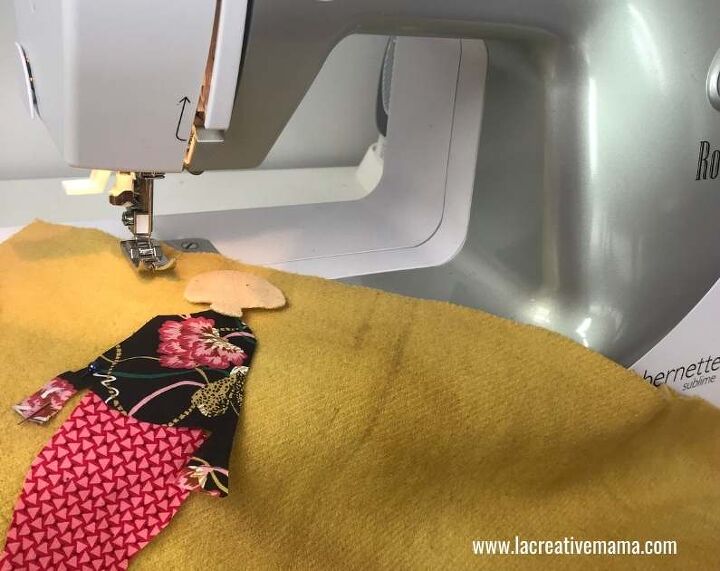
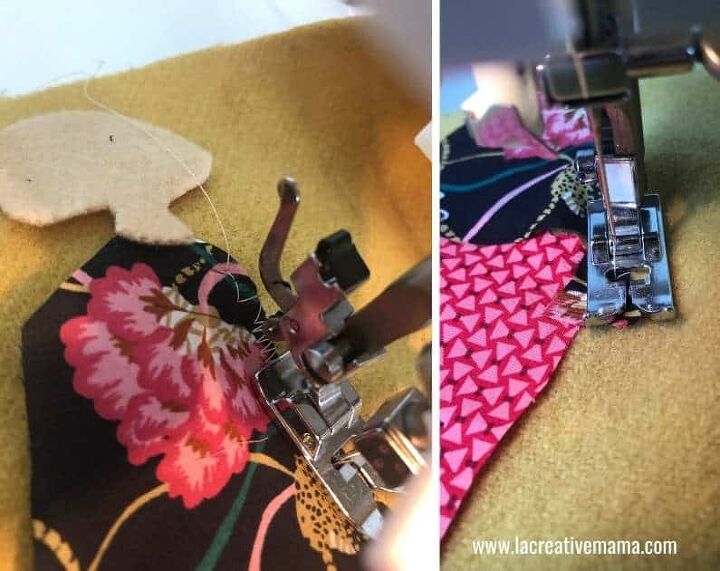
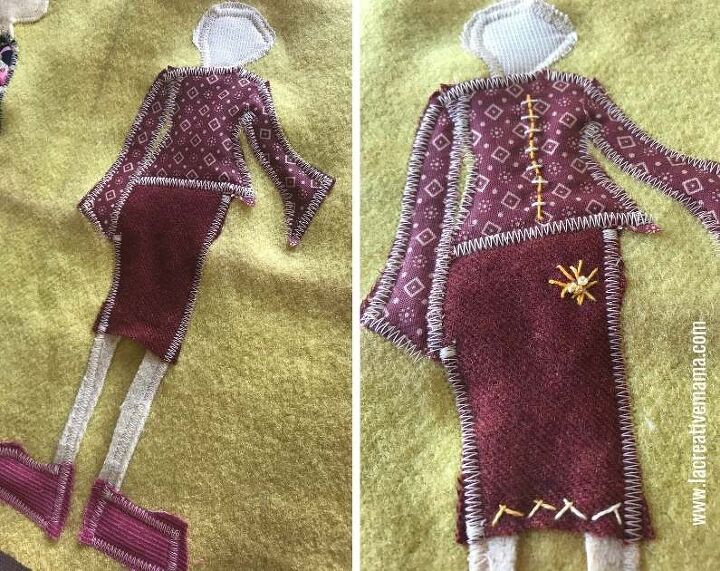
Start embroidering the patch figures with your favorite embroidery stitches. Here I have used whip stitch, back stitch and satin stitch. Embroider the figure directly over a piece of fabric.
You can do this step on an embroidery hoop but I like embroidering straight on the table. Also don’t worry about the edge of the patch yet, we will cover this at the end of the tutorial.
If you like using an embroidery hoop make sure that your hoop is big enough to allow for the size of the patch.
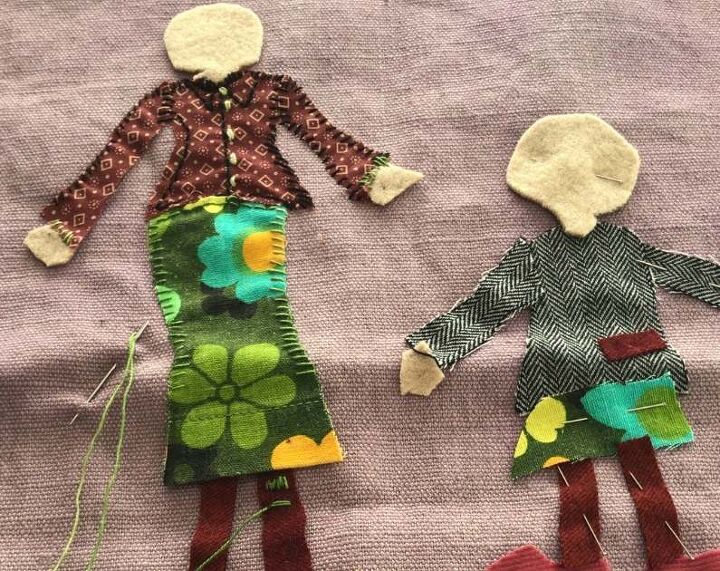
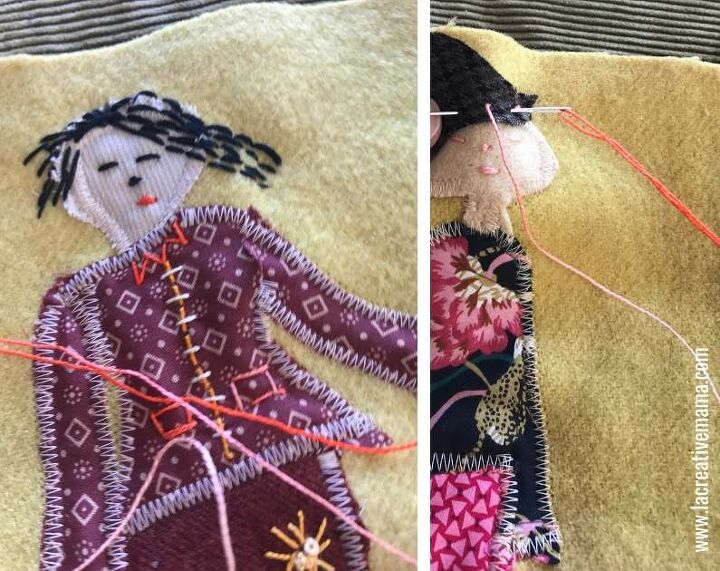
Have fun combining the fabrics with bright embroidery threads and go ahead and embroider details such as buttons, pockets, eyes, nose, hair, etc.
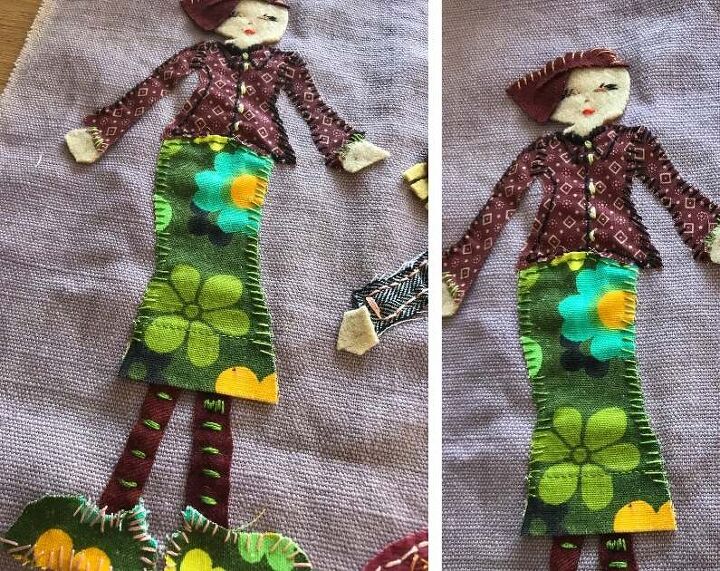
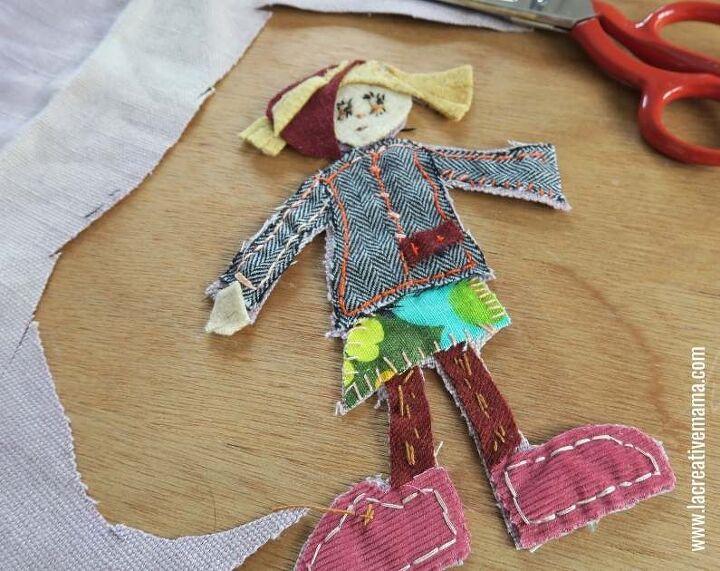
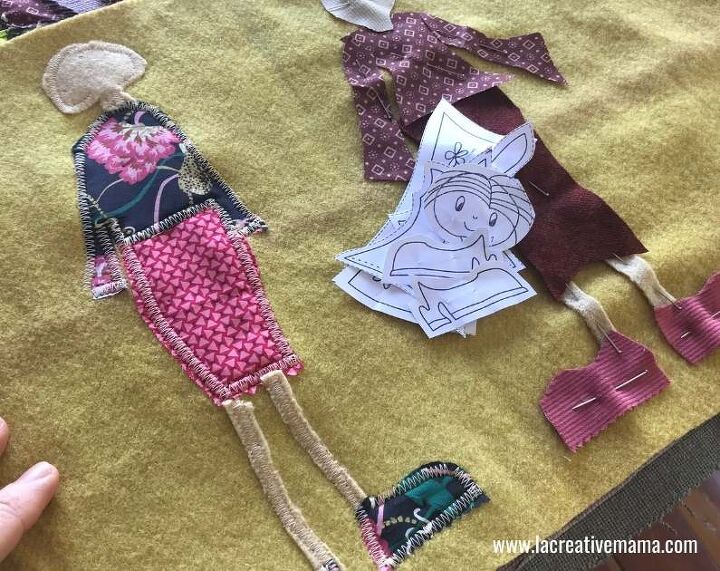
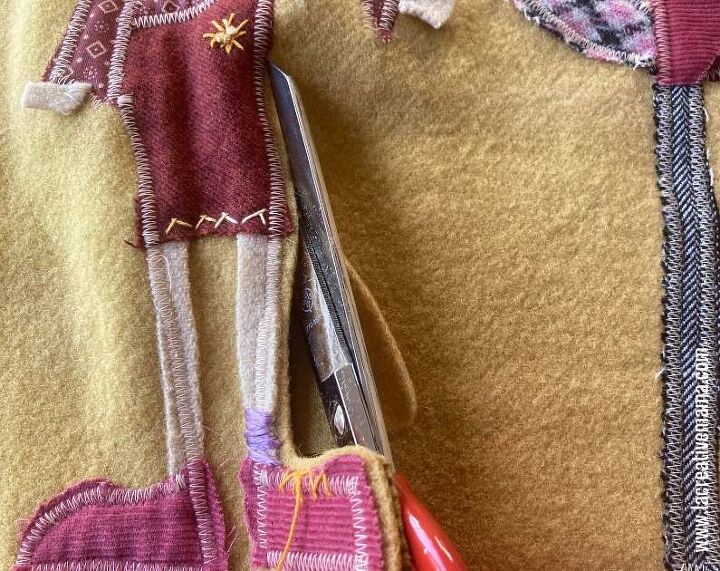
Once you have sewn the patches to the base fabric, go ahead and cut around them.
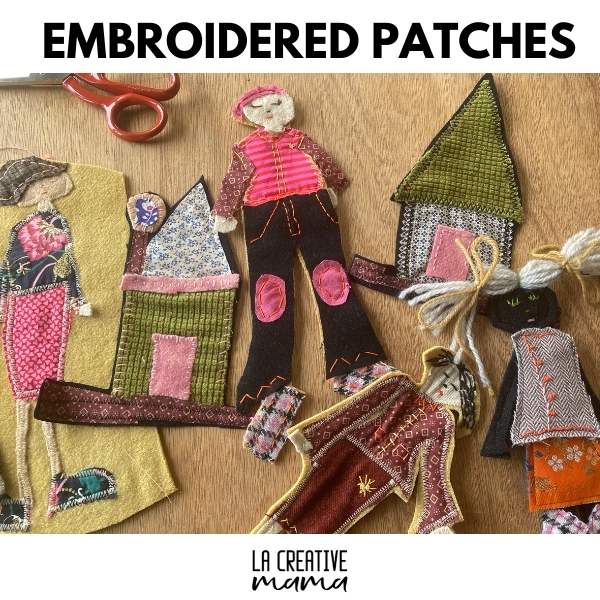
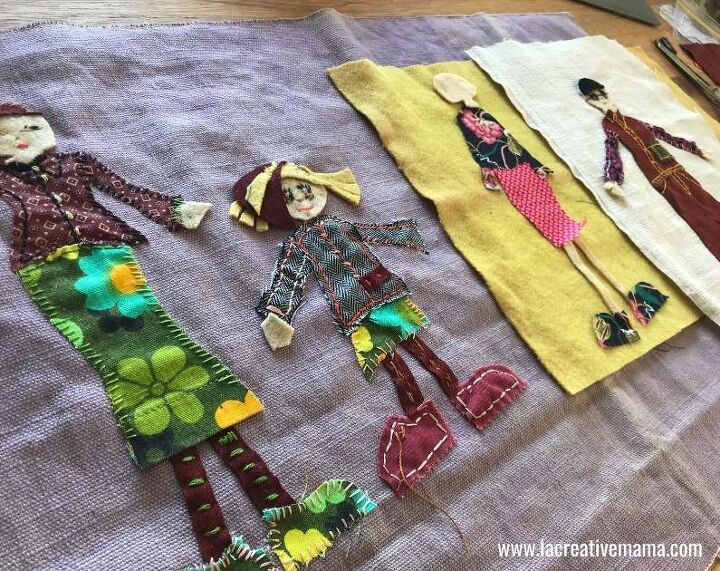
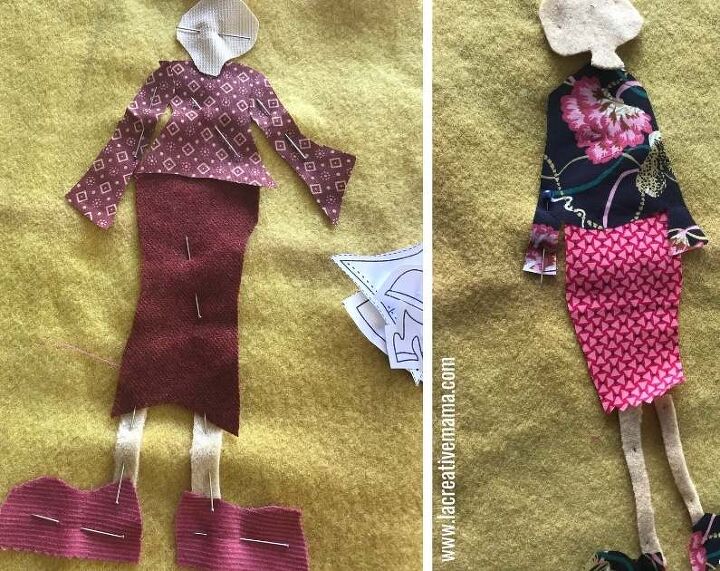
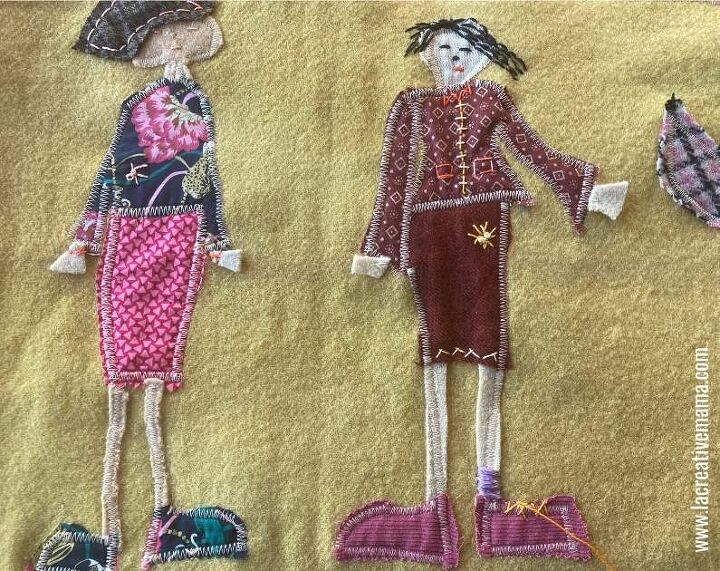
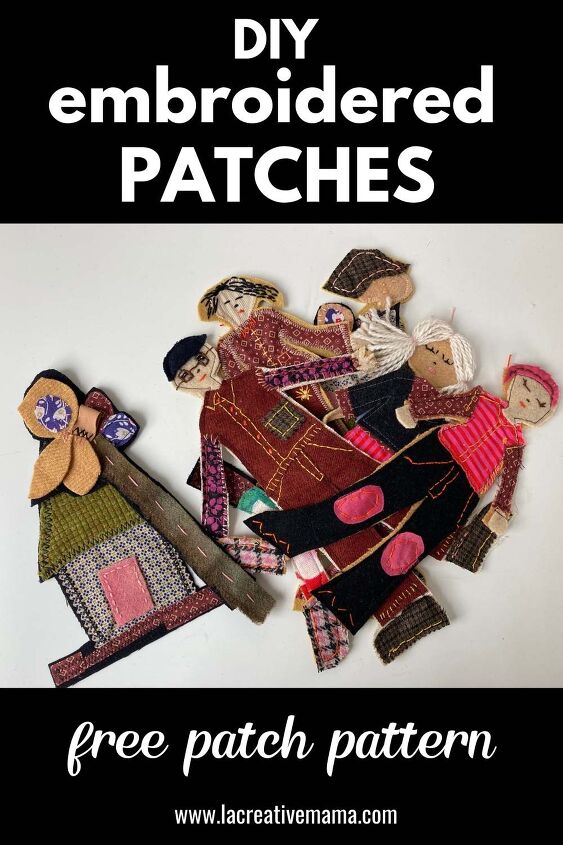
Below I have the whole family lined up (in this case I am making patches that represent a few members of my family which are made out of different fabrics).
This is one of my little girl patches. Make sure to iron before you cut the outline shape.
The easiest way to make embroidered patches is to choose a felt backing or to use felt to embroider directly on it.
In this case I am using an old recycled woolen blanket which is hand dyed using onion skins as the base fabric and I am using wool black felt for the pants and face and cotton for the shirt.
As in the previous example go ahead and download the Applique Template which is FREE from the resource library and cut out the different parts of the body in your chosen fabrics.
Pin them to the base fabric.
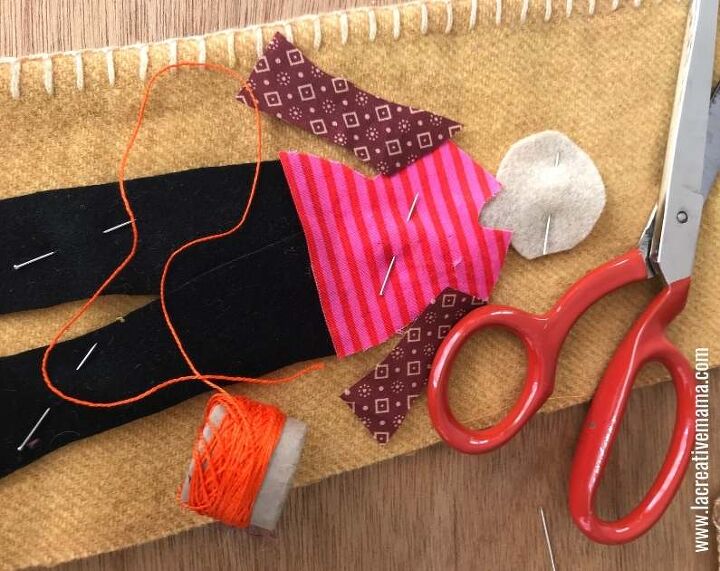
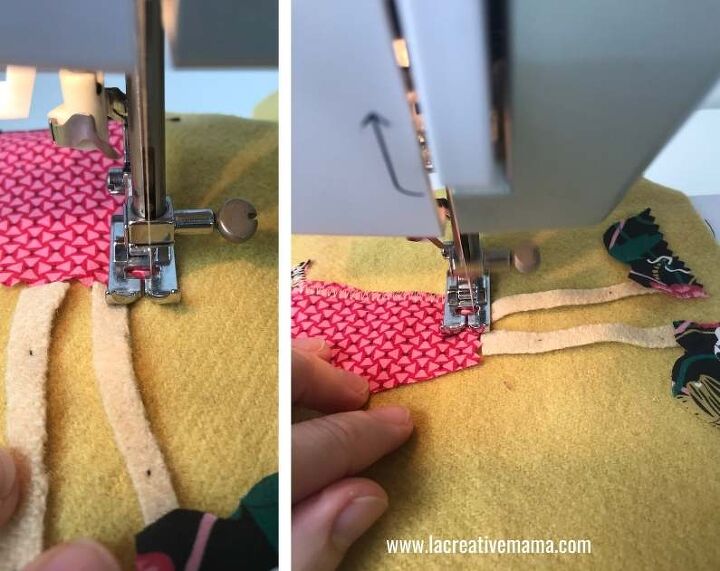
Embroider and sew to the base fabric at the same time.
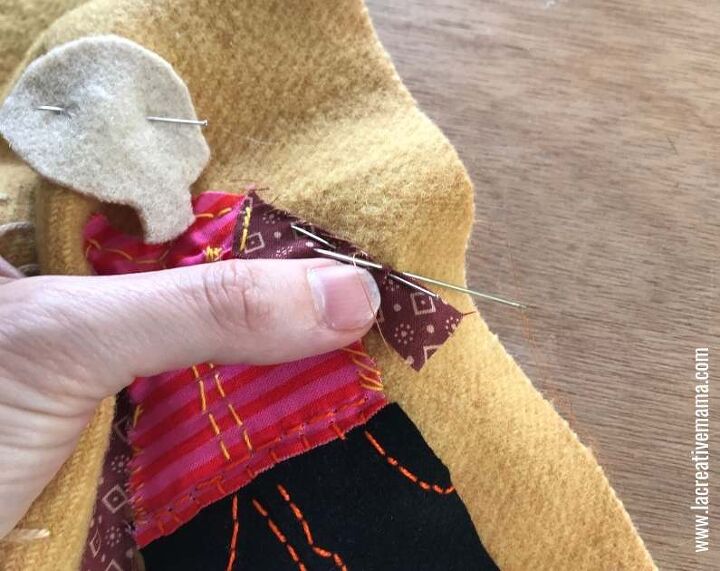
Have fun designing the different clothing details in different color threads.
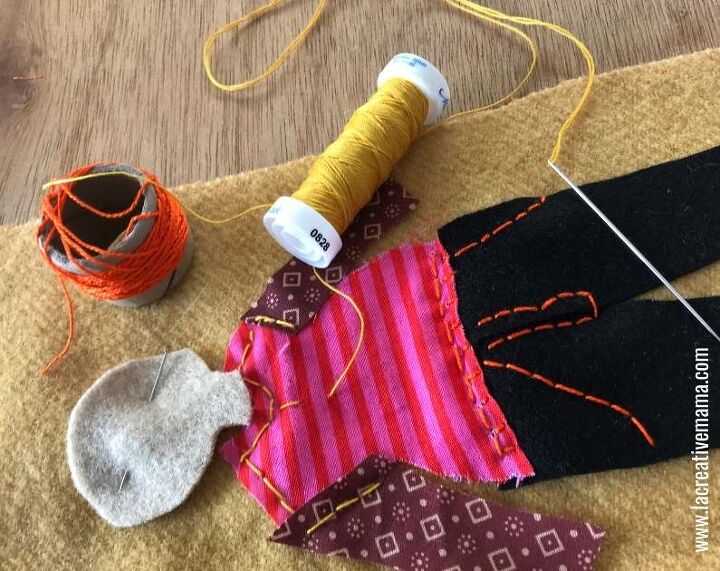
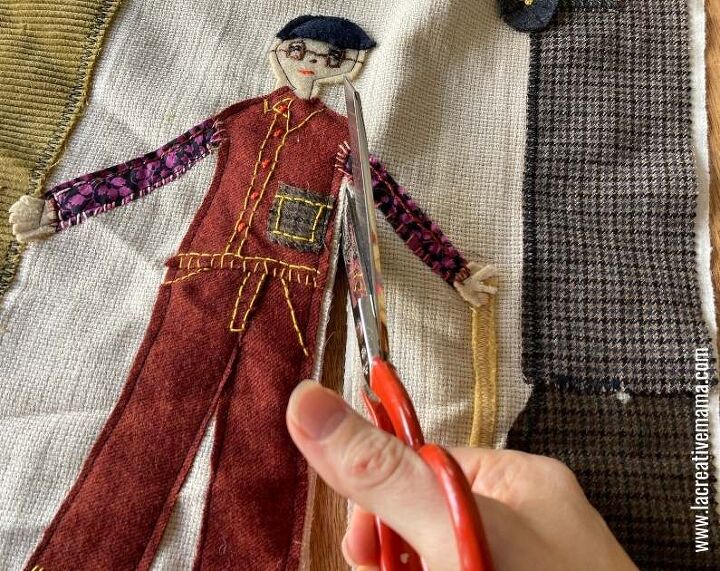
Once the patch is fully embroidered go ahead and cut around it.
Take them to the sewing machine and using a regular stitch sew around the patch. This will ensure that the patch is secure and durable but the hand embroidery will be the star of the patch.

I am also making this male patch to represent a special man in my family 🙂
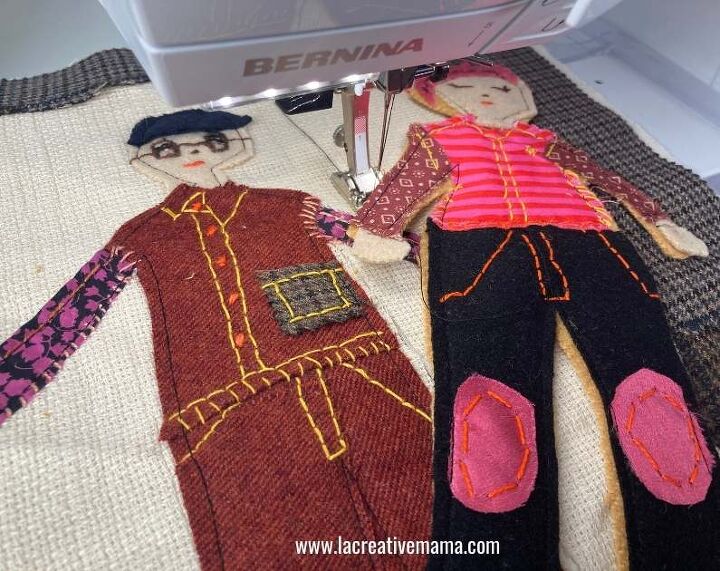
In the case of my male patch I have sewn around it before cutting it. I find both ways as good as each other so feel free to do whatever feels easier to you.
Press the final patches firmly with a hot iron.
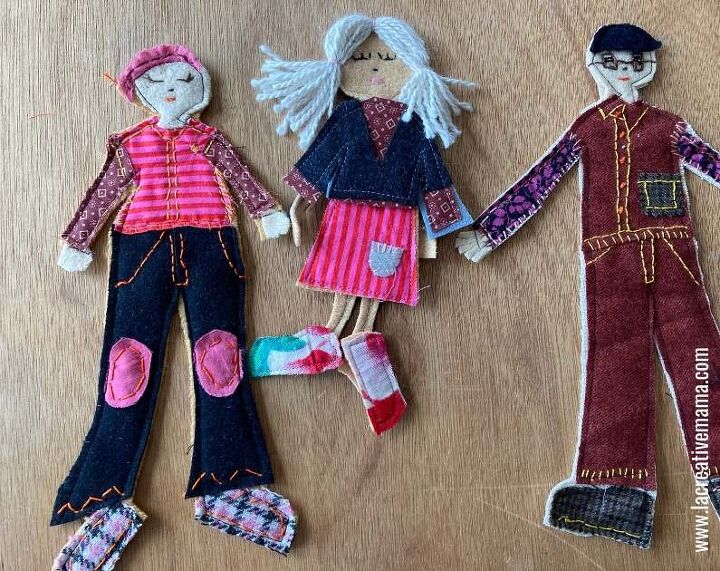
Here are my first 3 patches completed. A happy family 🙂
You can use wool yarn to make hair, beards, moustaches, shoe laces etc.
I want to show you another way on how to make embroidered patches which is faster and makes super durable patches too.
As in the previous examples, download your templates, cut out the pieces and pin them to the base cloth.
In this case I am using another woolen blanket which I hand dyed using Eucalyptus.
Have fun combining the different fabrics and positioning the arms and legs in different ways.
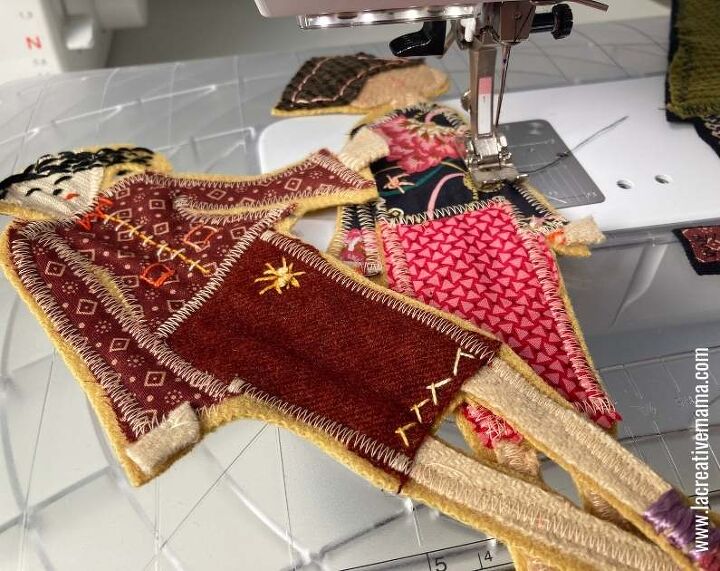
Take the pinned body to the sewing machine. You can choose any embroidery stitch that you like from the stitches menu.
In this case I decided to go for the simplest zig zag stitch.
Also choose the color of the sewing thread carefully so that you are happy with this color covering the whole figure.
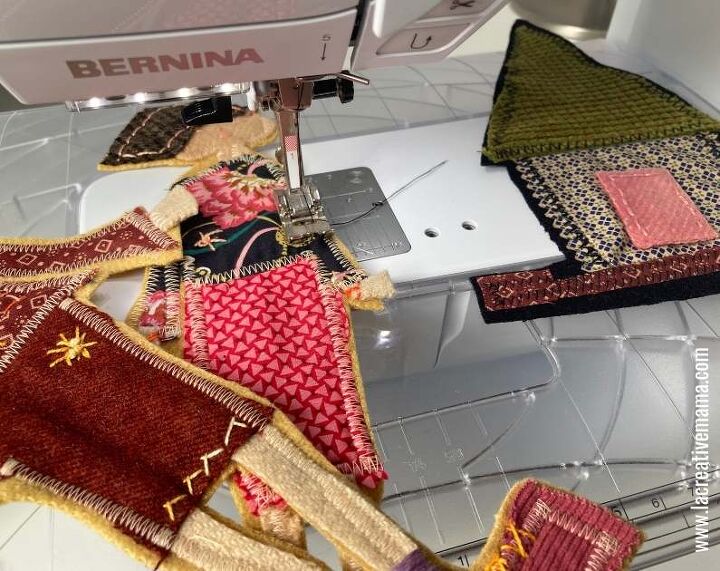
Sew around each individual piece to ensure that the embroidered patch is totally secured. You can sew several patches on the one piece of cloth.
Repeat the process with each figure.
Embellish by hand embroidering the face and clothing details. I love using my favorite embroidery stitches such as little french knots, lazy daisy stitches and satin stitch.
Here are my 2 machine embroidered patches.
Cut around them making sure to leave a little space around the edge so that a little bit of the felt base is showing.
You can go back to the sewing machine and secure in place if anything needs reinforcing.
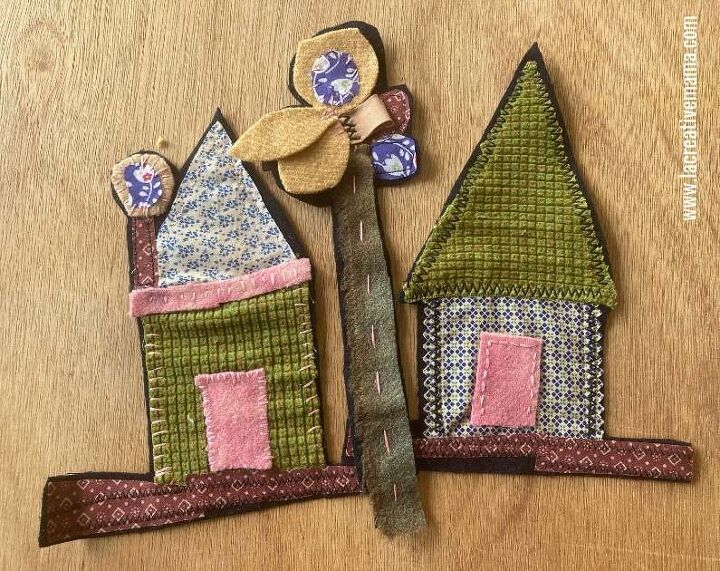
The patches below are my little houses ( from a fabric collage project) which are a combination of basic machine embroidery and hand embroidery over a piece of black felt.
I cut around them and also sew around them with a regular straight stitch. They were made out of scraps which are tea dyed and hand dyed with cochineal.
I love to stick to natural fibers. The problem is that because I am always using scraps it’s difficult to know if the fiber is natural or synthetic.
You can perform a quick burn test in order to find out the fabric composition.
The main thing to remember is that you need to use a heavy and firm base fabric so that the foundation of the patch is nice and sturdy.
I like using wool felt or a heavy wool as my base cloth. However (as in the first example in this post) I sometimes use a thick cotton cloth.
For the different pieces of the patch you can use any scraps that you may have lying around your sewing room.
Ok so we have made the patches and now we need to finish them either as applique patches or as pin patches.
You have 2 options:
- Glue a piece of felt to the back of the patch and sew a pin to that backing
- Sew a backing felt piece and rather than sewing a pin you can use a safety stitch pin.
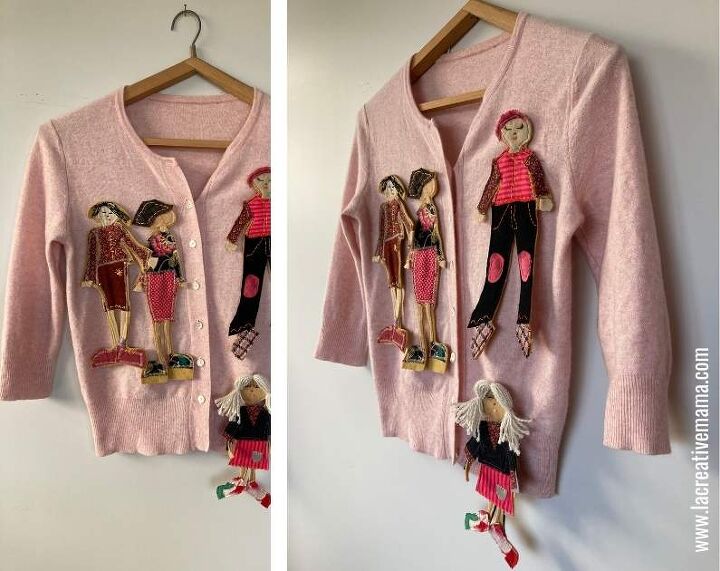
If you are using your patch as an applique you don’t need to worry about backing it with another cloth since it will be attached to another surface.
Simply place the patch on the desired position on your jeans, jacket, pillow, quilt, etc (make sure that is not jersey ) and sew in place using a regular sewing stich on the machine.
You can also sew by hand using either a whip stitch or a running stitch.
In this post I have left the edges untouched. I like this look and I think that frayed edges add to a more crafty feel.
However, if you like tidy edges you can either hand embroider the edges of the patch or apply anti fray liquid. This work wonders and it will avoid the fabric patch from frying.
Make sure you always iron the patch firmly.
You can easily make a custom patch by making your own drawings or purchasing the different patterns from the Applique Binder.
You can also trace your favorite illustrations from books and magazines!
Use a satin stitch to fill in the surface of the drawing. First embroider the outline using a backstitch and then patiently start making satin stitches until the whole shape is completely filled.
You can also make iron on patches by following these steps:
Start by tracing the applique designs to the adhesive fusing on the paper backing side. I like to use the lite quality adhesive fusing so that doesn’t create any stiffness. Feel free to experiment with different qualities.
Trace the individual parts of the pattern onto the paper backing of the heat and bond fusing. Cut the individual parts.
Place your fabric with the wrong side up and put the pattern piece paper side up. The adhesive fusible side of the paper that has the glue needs to be in contact with the wrong side of the fabric.
Now place a hot iron on top of the pattern piece making sure the iron is set on no steam. Cut around the marked pencil lines and place your applique pieces onto the base cloth.
Create your mom. Peel off the adhesive backing of the adhesive fusing and iron them to the base fabric.
Embellish by embroidering details with the machine, then cut around.
The author may collect a small share of sales from the links on this page.


Comments
Join the conversation