Quick and Easy Fall Nail Art Idea

Follow along to recreate this easy fall nail art design. The muted tones, plaid pattern and a bit of sparkle just scream fall!
Tools and materials:
- Acrylic nail set and stand
- Protective gloves
- Gel polishes: light gray, light pink, peach, matte chrome, white
- Detail brush
- Nail lamp

1. Paint 3 nails gray
Paint the thumb, middle and ring finger nails gray.
Don’t forget to cure each nail for about 20 seconds in between each layer!
2. Paint the index finger nail pink
Paint a base of gray-pink to your index finger nail.

3. Paint the pinky finger nail silver sparkle
Use a silver sparkle polish for the base of your pinky nail.

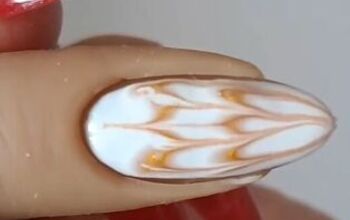
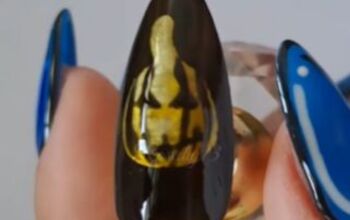
4. Paint peach details
With a detail brush dipped in peach polish, paint rounded shapes on the tops/bottoms of your middle and ring finger nails to look like pumpkins.
Also, paint the main lines for the plaid pattern on the pink nail.

5. Add white and matte, chrome detail
Use a detailed brush dipped in white polish to finish the plaid nail.
Then add a matte chrome outline to create the sections of the pumpkins.

Add thin chrome lines to the plaid nails and add more detail to the pumpkins.

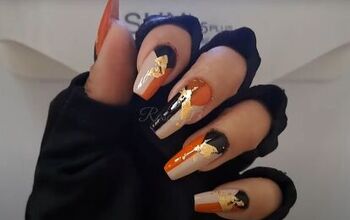
Here’s the final, fall set:

Easy fall nail art idea
I hope you loved this easy fall nail art idea. How cute are those little pumpkins?!
For more fall nail inspiration, check out my cute French tip sweater nails.
The author may collect a small share of sales from the links on this page.


Comments
Join the conversation