How to DIY Easy Milky Foil Nails

If you've been wanting to try a foil nail dip, this tutorial is for you.
We are going to be going back to basics with a simple milky nails foil design.
I’m going to be talking to you about how you can do a foil nail dip and get really nice coverage on your nails.
Tools and materials:
- Foil
- Colored dip powder
- Clear dip powder
- Dip cup
- Clear nail polish
- Nail brush
- Cuticle stick
- Gel base coat
- Gel top coat
- UV light
- Isopropyl alcohol
- Wipe
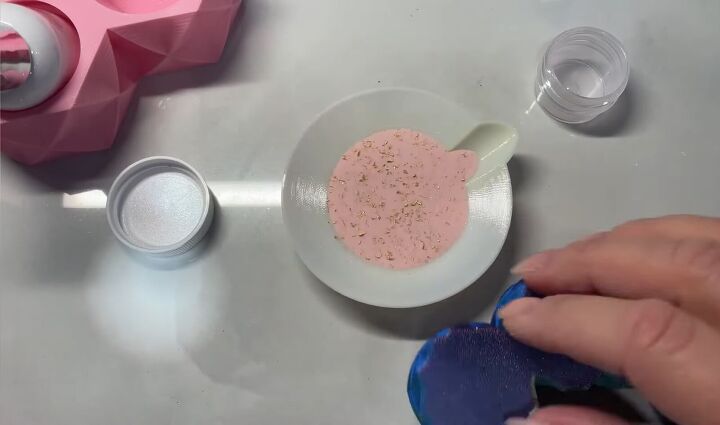
1. Pour foil dip
First, pour the foil dip into a dip cup (or a cupcake liner if you don’t have one of those).
The key to dipping your nail with foil is laying your nail flat in the foil.
Since the foils fly everywhere when you dip them, you don't want to pour the foil over your nails, or you're not going to pick many up.
I also added a light pink powder to the gold foil as pink and gold are an excellent combination, and the pale shade of pink gives a milky look which I really like.
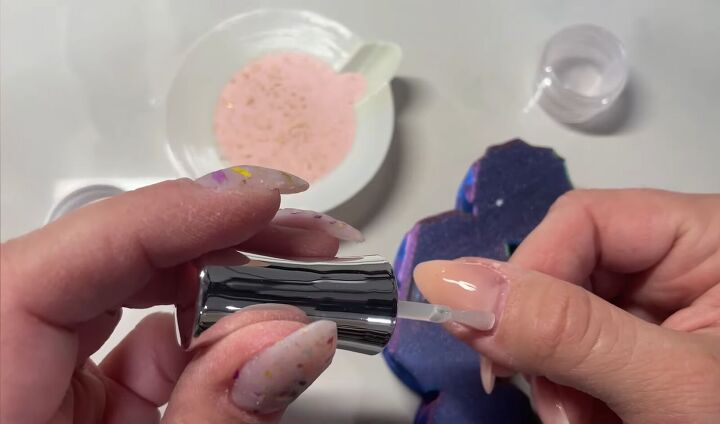
2. Paint nails
Next, paint your nails with clear polish, trying to keep the polish as thin as possible.
This way, the foils won't clump together and get too thick. When your polish is thin, your foil can stay thin too.
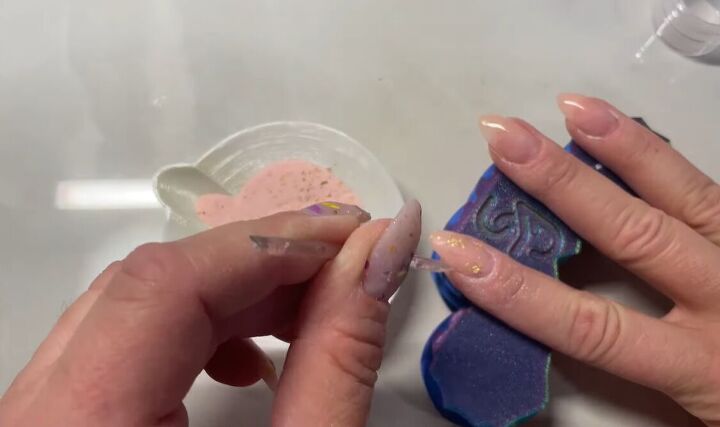
3. Dip in powder
When you’re dipping the first layer, you don’t need to try too hard to get so many pieces of foil on your nails.
You can try to pick up some foil pieces, but it's not super important.
Then, once that first layer is fully dry, take a stiff nail brush and brush off any excess powder and foils just to keep your nails as nice and thin as possible.
When you go in and dip the second layer, you want to shake up the powder gently, as this allows all the big pieces to come up to the top, which allows you to get a lot more coverage.
So apply another layer of clear polish to your nails and then dip again, trying to get as many pieces of foil as you can on the second dip.
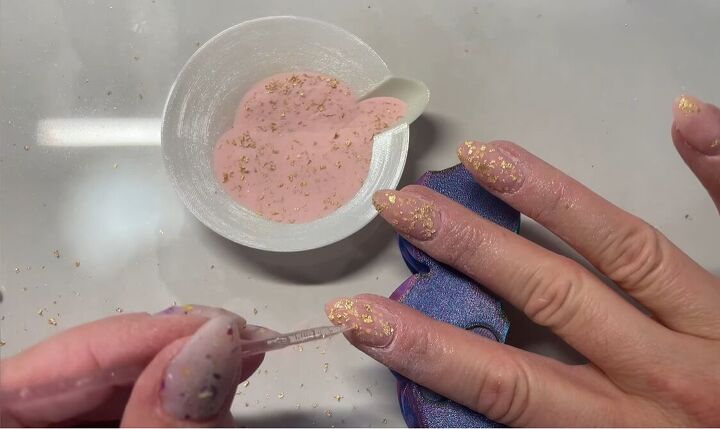
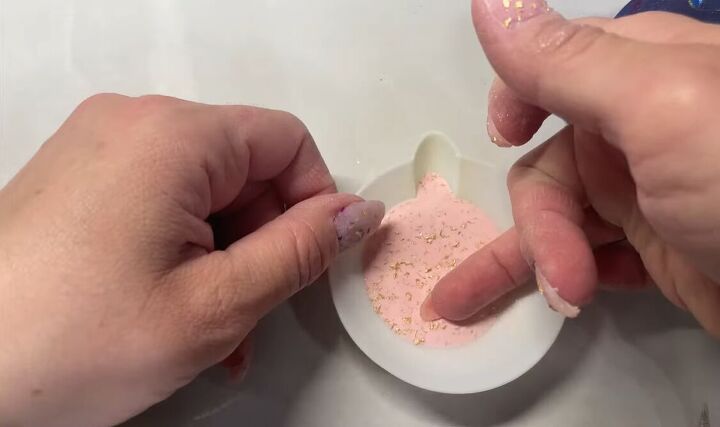
When the second dipping is done, go back through your nails and place foil on any areas that you think are too sparse, using your cuticle stick to help you.
Some people like the look of a little bit of foil, but I like my nails to be well-covered.
Once you’ve finished placing all the foil, let your nails dry fully.

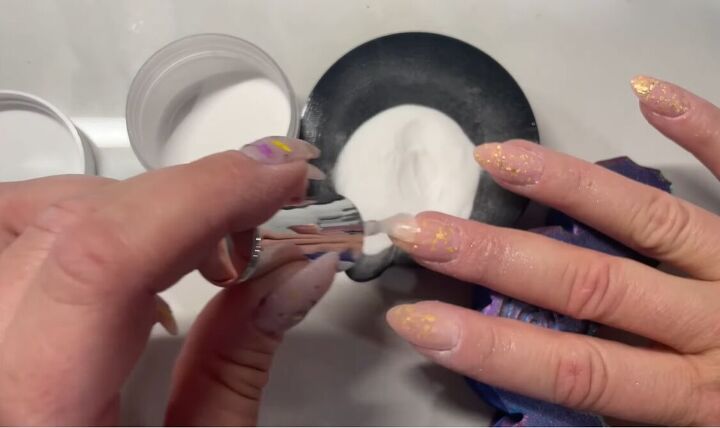
4. Add clear dip powder
Then go in with a layer of clear dip powder, wait for it to dry, and then brush off your nails.
If your dip layer isn't dry enough before you try to brush off any excess, your foils can sometimes bleed.
You'll know when you're brushing off any excess if it starts to stick to your brush you know that your layer is not dry enough.
5. Activate nails
The final step is to activate your nails by applying a gel base coat, fully curing your nails, and then applying a gel top coat and fully curing them again.
Once it is dry and your nails have hardened, you can do a very minimal amount of buffing, shaping, and filing.
Whenever you’re using gels to finish a mani, wipe your nails with isopropyl alcohol and a lint-free wipe.
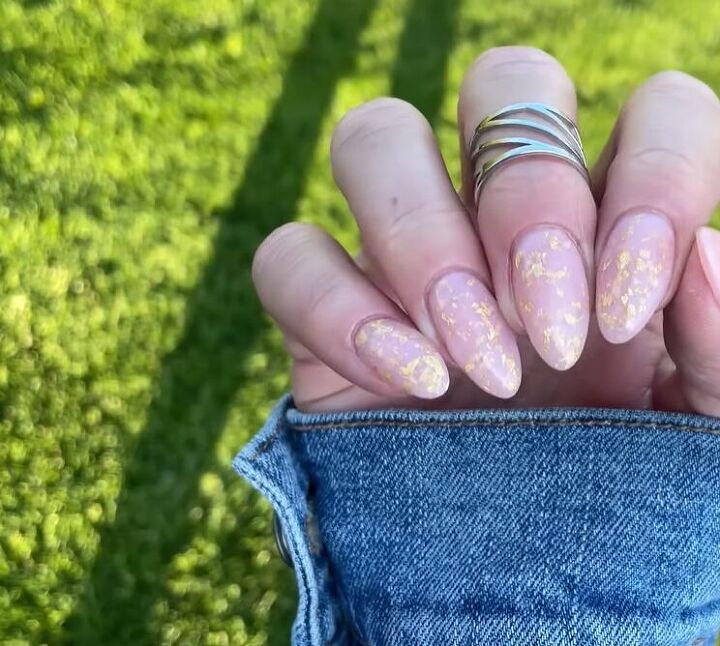
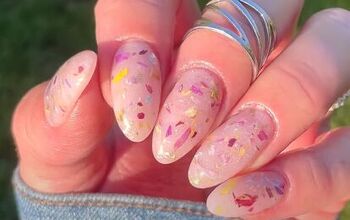
DIY dip milky foil nails
Here are the finished dip milky foil nails. I love the shiny gold foil flakes against the pale pink background and really just can’t get enough of this look.
If you’re new to using foil on your nails, I hope you’ve found this tutorial helpful! If so, leave a comment.
For more cute nail designs, check out How to DIY Glazed Pink Hailey Bieber Nails at Home.
The author may collect a small share of sales from the links on this page.


Comments
Join the conversation