How to DIY Awesome Orange Flame Nails

In this nail tutorial, we’re going to be creating some orange flame nails on the background of a checkerboard.
If you love bright, fiery colors, this nail design is for you. Follow along as I show you how to create this cute design.
Tools and materials:
- Nail polish (white, yellow, red, black)
- Fine brush
- UV light
- Top coat
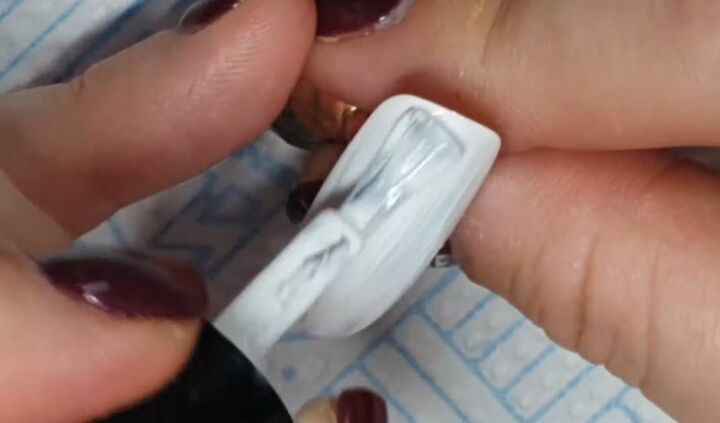
1. Paint the base
Start by painting a white base coat. Then cut the nails and go over them with a second coat.
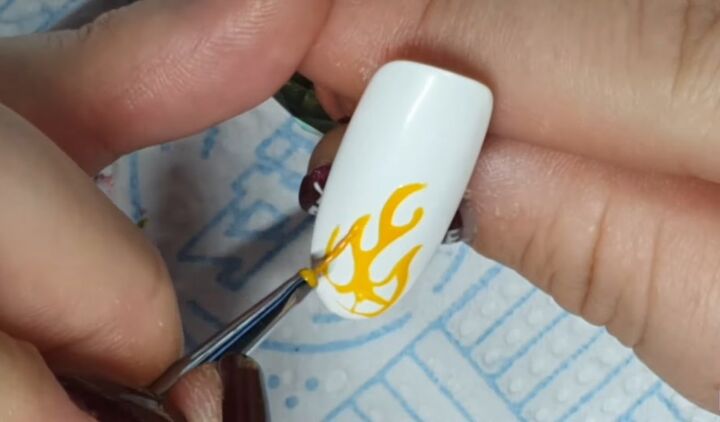
2. Paint the flames
Then take yellow nail polish with a fine brush and draw some flames from the top of the nail.
I find that it’s easier to look at a picture of a flame when you’re doing this so that I can copy the image. Then, proceed to cure the nails.
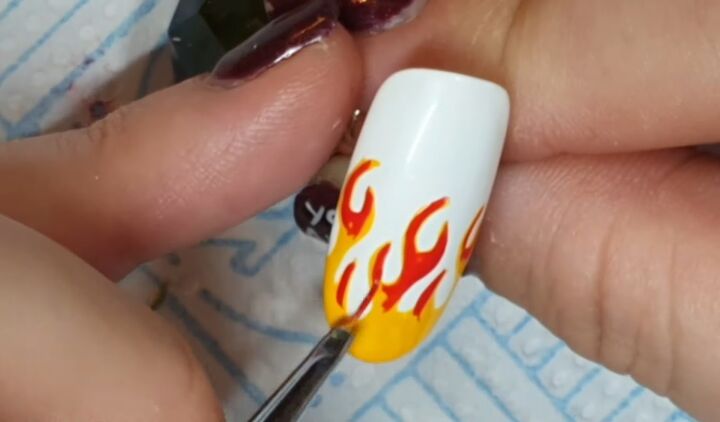
3. Go over with red polish
Next, go over the top of the yellow flames with some red nail polish. We’re not quite creating an ombre effect, as the yellow isn’t wet.
4. Blend the colors
With the red paint still wet, blend out the color slightly. We want it to be redder at the top, yellow at the bottom, and orangey in the middle.
You can add more red polish, yellow polish or mix the two until you have the desired effect.
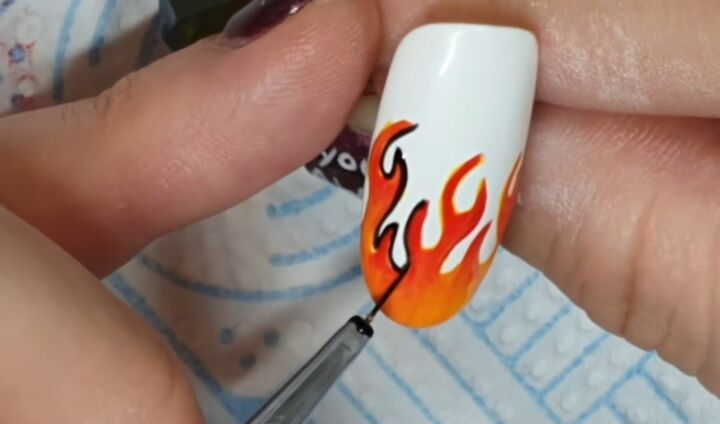
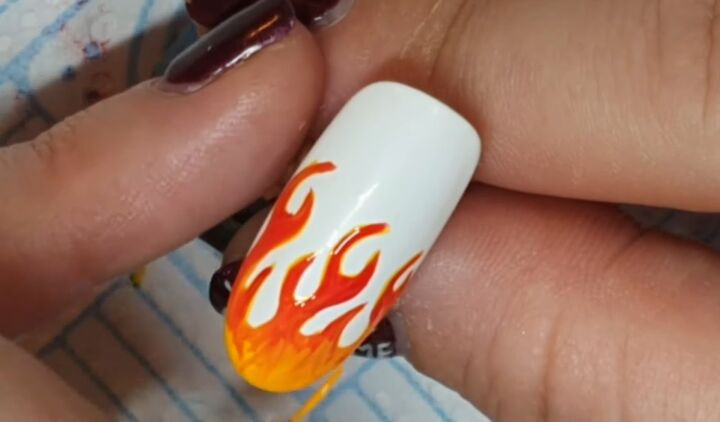
5. Outline the flames
Outline the flames with black nail polish and cure your nails.
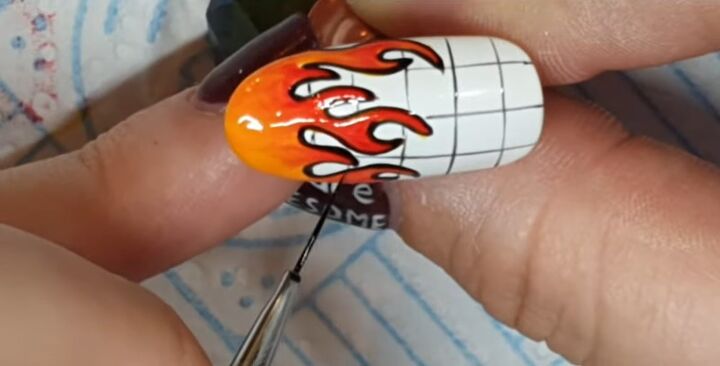
6. Draw the background lines
Draw some vertical and horizontal lines throughout the white and then cure those.
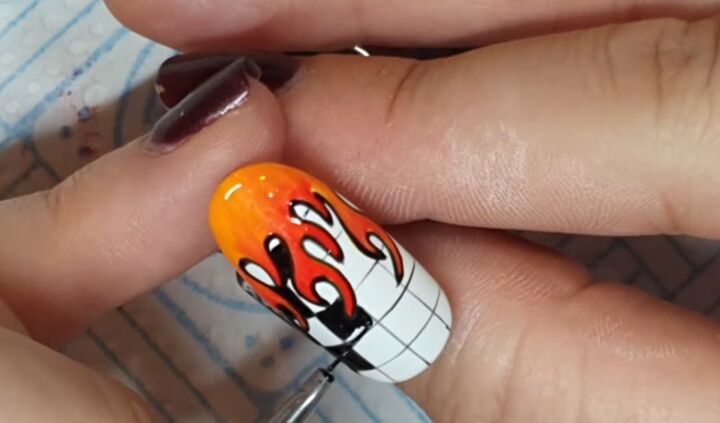
6. Fill in the boxes
Fill in every other box with black nail polish to create a checkerboard look.
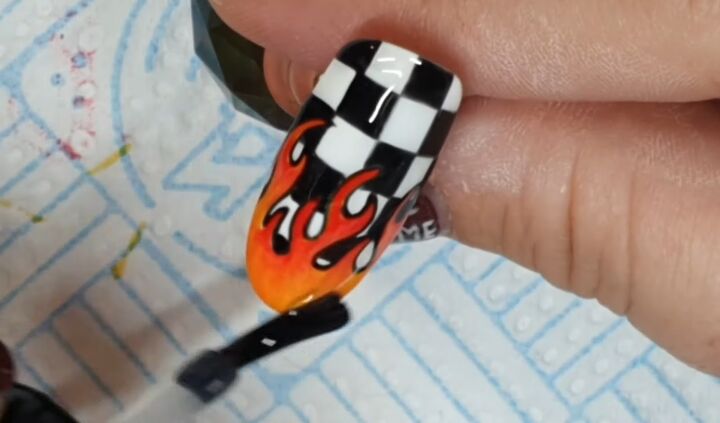
7. Apply topcoat
Go over the nails with a topcoat and then you’re done.
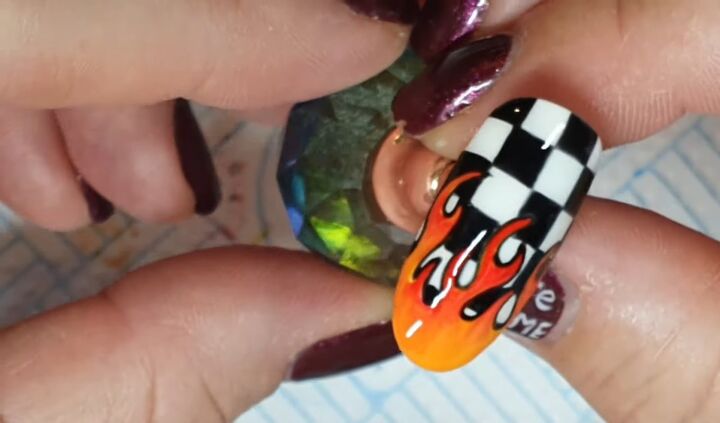
DIY orange flame nails
Here is the finished look! I love the bright fiery flame contrasted against the black and white checkerboard.
If you’ve always wondered what a chessboard on fire looks like, now you know! This is a really different and unique nail look, and I hope you’ll give it a try! Let me know in the comments if you do.
For more nail content, check out my Easy Galaxy Nail Art Tutorial.
The author may collect a small share of sales from the links on this page.


Comments
Join the conversation