DIY SUEDE MIDI PENCIL SKIRT
Sponsored by Zappos
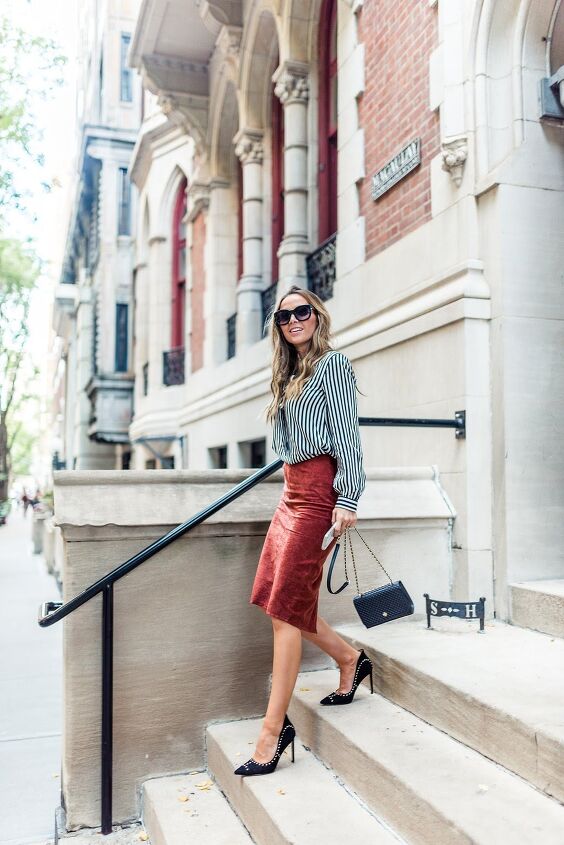

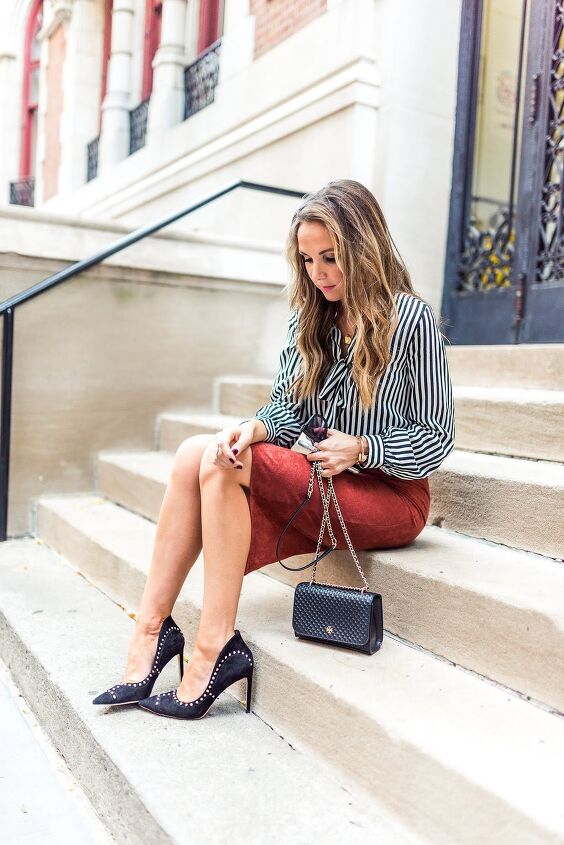
SHIRT || HEELS || BAG || SUNGLASSES || COCKTAIL RING

When I was prepping for Fashion Week earlier this month, I bought this faux suede fabric. I’d planned to only use it to make a dress ( which I did here), but then I loved it so much I ended up making a skirt too.

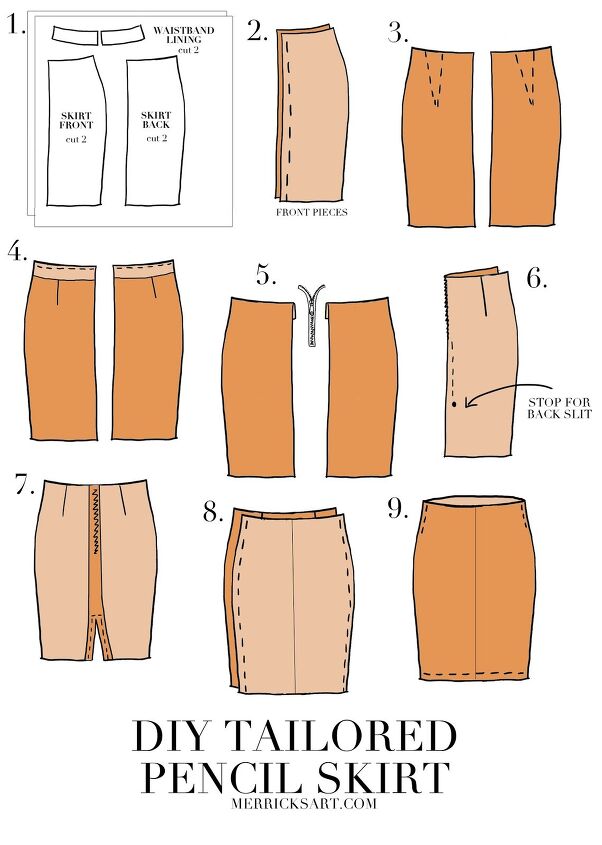
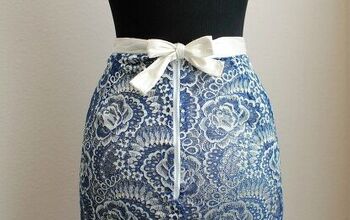
Step 1. Cut your pieces. You’ll need 2 SKIRT FRONT pieces (make sure they’re mirror images of each other), and 2 SKIRT BACK pieces (also mirror images). Then you’ll need 4 WAISTBAND LINING pieces. These should match the dimensions of the top of your skirt pieces.
Step 2. With right sides together, sew your SKIRT FRONT pieces together down the middle. This is an extra step that’s not necessary — you can cut your skirt piece on the fold if you’d like. But I liked how it looks with the seam down the middle.
Step 3. Take your SKIRT BACK pieces and sew darts on either side. This will make it fit nice and snug around your curves. Also you can add darts to the front if needed!
Step 4. Now take your SKIRT LINING pieces and sew them to the skirt pieces with right sides together. Do this for both the SKIRT FRONT and SKIRT BACK pieces! Then fold the lining over to create a nice smooth edge of your waistband.
Step 5. Once the skirt lining is attached, it’s time to put in your zipper. I did an invisible zipper, but you can do whatever you’d like.
Step 6. Now that your zipper is inserted, sew up the rest of the SKIRT BACK pieces (with right sides together). Mark the end of your slit and stop sewing there.
Step 7. Open the SKIRT BACK, as shown, and press your seam allowances open. Sew on the seam allowances, up and around the slit, to secure it.
Step 8. Now with right sides together, sew the SKIRT FRONT and SKIRT BACK pieces together on the sides.
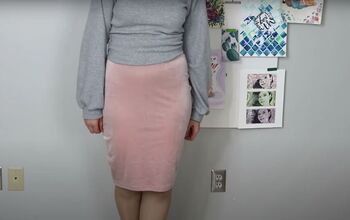
Step 9. Hem the skirt to your desired length. Then, since we didn’t sew around the waistband, we need to tack down the LINING so it doesn’t flap around. Stitch in the ditch on your side seams to tack the lining down. Easy. And you’re done!

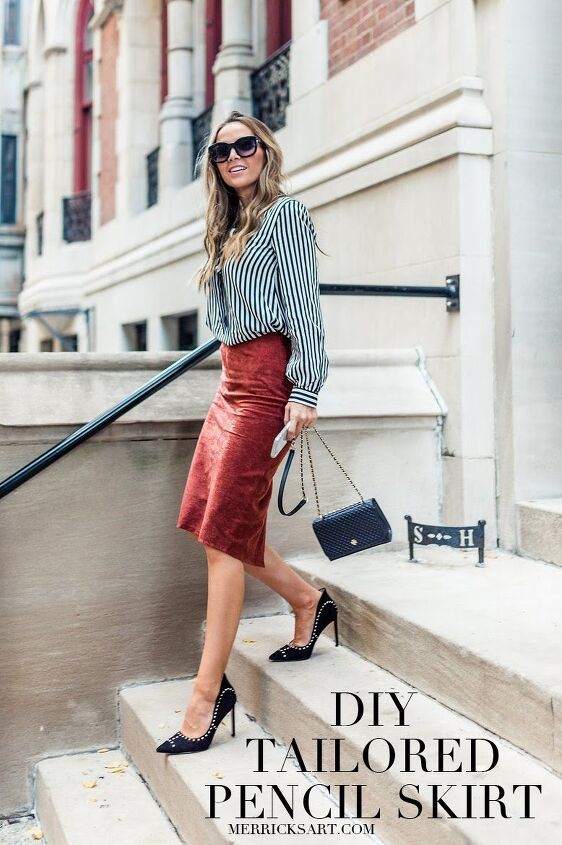
I haven’t made a tailored skirt in a long time, so it was a fun little challenge for me and I’m super happy with how it came out. I’ll be sharing the tutorial at the end of this post!
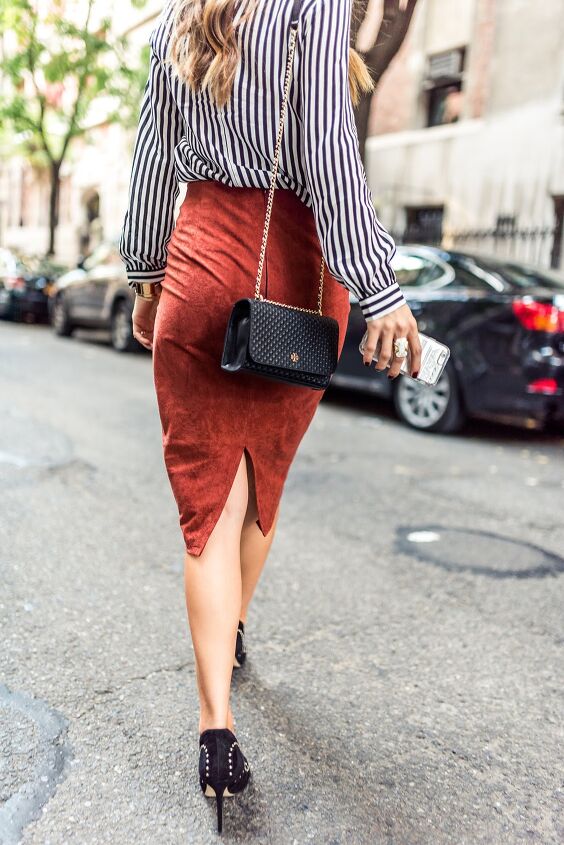
Once the skirt was done, I chose a striped button up to wear with it, and then it was time for accessories. Since the look of a pencil skirt and button up is very sophisticated, I wanted to add a little bit of edge. So I picked up these studded stilettos at Zappos, and also this pretty little quilted crossbody bag with a chain strap. The studs and chain make the look a little less secretary 😉
Also, did you hear that Zappos just launched a reward program?? Now you get rewarded just for shopping! I’ll be sharing more about it in the coming weeks, but you can check out details early right here.


photos by jordan zobrist
The author may collect a small share of sales from the links on this page.


Comments
Join the conversation