Easy and Beautiful Butterfly Sleeve Top

I’ve gotten a lot of requests for a tutorial on how to make this top, after posting a picture of it on Instagram. A friend of mine also asked me to make one for her, so I decided to kill two birds with one stone and record myself as I make this top for my friend. This pattern is very easy, and only requires two lines of stitching, a hem, and a zipper, so in no time at all, you will have a gorgeous new DIY butterfly sleeve top to wear.
Tools and materials:
- 2 yards of fabric
- Measuring tape
- Scissors
- Ruler
- Zipper foot
- Pins
- Chalk
- Open-ended zipper
- 12 mm bias tape
- Sewing machine
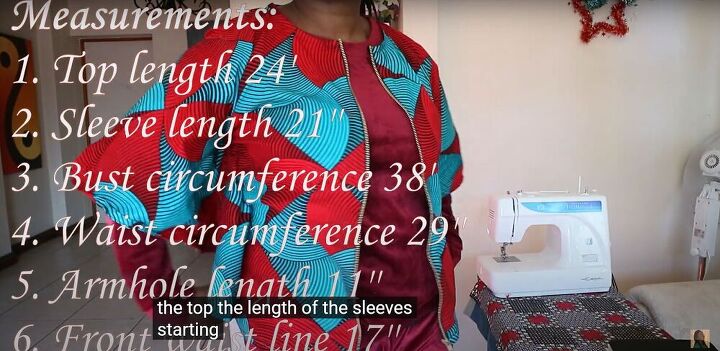
Take measurements
I took all the measurements shown above before beginning the project. For more information on taking these measurements, see the video from 1:47-2:01.
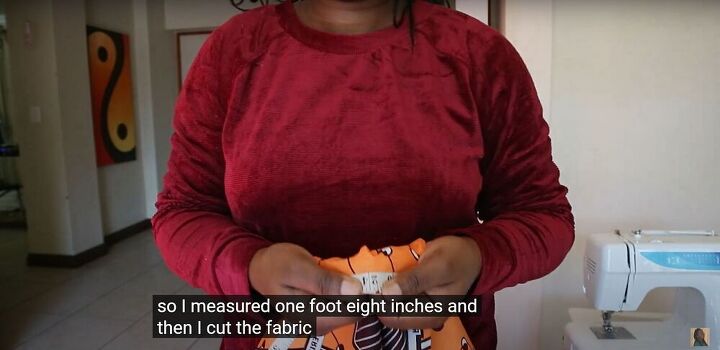
Measure and cut
The amount of fabric needed is twice the length of the sleeve, plus 2 inches, minus 24 inches. I measured this out and cut the fabric.
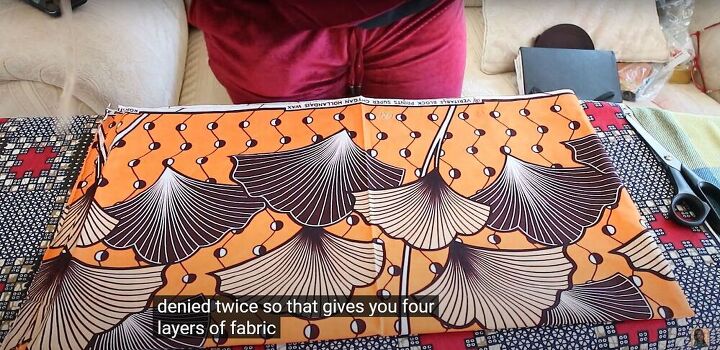
Fold
Next, I folded my fabric once lengthwise and once widthwise, which left me with four layers of fabric.
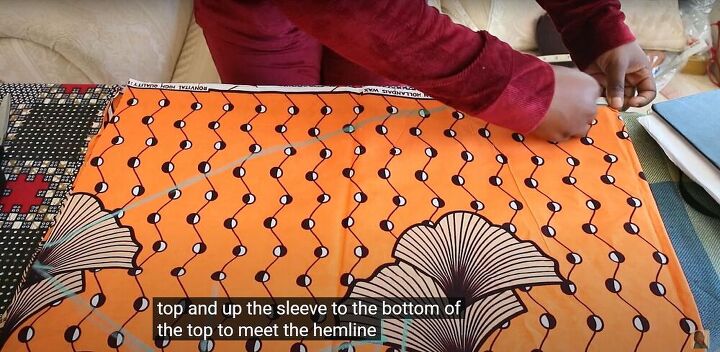
Measure and mark
See the video from 2:22-4:08 for instructions on how to draw out the pattern for the top on the fabric.
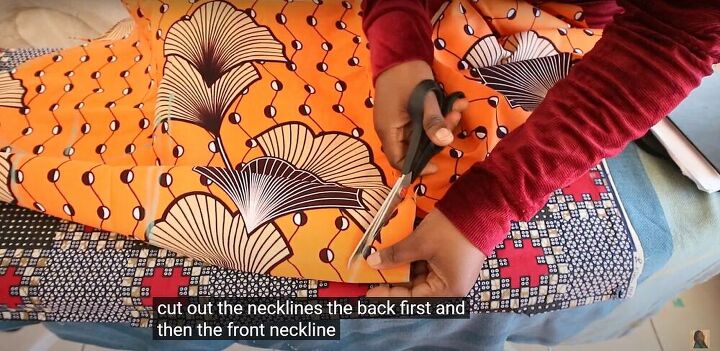
Cut
I began by cutting out the back neckline first and then unfolding the fabric partially and cutting the front neckline.
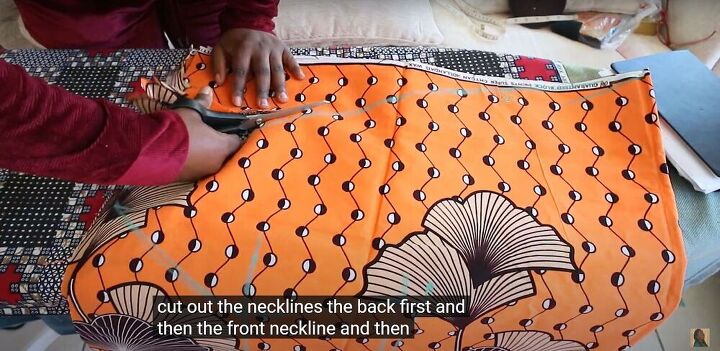
Then I cut along the curved line that will create the butterfly sleeves.
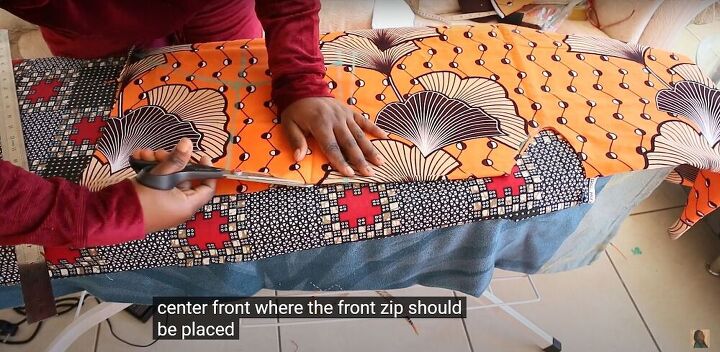
Then I cut open the center front, where the zipper will be sewn in.
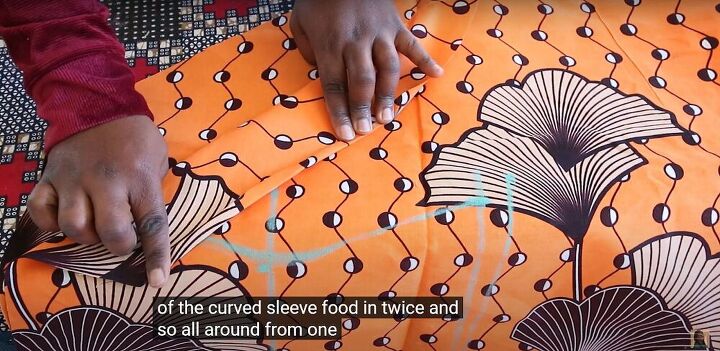
Fold and sew
I folded the edges of the sleeves twice to hide the raw edge and sewed them down. This also hemmed the bottom of the shirt in addition to the sleeves.
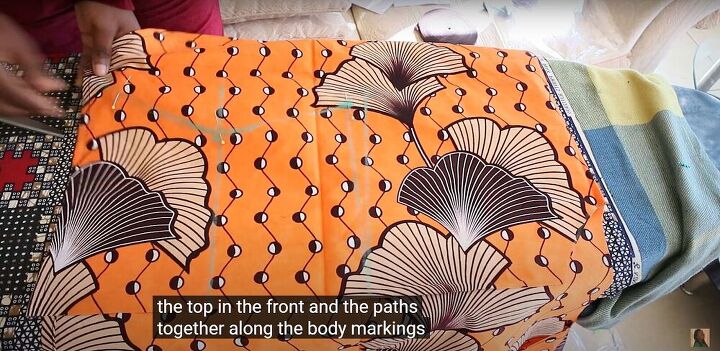
Pin and sew
I pinned along the body marks on the top so the fabric wouldn’t move around while I was sewing. Then I sewed the front and back together by sewing along the marks I drew previously.
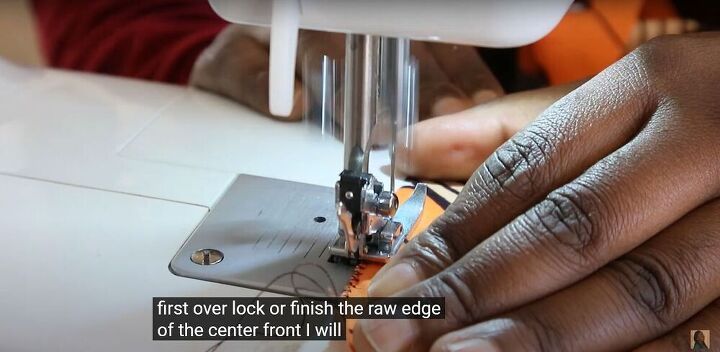
Overlock
I used a zigzag stitch to overlock any raw edges and prevent fraying.
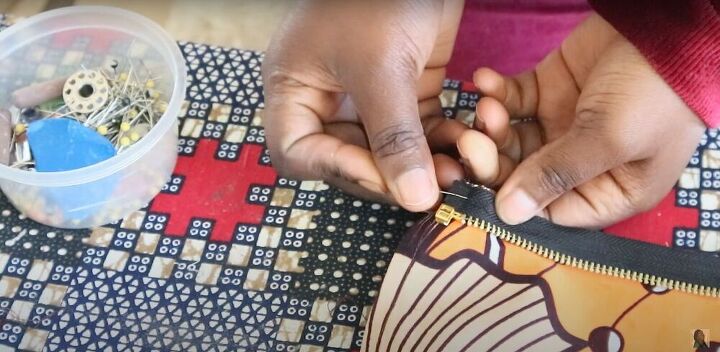
Attach the zipper
I separated the sides of the zipper, and pinned each side down very close to the edge of the fabric, and sewed them in place using the zipper foot on my sewing machine.
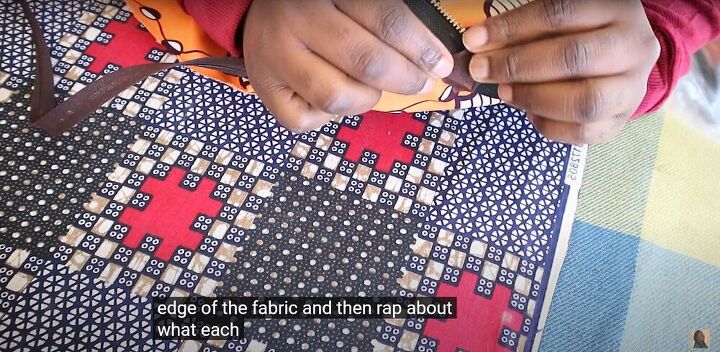
Finish the neckline
I used the bias tape to finish the neckline. I wrapped about 1 inch of the tape around the zipper and then pinned the tape along the neckline on the right side of the fabric. I left 1 inch of tape on the other end to wrap around the zipper on that side, as well. Then I sewed everything down.
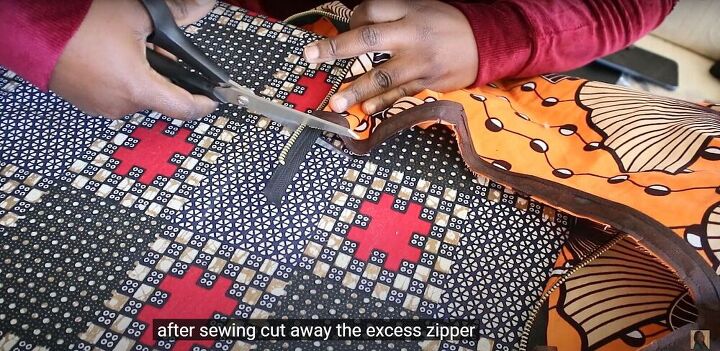
Cut
Once everything was sewn in place, I cut off the excess zipper.
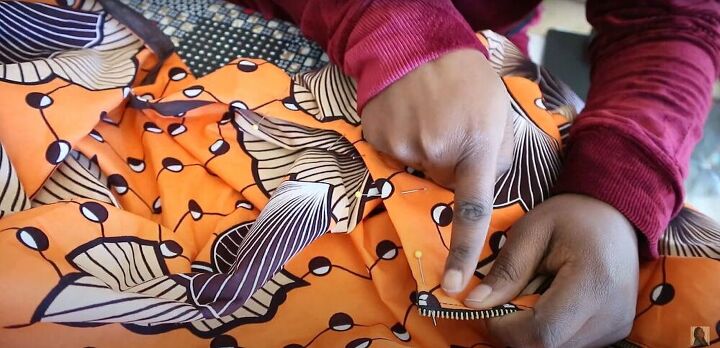
Pin and sew
The last step was to flip the bias tape inward and pin it to the wrong side of the fabric, and then sew it down.
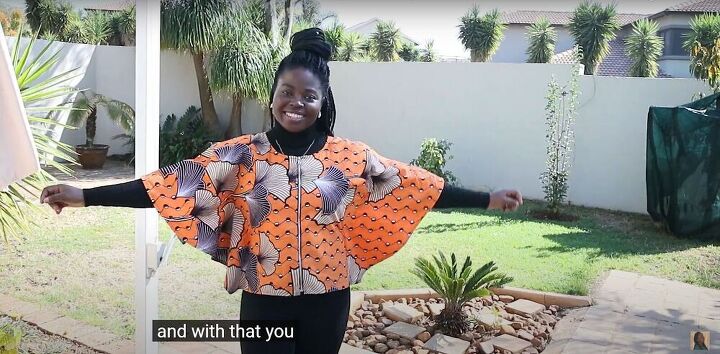
And my easy butterfly sleeve top was done!
This top is great for summer or as a layer in autumn or winter.
I hope you found my tutorial helpful. If you make a butterfly sleeve top of your own using these instructions, I would love to see how your top comes out.
The author may collect a small share of sales from the links on this page.


Comments
Join the conversation
The Style and fabric are beautiful.
Love it , love it !!! Better still it will suit any age & size !! Bravo !